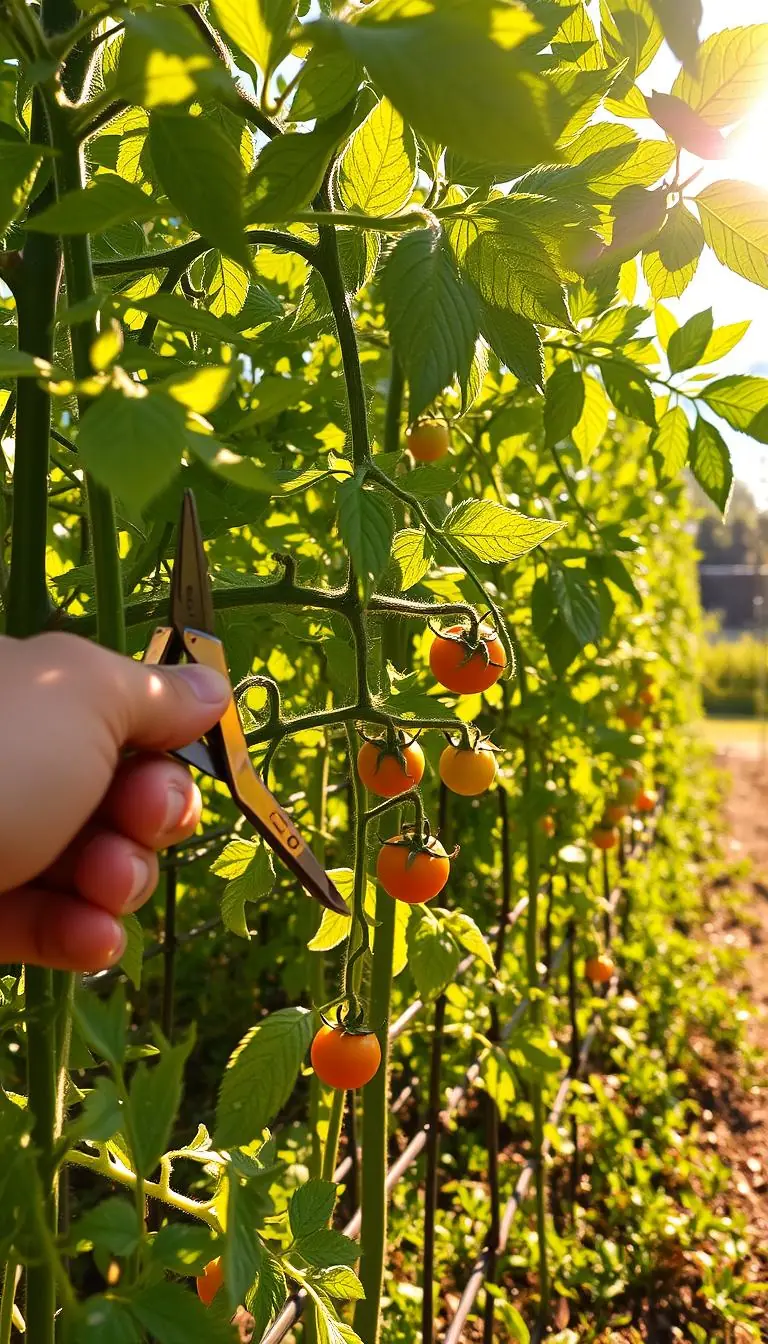
Imagine the scent of basil at dawn and the warm feel of sunlit soil between your fingers. Have you noticed thin patches on the lawn or wished for a colorful patch outside your kitchen window? You can grow a lush, productive garden without synthetics and without losing harvest.
We’ll guide you along a step-by-step path that starts with easy wins—leafy greens—then moves to roots and fruiting plants. You’ll get clear actions by USDA zone: choose a sunny site (6+ hours), check drainage, and test soil at your county Extension office.
Practical details include bed sizes that fit small yards, spacing that avoids crowding, and simple tools like planters, lights, compost bins, drip lines, and timers. Learn to read early signs from your plants—leaf color, growth rate, and soil feel—so you can act before problems grow.
We’ll flag common mistakes like planting too much at once or overwatering, and show how to blend beauty and function by weaving herbs and flowers with vegetables for scent, color, and pollination.
Key Takeaways
- Follow a simple, seasonal plan: greens first, then roots, then fruits.
- Pick a sunny, well-drained site and test your soil through Extension services.
- Use measured beds, correct spacing, and reliable tools to protect yield.
- Watch plant signs—leaf color and soil feel—to catch issues early.
- Avoid common pitfalls: overplanting, overwatering, and skipping soil tests.
Start Here: The Fast Path to High-Yield Organic Gardening
Take a staged approach: quick-cut greens to start, a simple root trial next, and fruiting crops when your routines are steady.
Set realistic goals for your first season
Begin with one or two 4x8 beds or four large planters. This keeps care simple and fits into a busy schedule.
Aim for quick wins: sow lettuces, spinach, and basil. Many baby leaves are ready in 25–30 days so you get fast feedback and tasty salads.
The leaves → roots → fruits method for steady harvests
After you’re cutting greens regularly, plant a short row of radishes (about 28 days) and a fabric bag of potatoes as your gentle root trial.
When watering, mulching, and staking feel routine, add a single row of tomatoes and a hill of squash. These give sun-warmed fruits but need more space and attention.
Common early mistakes that limit yield
- Overcrowding—keep greens 6–8 inches apart, potatoes 12 inches, tomatoes 18–24 inches, and squash 3–4 feet.
- Feeding too hard—heavy fertilizer can burn tender roots.
- Skipping mulch or letting soil dry between deep waterings.
Schedule care: 10 minutes daily to check moisture and leaves, 30 minutes weekly for mulching and tying. Track days to maturity on tags so you know when to harvest.
What “Organic” Means in the United States
Let’s clear up what 'organic' really means for a home plot in plain, useful terms. The USDA National Organic Standard (in effect since 2002) set clear rules for how food and inputs are produced and handled. Those rules focus on soil health, approved inputs, and limiting synthetic pesticides in production.
USDA rules and home-garden relevance
You don’t need certification to follow these practices at home. Certification matters when you sell produce as organic—unless your sales are under $5,000 a year. Still, following the same production practices gives you healthier plants and safer produce.
Seeds, inputs, and label tips
Choose certified organic seed when you can. When it isn’t available, look for untreated seed—seed that isn’t coated with prohibited chemicals. Read packets for resistant varieties and types suited to your climate; they cut disease pressure and improve yield.
- Ask garden center staff which fertilizers and pest-control products meet organic production guidelines.
- Place your organic garden away from likely pesticide drift and old contaminated edges.
- Keep purchase and application records if you ever scale up or sell an organic vegetable crop.
Choose the Right Site for an Organic Vegetable Garden
Before planting, spend ten minutes checking sunlight, drainage, and airflow; it pays off all season.
Start by noting where full sun lasts 6–8 hours. Most vegetable plants need that light, especially fruiting types like tomatoes and peppers.
Sunlight, drainage, and airflow: practical checks in 10 minutes
Walk your yard on a sunny day and mark sunny pockets. Do a quick drainage check: dig a 12-inch hole, fill with water, and see if it drains in under four hours.
Feel breezes. Gentle airflow keeps leaves dry and cuts disease risk. Avoid windy strips that whip tender shoots.
Soil tests: where to get kits, what pH and nutrients tell you
Order a soil test from your county Extension. Aim for pH 6.2–6.8 for most crops. Tests show phosphorus and potassium so you add only what the soil needs.
Avoiding pesticide drift and legacy contamination at property edges
Keep edible beds away from painted or treated timbers and from a neighbor’s spray zone. Signs like dead plants or sudden browning can indicate drift or residue.
- Count sun hours; place greens in partial shade if needed.
- Use raised beds if soil stays soggy or sticky.
- Use your finger or a moisture meter to check water needs weekly.
| Quick Check | How to Do It | Fix |
|---|---|---|
| Sun hours | Note where 6–8 hours of direct sun fall | Reserve sunniest strip for fruiting plants |
| Drainage | 12" hole soak test; refill if needed | Use raised beds or amend with grit and compost |
| Airflow | Walk site for wind patterns | Add windbreaks or stagger plant rows |
| Soil test | Send sample to county Extension | Adjust pH and add nutrients per report |
Build Soil Fertility the Organic Way
Feed the soil first and the plants will follow. Small, steady inputs build texture, water-holding capacity, and steady nutrients for long-term production.
Compost: how much, how often, and simple bin options
Spread 1–2 inches of finished compost across beds before planting and gently work it into the top few inches. This adds organic matter and slow-release nutrients.
Start a simple bin: a tumbling compost, a three-bin pallet rack, or a covered plastic bin all work. If space is tight, many U.S. towns sell fully finished municipal compost at low cost.
Green manures and cover crops by season and purpose
Choose cover crops to match the season and goal: buckwheat in summer to smother weeds, crimson clover in spring/fall to add nitrogen, and winter rye to protect soil over winter. These crops boost organic matter and feed soil life.
Using fresh manures safely: 90–120 day harvest intervals
Follow safety intervals: incorporate fresh manure at least 120 days before harvesting crops that touch soil (squash, carrots) and 90 days for crops with fruit off the ground (staked tomatoes). Avoid sewage sludge.
Crop rotations that balance nitrogen users and givers
Rotate to balance nitrogen: plant legumes (beans, peas) before leafy greens, follow heavy feeders with root crops, and alternate deep- and shallow-rooted beds.
| Action | Rate / Timing | Easy Options |
|---|---|---|
| Compost | 1–2 inches before planting; scratch into topsoil | Finished municipal compost, tumbler, pallet bin |
| Cover crop | Summer or winter depending on species | Buckwheat (summer), crimson clover (spring/fall), winter rye (over winter) |
| Fresh manure | 90 days (no soil contact) / 120 days (soil contact) | Well-aged farm manure; avoid raw piles near beds |
Planting Plan: From Easy Greens to Roots, Then Fruiting Crops
Begin with quick, satisfying plantings that teach you timing and reward you with fast bowls of greens. This staged approach—leaves, roots, fruits—builds skill without stealing all your free time.
Quick wins: lettuces, spinach, and herbs for daily harvests
Sow cool-season vegetables like lettuce and spinach 1/8–1/4 inch deep and space plants 6–8 inches apart. Baby leaves are ready in 25–30 days; use cut-and-come-again to keep bowls full.
Tuck herb seeds—basil, cilantro, dill—along sunny edges. Succession sow every 2–3 weeks for steady snips of mint and savory leaves.
Roots next: radishes and potatoes for skill-building
Direct-sow radishes 1/2 inch deep, 1 inch apart; thin to 2 inches. They mature in about 28 days and teach thinning and timing.
Grow potatoes in 10–15 gallon fabric bags. Plant certified seed pieces 6 inches deep and 12 inches apart; hill soil as stems grow for cleaner, easier harvest.
Graduate to tomatoes, peppers, and squash with confidence
Place two tomato plants per bed section. Choose determinate varieties for compact habits and earlier fruit. Stake or cage at planting.
Add one squash hill in the sunniest spot; give plenty of room and mulch to keep moisture steady and fruits clean.
Spacing, days to maturity, and USDA zone timing
- Match sowing to your USDA zone: Zones 5–6 use early spring for cool crops, wait until after last frost for warm crops; Zones 8–9 can add fall windows for greens.
- Read seed packets for days to maturity and stagger sowings so one row ripens as another starts.
- Keep tools simple: a hand fork, dibber, and a trellis or soft ties for support.
Watering and Feeding for Vigorous, Pest-Resistant Plants
When you match water to soil type and feed with care, plants stay strong and pests struggle.
Aim for about 1 inch of water per week, delivered in two deep irrigations. Increase frequency during heat waves and for sandy soil that drains fast. Deep wetting builds roots and helps steady production.
Install a simple drip line with a battery timer to water the root zone. Drip reduces wet foliage, saves water, and frees mornings for other tasks. Run lines along row centers and use emitters near each plant.
Mulch and gentle feeding
Mulch 2–3 inches with straw or shredded leaves to keep soil cool, cut evaporation, and cushion fruits from splash. Replenish mulch midseason as it breaks down.
Feed gently: scratch in compost at planting and side-dress midseason. If leaves turn pale or growth slows, try a balanced fish or seaweed emulsion per label rates.
Reading plant signs early
Watch leaves and growth for quick clues. Midday wilt that recovers by evening is normal. Persistent morning wilt means water stress.
Uniform pale green often points to general nutrient need. Interveinal yellowing can signal specific deficiencies. Act early: adjust water, add compost, or apply a mild nutrient spray.
Keep airflow by pruning lower tomato leaves and spacing plants for good circulation. Clean up fallen debris; sanitation reduces disease risk and long-term pest pressure.
| Focus | Target | How to Do It | Why It Helps |
|---|---|---|---|
| Watering | ~1" per week | Two deep irrigations; more for sandy beds or heat | Builds deep roots; reduces stress and crop loss |
| Irrigation | Drip + timer | Lay drip lines along rows; set morning runs | Targets roots, keeps foliage dry, saves time |
| Mulch | 2–3 inches | Apply straw or shredded leaves; refresh midseason | Conserves moisture; shields soil and fruit |
| Feeding | Compost + light supplements | Scratch compost at planting; side-dress; use fish/seaweed if needed | Steady nutrients support growth and pest resistance |
organic gardening Pest and Weed Control Without Synthetic Pesticides
Preventing pests starts with small daily habits that add up fast. Follow a calm, steady routine and most problems never take hold. The focus is on prevention: vigor, airflow, clean tools, and timely action.
Sanitation habits that prevent outbreaks
Don’t work wet foliage. Wet leaves spread diseases and move pests. Remove and bag clearly sick plants right away. Wipe pruners with alcohol after cuts to stop spread.
Physical barriers: row covers, collars, and traps
Use floating row covers for seedlings and cutworm collars at transplant time. These simple steps protect stems and reduce early pest damage. Set sticky traps to monitor flying insects. Place a shallow saucer of beer at soil level to catch slugs.
Scouting daily: what to look for under leaves
Check below leaves for egg clusters, frass, and tiny caterpillars. Crush or wipe eggs before they hatch. Spotting issues early saves a lot of work.
Encouraging beneficial insects and safe handpicking tips
Create shelter for lady beetles, lacewings, and parasitic wasps by planting small flowers and leaving refuge areas. Handpick large caterpillars with a clothespin and drop them into soapy water. Avoid broad sprays so allies thrive.
- Rotate plant families each season to break cycles of pests and diseases.
- Keep weeds low with mulch so habitats don’t favor troublemakers.
- If you find leftover pesticides from past projects, take them to a hazardous waste collection day.
Season-by-Season Actions to Protect Yield
A clear seasonal checklist keeps pests low and harvests steady from spring through winter. Use these short, timed actions so your beds and plants stay healthy every year.
Spring setup
Now: loosen beds and spread 1–2 inches of compost. Work compost into the top few inches before planting.
Start seeds indoors for warm-season crops two to six weeks before your last frost. Direct-sow cool-season crops as soon as soil thaws.
Set trellis posts early for peas and future tomatoes. Installing supports now saves time when vines surge.
Summer management
Lock in irrigation with drip lines and a timer. Mulch 2–3 inches to hold moisture and suppress weeds.
Prune lower leaves and open the canopy for airflow. Add shade cloth during heat spikes to protect tender plants.
Harvest often. Regular picking encourages more flowers and steady fruit set.
Fall transitions
Use cleared beds for quick greens and late radishes. Sow cover crops like crimson clover or winter rye after main crops finish.
Continue succession planting in freed spaces for a final harvest before frost. This extends fresh pickings and fills gaps.
Winter prep
Clear spent plants and remove debris. Good sanitation stops pests and diseases from overwintering.
Sharpen tools, oil handles, and map rotations for the next year. Move plant families to new beds to break pest cycles.
"Small, steady care—set aside one hour a week—protects your harvest and saves time later."
| Season | Key Actions | Timing |
|---|---|---|
| Spring | Compost, seed starts, trellis install | Before/around last frost |
| Summer | Drip irrigation, mulch, prune, shade | Heat months; monitor weekly |
| Fall/Winter | Succession sow, cover crops, cleanup, rotation map | After harvest through winter |
Year-round: walk your garden weekly to note tasks and adjust plans. This small time investment protects crops and maximizes harvest.
Designing for Beauty and Function
Think of beds as rooms: each one should be useful, inviting, and easy to care for. Good design blends scent, color, and texture with paths and tools that save time.
Textures, colors, and scents: mixing flowers with vegetables
Mix marigolds, calendula, and nasturtiums with your vegetables for bright petals and a gentle peppery scent that draws pollinators. Pair feathery dill with glossy peppers and frilly kale beside smooth lettuces.
Plants placed for contrast make the space feel intentional and lush while supporting pollination and pest balance. Scatter small flowering clumps near the kitchen door so snipping herbs and blooms is effortless.
Low-maintenance materials: planters, paths, compost bins, and lights
Use raised beds of cypress or galvanized steel for tidy lines and healthy soil. Lay mulched paths or crushed stone for dry feet and quick access.
Install a simple drip grid with a timer; it keeps roots watered and frees your mornings. Place a compact compost bin close to beds so you’ll add scraps to the pile and return dark, springy matter to soil.
Add solar path lights for soft evening glow and safe steps during late harvests. Choose ergonomic tools to protect wrists and make routine tasks pleasant.
- Group plants by water needs and height so tall vines don’t shade low crops.
- Keep wide, mulched access lanes for harvest and quick checks.
- Place planters near entry points for daily herb snips and convenience.
| Feature | Why it helps | Materials / Options | Quick tip |
|---|---|---|---|
| Raised beds | Cleaner lines, warmer soil, better drainage | Cypress, galvanized steel, cedar | Build 6–12" high for roots and comfort |
| Mulched paths | Dry access, fewer weeds, softer step | Wood chips, crushed stone, bark | 2–3" mulch; replenish yearly |
| Drip irrigation | Targets roots, saves water, reduces leaves wetting | Soaker lines, emitter grid, timer | Group by water need; use a timer |
| Compost & lights | Easy soil amendments; safe evening access | Compact bin near beds; solar LED lights | Keep bin handy; place lights along paths |
Conclusion
Let the garden teach you slowly: one step, one season, better soil and stronger plants.
Choose a sunny spot, build living soil with compost and cover crops, and follow safe manure intervals. Rotate crops, tidy beds at season end, and use simple barriers for pests.
Watch leaves and stems for early signs, water deeply but not often, and welcome beneficial insects. Pick resilient seeds and varieties, space them correctly, and protect young starts.
Small, steady habits keep weeds low, boost fertility, and make harvests more reliable. Trust the process—each year your soil and yield deepen, and the space becomes a peaceful, sunlit place you love to visit.
FAQ
How do I get high yields without using synthetic chemicals?
Focus on soil health first. Build stable fertility with compost, green manures, and balanced crop rotations so plants are vigorous and resist pests. Use cultural tactics — proper spacing, timely watering with drip, and mulch — to reduce stress. Scout regularly and use physical controls like row covers or handpicking before infestations grow. These steps cut losses and keep production strong.
What are realistic goals for my first season?
Start small and measurable. Aim to reliably harvest lettuces and herbs within weeks, grow a few rows of radishes or potatoes to learn root care, and try two or three tomato or pepper plants for fruiting experience. Set goals by harvest frequency (daily or weekly salad picks) rather than an all-or-nothing yield number.
What does “organic” mean for my home garden in the U.S.?
At home, think of it as avoiding synthetic pesticides and fertilizers and building natural fertility. The USDA National Organic Program defines standards for certified farms and products; for backyard plots, follow those principles by using untreated seeds, approved organic inputs, and practices that promote soil life and biodiversity.
Where can I get soil test kits, and what should I look for?
Many county extension services, university labs, and brands like SoilKit or Rapitest sell kits. Test for pH, phosphorus, potassium, and basic organic matter. pH affects nutrient availability; most vegetables prefer slightly acidic soil (around 6.0–7.0). Use results to add lime, sulfur, or targeted amendments and to plan compost and green-manure crops.
How much compost do I need and how often should I add it?
A thin layer (1/4–1/2 inch) of finished compost worked into topsoil each year boosts fertility. For new beds, mix 2–3 inches into the top 6–8 inches. Top-dress vegetable beds mid-season if plants look hungry. Compost provides steady nutrients and improves structure without overfeeding.
Are fresh manures safe to use, and when should I apply them?
Use fresh manures cautiously. Apply well-aged or composted manure when possible. If you use fresh manure, incorporate it into soil at least 90–120 days before harvesting crops that touch the ground (like leafy greens or root crops) to reduce pathogen risk. Poultry and sheep manures are higher in nitrogen and require thorough composting or waiting periods.
How do I plan crop rotations to keep nutrients balanced?
Rotate groups: follow heavy nitrogen feeders (tomatoes, corn) with legumes or cover crops (clover, vetch) to rebuild nitrogen. Also rotate families to reduce disease carryover—avoid planting nightshades in the same spot two years in a row. A simple three- to four-year rotation prevents nutrient depletion and breaks pest cycles.
What’s the best planting order for a beginner bed?
Start with quick greens and herbs for fast rewards. Next, plant roots like radishes and potatoes to practice spacing and soil depth. Once confident, add fruiting crops such as tomatoes, peppers, and squash. This leaves → roots → fruits progression builds skills while delivering steady harvests.
How should I space and time plants by USDA zone?
Follow seed packet spacing and days-to-maturity, then adjust for your zone. In cooler zones, start seeds indoors or choose short-season varieties. In warm zones, stagger plantings to avoid hottest months. Proper spacing improves airflow and reduces disease risk, so resist crowding even if garden space is tight.
What’s the simplest way to water efficiently and prevent disease?
Install drip irrigation with timers and use 2–3 inches of mulch to hold moisture. Water at the root zone early in the morning to keep foliage dry. Consistent moisture prevents stress-related pest problems and supports steady fruit set and root growth.
How can I spot problems early from plant leaves and growth?
Check leaves daily for yellowing, spots, holes, sticky residue, or curled edges. Look under leaves for eggs, larvae, or tiny insects. Slow growth or pale foliage often means nutrient deficits or pH issues. Early detection makes physical or cultural fixes — pruning, watering adjustment, or targeted organic inputs — much more effective.
Which nonchemical pest controls work best in small plots?
Sanitation (remove diseased foliage), row covers, sticky traps, collars for stems, and handpicking caterpillars and beetles are highly effective. Encourage beneficial insects—ladybugs, lacewings, and parasitic wasps—by planting flowers like calendula, yarrow, and dill. Use them together for layered protection.
What cover crops should I plant by season and purpose?
In spring and fall, sow fast-growing legumes (vetch, clover) to fix nitrogen. Winter rye and oats are excellent for erosion control and adding organic matter when tilled in spring. Choose mixes for your climate: legumes to add nitrogen, grasses to build biomass, or blends for balanced benefits.
How do I protect summer crops from heat and sun stress?
Use shade cloth during heat waves, increase mulch depth to keep roots cool, and move irrigation to morning or evening to reduce evaporation. Trellising vining crops like tomatoes and cucumbers improves airflow and reduces sunscald on fruits.
What tasks should I do each season to maintain yield?
Spring: prepare beds, test soil, start seeds, and plant early crops. Summer: irrigate, stake or trellis, thin crowded plants, and scout for pests. Fall: plant cover crops, collect seeds if desired, and remove diseased debris. Winter: clean and sharpen tools, map rotations, and plan next season.
How can I design a garden that’s both beautiful and productive?
Mix textures and colors—salvia, marigolds, and nasturtiums attract pollinators and add visual interest next to greens. Use low-maintenance materials like cedar raised beds, gravel paths, and compact compost bins. Group plants by water need to simplify care and keep beds looking intentional and lush.