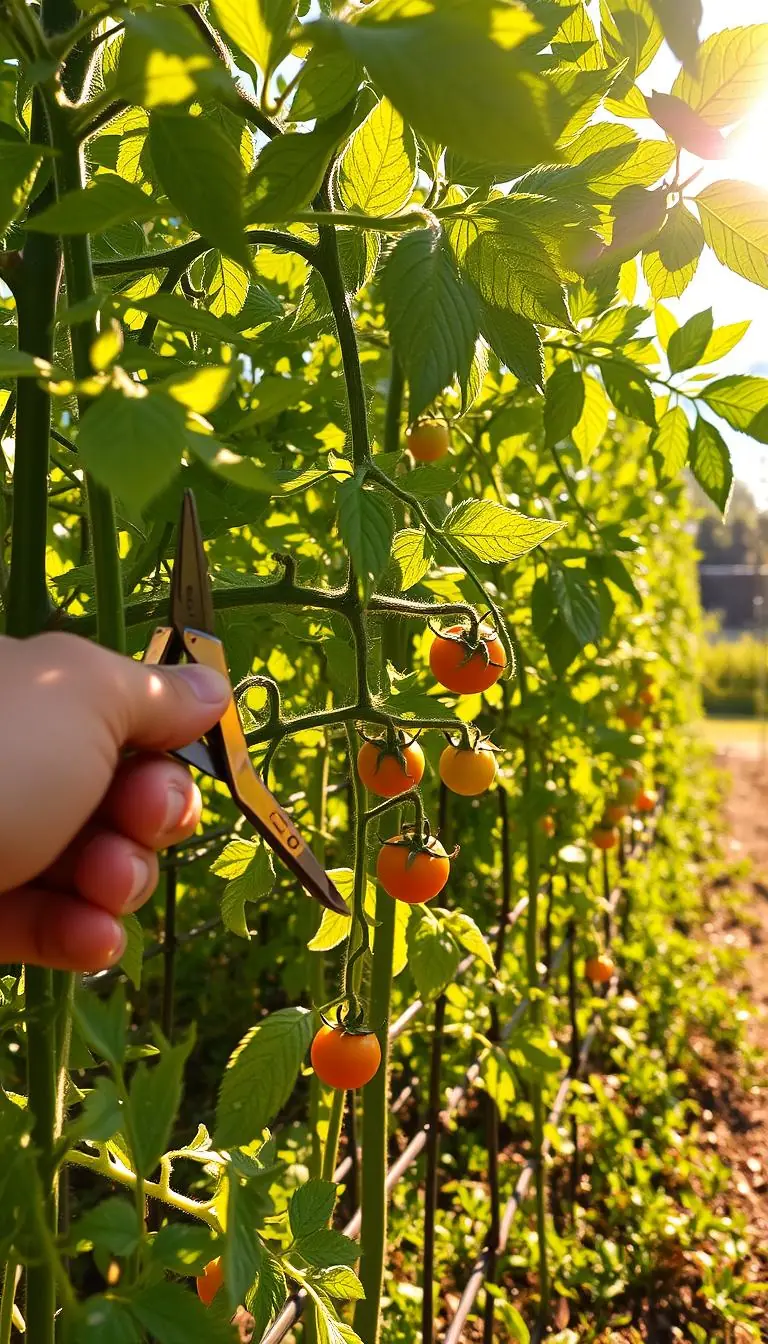
Warm sunlight on a damp leaf, the soft scent of earth after a shower. Have you noticed thirsty patches on the lawn or wished your herbs drank gentler, chlorine-free water? You’re in the right place.
We’ll walk you through a simple plan to collect rooftop runoff and guide it from gutters into a tidy tank. You’ll learn easy measurements, how to size a container with the 0.62 conversion factor, and whether a barrel or a cistern fits your yard and budget.
Expect clear weekend steps: pick a level base, add screens to keep debris and mosquitoes out, and fit an accessible hose bib for hand-watering beds and planters. We’ll also cover seasonal care — winterizing in snow country and shading in hot climates — plus a short tool list so you feel ready.
By the end you’ll have calm, practical information and a plan to give your garden soft, thriving water that brings out lush leaves and richer soil.
Key Takeaways
- Collect rooftop runoff into a barrel or cistern to use cleaner, non-chlorinated water for plants.
- Measure roof area and apply the 0.62 factor to estimate gallons per inch of rain.
- Choose a level base, screens, and a hose bib for easy, low-maintenance use.
- Prep for seasons: winterize in cold zones and shade tanks in heat to prevent algae.
- Simple tools—tape measure, level, drill, gravel—make installation weekend-ready.
Why Harvest Rainwater for Your Garden and Home
A single storm can fill a modest tank and leave your beds ready for sunny days. Capturing rooftop flow gives you soft, chlorine-free water that plants prefer. You’ll notice greener leaves, less spotting on tender foliage, and a cleaner, richer soil scent after you water.
Beauty meets function: softer water, greener growth
Soft collected water helps show truer greens on ferns, hydrangeas, and herbs. Potted citrus, tomatoes, and blueberries also avoid mineral buildup when you use stored water.
Top benefits vs. municipal water use and costs
Free outdoor supply trims your municipal water bill and eases pressure on local water supplies. During drought rules, your tank often stays usable for hand-watering, fountains, and rinsing tools.
- Less rooftop runoff keeps nutrients on-site and protects storm drains.
- Simple upkeep: screens and a hose nozzle make chores easy.
- With treatment, the system can expand to non-potable indoor uses or, if needed, meet drinking water standards.
| Quick Win | Plants That Love It | Common Uses |
|---|---|---|
| Softer leaves, fewer salt spots | Ferns, hydrangeas, herbs | Irrigation, birdbaths, fountains |
| Lower bills in summer | Citrus, tomatoes, blueberries | Washing cars, patios, tools |
| Less stormwater runoff | Containers and planters | Backup supply during restrictions |
Understanding Rainwater Harvesting Systems
Choose the size that matches your garden and life. A small barrel and a whole-yard cistern both capture rooftop flow, but they serve different needs.
From simple barrels to whole-yard systems
Rain barrels (about 50–100 gallons) are quick and affordable. They work best for hand-watering containers and small beds near the house.
Dry systems route a single downspout to a nearby tank. The pipe drains after storms, so it’s low-maintenance and good where storms are intense but infrequent.
Wet systems use buried pipes to link multiple downspouts to one cistern. Choose this when you have a large roof or want a tidy yard layout.
Common end uses and when to upgrade
- Irrigation: drip lines, soaker hoses, and sprinklers.
- Wash tasks: cars, pets, and garden tools.
- Features: topping ponds, fountains, or non-potable toilet supply with added treatment.
How the water travels — quick step‑by‑step
- Rain hits a smooth rooftop and runs to gutters.
- The flow passes an inlet screen and a first‑flush diverter to remove debris.
- Clean flow enters the storage tank with a tight lid and overflow outlet.
- A pump or gravity feed delivers stored water to irrigation or other uses.
Quick estimate: use 0.62 gallons per sq ft per inch of rainfall. A 1,000 sq ft roof yields about 620 gallons from a 1" storm — often enough for several deep drip sessions.
Plan Your Collection System: Roof, Gutters, and Catchment Area
Start simple and local: one walk around the house gives most of the data you need.
Measure the horizontal projection: walk the perimeter with a tape measure. For each roof section calculate length × width and add the totals. Ignore pitch—this is the bird’s-eye area that feeds your collection system.
Quick measuring walkthrough
Example math: 1,200 sq ft catchment × 0.75" rainfall × 0.62 = ≈558 gallons. Apply an 85% collection factor for losses → ≈474 gallons usable.
Gutter basics and debris control
Choose sturdy gutters sized to match roof area. Fit continuous screens and a rain head at the downspout to deflect leaves and pollen. Add a first‑flush diverter to route the dusty initial flow away from storage.
Rooftop materials, pitch, and regional notes
Metal and sealed membranes shed best; shingles work but need tighter screening. Lower pitches deliver steadily; steep roofs move water fast, so upsize downspouts and screens.
| Feature | Why it matters | Quick tip |
|---|---|---|
| Catchment area | Defines potential collection | Measure flat projection; ignore pitch |
| Gutters & screens | Keep debris out of storage | Use continuous screens + rain head |
| First‑flush | Improves water quality | Divert first liters after dry spells |
| Roof material & pitch | Affects flow rate and cleanliness | Prune trees and choose screens accordingly |
Size the Storage Tank and Capacity for Your Needs
Start by comparing the gallons your roof can give each month with the gallons your garden needs. This simple month‑by‑month view helps you pick a storage tank that fits your yard and budget.
Use the 0.62 factor and monthly demand to right‑size
Step 1 — calculate supply: catchment area × monthly rainfall × 0.62 × collection factor (80–85%).
Step 2 — estimate demand: track gardening use with a flow meter; summers often need more water than spring or fall.
Step 3 — compare: aim for enough storage to cover 2–4 weeks of dry weather. More variable rainfall demands larger capacity.
Tank placement trade‑offs: aboveground vs. underground
Aboveground tanks are easy to install, inspect, and decorate. Underground tanks save surface space and moderate temperature but cost more and need pumps and excavation.
Keep outlets ≥6 inches above the bottom to let sediment settle. Place tanks close to your main water supply points to reduce pumping and hose length.
Real examples for common needs
- Small garden (Zones 6–8): 600 sq ft roof → ~373 gal per 1" storm; a 65–100 gal barrel suits herbs and small beds.
- Southwest xeriscape (Zones 8–9): 1,200 sq ft roof → ~746 gal per 1"; consider a 1,000–1,500 gal aboveground tank with drip lines.
- Larger yard (Zones 5–7): 2,000 sq ft roof → ~2,480 gal for a 2" month at 85% collection; a 2,500–3,000 gal tank supports multiple drip zones.
"Size for typical months, then add an expansion port so you can join another tank later."
Choose a Harvesting Method: Rain Barrel, “Dry” System, or “Wet” System
Match your garden goals to a simple barrel, a nearby tank, or an underground network.
Rain barrels — fast start, 50–100 gal
What it is: A 65–95 gallon barrel with a screened lid and overflow hose gives you hand‑watering today.
Pros: Small footprint, low cost, quick install.
Cons: Limited capacity and fast overflow in big storms.
“Dry” systems — single downspout to a nearby tank
This approach routes one downspout to a larger tank. The pipe drains after a storm so it stays low‑maintenance.
Pros: Economical, simple layout, good where rainfall is infrequent but heavy.
Cons: Tank usually sits close to the house.
“Wet” systems — underground piping for multiple rooftops
Underground pipes link several downspouts so you can place the cistern away from the building.
Pros: Captures from the whole rooftop and gives placement flexibility.
Cons: Higher cost, watertight joints, and need for grade or pump.
- Mix methods: put a barrel at the shed for quick herb watering and a wet system for the main house.
- Seasonal tip: drain or disconnect barrels before hard freezes; in warm areas, shade tanks to keep water cool.
- Plan overflows for all methods to avoid erosion during heavy rain.
Core Components and Materials of a Rainwater Harvesting System
Think of the setup as a chain—each part protects the next and keeps usable water moving to your garden.
Collection and filtration
Start at the roof and gutters: keep them clean so less debris reaches the inlet. Fit a rain head or downspout filter to trap leaves.
First‑flush diverters send the dusty initial runoff away from the tank. Add a tight inlet screen and 1 mm mosquito mesh on all openings to block pests.
Storage tanks and materials
Choose a storage tank by cost, look, and durability. Plastic tanks are affordable and easy to drill for bulkhead fittings.
Metal tanks with liners look handsome but need careful assembly. Concrete or fiberglass offer long life and steady surface temperatures.
Tip: darker or opaque tanks reduce algae. FDA‑approved resins are best for long‑term stored water quality.
Overflow, backflow prevention, and level indicators
Plan an overflow with an insect‑proof flap valve and a clear route to safe drainage. Always fit a backflow preventer if you tie into municipal supply.
Install a float gauge or wireless level sensor so you can check the tank at a glance.
Pumps, filters, and controls
Choose a pump sized for your irrigation needs and mount it on a rubber pad to cut vibration. Put an irrigation filter after the pump to protect drip emitters.
Simple controls—pressure switches or a small controller—automate fill and protect the pump. Label valves and use bulkhead fittings and Teflon tape for leak‑proof, neat work.
- Essential tools: hole saws, bulkhead fittings, Teflon tape, and 1 mm mosquito mesh.
- Neatness tips: gravel pad, soft lattice or climbers to screen tanks, and a small pump enclosure for quiet operation.
- Maintenance note: clean filters seasonally and inspect seals to maintain steady irrigation and long system life.
Step‑by‑Step: Install Your Collection System and Storage Tank
Choose a spot that’s level, clear of buried lines, and a short run from the downspout. This protects foundations and keeps plumbing simple.
- Prepare the pad: Level and compact the site. Lay gravel with pavers or a small concrete slab sized to your tank footprint. Verify soil bearing capacity; a wider base helps on softer soil.
- Check utilities: Mark underground lines before digging. Keep tanks off septic fields and away from house foundations to avoid structural issues.
- Route and dry‑fit piping: Plan short, sloped runs from gutters to inlet. Install a rain head and first‑flush diverter at the downspout to reduce debris entering the tank.
- Install bulkheads and seals: Drill clean holes with a hole saw, deburr edges, seat gaskets inside, and tighten. Place the outlet at least six inches above the tank bottom to allow sediment to settle.
- Screen and overflow: Fit a screened inlet and a tight lid; cover openings with 1 mm mosquito mesh. Add an insect‑proof flap valve on the overflow and route it to safe drainage that matches your gutter capacity.
- Plumb for garden use: Mount a hose bib at a comfortable height. For drip systems, add a pump, pressure regulator, and irrigation filter downstream for steady pressure and low maintenance.
- Power options: Wire pumps to a GFCI outlet. Consider a small solar array and battery for off‑grid resilience and quiet operation; test connections after outages.
- Monitor and test: Add a simple flow meter and level indicator so you can track capacity and plan watering. Test for leaks during the first storm and confirm overflow discharges onto rock or a splash block.
- Finish and maintain: Mulch around the pad, add planters to soften appearance, and keep a lidded bin for spare filters and Teflon tape. Seasonal tip: drain or disconnect exposed barrels before hard freezes.
Tools & materials checklist: hole saw, bulkhead fittings, 1 mm mesh, gravel/pavers, pressure regulator, irrigation filter, pump (solar‑ready if desired), GFCI outlet, flow meter, and level gauge.
Use Harvested Rainwater Wisely: Irrigation and Garden Design
Smart layout and timing help your garden sip stored water, not gulp it. Start by mapping beds, planters, and young trees so you can match supply to demand. Group plants by thirst to make the most of a single tank and pump.
Matching supply to demand: beds, planters, and drip zones
Group plants by water needs. Dedicate a drip zone for vegetables, one for perennials, and one for new trees. This lets you set runtimes for each zone and avoid overwatering.
Use these emitter guidelines when you plumb beds and planters:
| Plant Type | Emitter Size | Frequency (summer) |
|---|---|---|
| Perennials & native beds | 0.5–1 gph | Deep soak 1–2× weekly |
| Tomatoes & shrubs | 1–2 gph | Deep soak 1–2× weekly |
| Young trees | 2–5 gph (multiple emitters) | Slow soak 1× weekly |
In small pots, use the hose bib and a watering can for precise fills. Pumps and filters protect lines and drip emitters; keep a flow meter to track daily use so you can adjust runtimes during hot spells.
Sensory planting ideas: colors, textures, and scents that love stored water
Build sensory rooms in the garden by sun exposure. Full sun beds do well with rosemary, lavender, purple salvia, and silver lamb’s ear for contrast and fragrance.
Part shade pockets glow with ferns, hostas, and astilbe. Add a bench to enjoy the earthy scent after irrigation and the soft rustle of leaves.
Echinacea and black‑eyed Susan invite pollinators and bring bold color to mixed borders. Top-dress beds with finished compost after watering to boost soil structure and long-term growth.
- Add 2–3 inches of mulch to lock in moisture and reduce weeds.
- Water early in the morning to cut evaporation and leaf disease.
- Track demand with a flow meter; increase runtime, not outlet count, during heat waves.
- Expand zones gradually as your garden grows so the system stays in balance.
Safety, Codes, and Water Quality Considerations
Good systems start with clear safety choices and a bit of local homework. What you plan to use stored water for decides how much treatment and permitting you’ll need. Simple garden use usually needs only screens and a filter; indoor or drinking water requires more steps and often professional oversight.
Non‑potable vs. potable treatment
For outdoor use: a screened inlet, first‑flush diverter, and a post‑pump irrigation filter keep lines clear and plants healthy. This is the common and low‑maintenance approach for most gardens.
For drinking water: expect a full treatment train—sediment and cartridge or membrane filters plus disinfection (UV, chlorination, or ozone). UV lamps typically need annual replacement and filters must follow manufacturer schedules.
Backflow prevention and municipal makeup connections
Any makeup connection to municipal water must include a backflow preventer. This protects the public supply and is often required to be tested yearly. Label makeup valves and keep test records in a waterproof folder beside the tank.
Permits and state regulations
Rules vary widely across the United States. Some states encourage collection with few limits; others require specific overflow routing, labels, or permits. Check local code early and use state tools or the county planning office for clear information.
"End use determines treatment — plan for the safest option you can maintain."
| Use Type | Key Components | Typical Maintenance |
|---|---|---|
| Garden irrigation (non‑potable) | Inlet screen, first‑flush, post‑pump filter | Clean screens seasonally; change filters yearly or as needed |
| Indoor non‑potable (toilets, laundry) | Staged filtration, labeled valves, local code approval | More frequent filter changes; inspect valves and labels |
| Drinking water (potable) | Sediment + membrane/cartridge + UV/chlorine; licensed oversight | UV lamp annual replacement; routine water testing and logs |
- Always position the overflow to drain to rock or a safe path away from foundations and neighbors’ yards.
- Confirm roofing materials and tank resins are compatible with future drinking‑water plans before you commit.
- Label every non‑potable spigot clearly: Non‑Potable—Do Not Drink.
Seasonal Maintenance, Troubleshooting, and Common Mistakes
A little routine maintenance prevents most problems before they start. Keep short, regular checks and your collection system will serve your garden with less fuss.
Monthly and annual O&M: filters, pumps, and inspections
Weekly or after big storms: brush gutter screens, rinse the inlet filter, and confirm flow into the tank.
Monthly: test the first‑flush diverter, peer into the overflow, listen for odd pump noise, and check wiring and hose fittings.
Annually: inspect the tank for cracks, tighten bulkheads, and schedule backflow testing if you have a municipal makeup line.
Winterizing and algae control
Cold regions: drain exposed pipes, open barrel spigots, and disconnect downspouts before hard freezes. Insulate pump lines or bring portable pumps indoors.
Warm regions: shade the tank, use opaque wraps or dark tanks, and keep filters on schedule to limit algae growth.
Overflow sizing, debris control, and avoiding undersized systems
Right‑size the overflow to match heavy rainfall events and your gutters. Armor discharge points with rock and route flow away from foundations.
Common mistakes include undersized tanks for summer demand, skipping a first‑flush (cloudy water), weak bases that tilt tanks, and outlets set too low where sediment builds.
Quiet upgrades, organization, and useful extras
Place the pump on a rubber mat and add a small enclosure to reduce noise. Guide hoses with simple stakes to protect plants.
Add solar path lights around the pad, a weatherproof box for spare filters and tools, and a compost bin nearby for quick soil amendments after watering.
"Track trends with your flow meter — a sudden drop often signals a clogged filter; frequent overflows mean you need more capacity."
| Task | Frequency | Why it matters |
|---|---|---|
| Gutter & inlet screen cleaning | Weekly / after storms | Prevents debris from entering the tank and reduces filter load |
| First‑flush & overflow check | Monthly | Ensures dirty initial flow is diverted and overflow is clear |
| Pump & electrical inspection | Monthly / after outages | Finds noise, leaks, or wiring issues early |
| Tank structural inspection | Annually | Detects cracks, loose bulkheads, and sediment buildup |
Friendly checklist: clear gutters, test diverters, listen to pumps, shield tanks from light, and armor overflows. Small, timely fixes protect capacity, keep levels steady, and help your garden thrive.
Conclusion
Finish with a small, sensible step: try a single barrel and watch your garden respond. A simple start builds confidence and gives you real results fast.
Beauty and function live well together. Collected rainwater brings softer leaves, steady blooms, and soil that smells full and alive. This approach to harvesting is flexible—barrels, tanks, or linked systems grow with your needs.
Practical and peaceful: the parts are straightforward and upkeep fits a short monthly rhythm. You lower bills and help local water supplies while enjoying a lush, resilient yard.
Begin small, enjoy the senses, and expand when you’re ready. We’re cheering you on as your garden rewards patience with color, texture, and calm.
FAQ
What is the simplest way to collect rain for my garden?
The easiest start is a rain barrel under a downspout. It captures roof runoff, uses gravity for flow, and works well for hand-watering beds and containers. Add a screened inlet to keep leaves out and a spigot or hose connection for easy access.
Why should I collect rainwater instead of relying only on municipal water?
Collected water is softer and free of added chlorine, which many plants prefer. It reduces your municipal usage and water bills, supports healthy soil biology, and gives you a local backup supply during short restrictions or droughts.
What types of collection systems are available?
Options range from a single rain barrel to a whole-yard system with tanks, pumps, and filters. You can choose aboveground tanks for easy access or underground cisterns for larger capacity and better aesthetics.
How do I estimate how much water my roof will provide?
Measure your horizontal roof catchment area, multiply by average monthly rainfall and use a 0.62 conversion factor to get gallons. That helps you size a tank to match your monthly irrigation demand and garden size.
How big should my storage tank be?
Size depends on demand and rainfall patterns. Small gardens often do well with 50–100 gallon barrels, while larger landscapes may need several hundred to several thousand gallons. Consider seasonal needs and whether you want to cover dry months.
Aboveground or underground tank — which is better?
Aboveground tanks are cheaper and easier to install and maintain. Underground tanks save space, stay cooler, and are less visible but cost more to install and can need pumps and access points for maintenance.
What's the difference between a “dry” system and a “wet” system?
A dry system uses piping that drains to a nearby tank only when it rains. A wet system has pressurized pipes that remain full between storms and collect from multiple downspouts. Wet systems suit larger setups; dry systems are simpler for small sites.
Do I need filters or first‑flush diverters?
Yes. Inlet screens, gutter guards, and first‑flush diverters remove leaves, debris, and the initial dirty runoff, protecting water quality and reducing maintenance on pumps and irrigation filters.
Can I use collected water for drinking?
Stored water is typically nonpotable unless treated. For potable use you’ll need certified filtration, UV or chlorination, and local permits. Most homeowners use collected water for irrigation, washing cars, and other nonpotable tasks.
Do I need a pump for garden irrigation?
If your tank is below garden level or you want steady pressure for drip systems, a pump is necessary. Small submersible or inline pumps work for many yards; solar pumps are an option for off‑grid resilience.
How do I keep mosquitoes and algae out of my tank?
Use tight‑fitting lids, fine mosquito screens on inlets and over vents, and shield tanks from direct sun when possible. Regular maintenance and circulation via pump also reduce algae growth.
What routine maintenance does a system need?
Monthly checks of gutters and screens, periodic cleaning of first‑flush devices and filters, and annual inspection of tank interiors, pumps, seals, and overflow fittings will keep things running well.
Are there code or permit issues I should know about?
Regulations vary by state and municipality. Check local building codes for backflow prevention, potable conversion rules, and stormwater requirements. Many areas allow nonpotable systems for irrigation with simple measures in place.
How do I match my collected supply to irrigation demand?
Map your beds, estimate monthly water needs for each zone, and size storage to cover typical dry periods. Group high‑need areas on dedicated zones and use drip irrigation and mulch to stretch supply.
What materials are best for storage tanks?
Common choices are food‑grade polyethylene (lightweight and affordable), fiberglass (durable), metal (sturdy, can heat), and concrete (long‑lasting). Pick based on budget, aesthetics, and whether you need aboveground or buried placement.
Can I combine different collection methods on one property?
Absolutely. Mixing barrels, aboveground tanks, and underground cisterns lets you tailor capacity to different roof areas and uses. Use valves and piping to route overflow or share supply between tanks.
How should I winterize systems in cold climates?
Drain exposed pipes, insulate or bury lines, and either empty aboveground tanks or use freeze‑resistant models. Shut off pumps and clean filters before freezing temperatures arrive.
What common mistakes should I avoid?
Undersizing tanks, skimping on inlet screening, ignoring overflow routing, and skipping maintenance are frequent errors. Plan for debris control and adequate capacity to avoid system frustration.