You step outside after a rain and smell rich, earthy compost while your boots squelch in one spot. Have you wondered why some beds stay springy and others collect puddles? This friendly guide helps you see simple fixes you can do this weekend.
Too much water harms plants, invites pests, and can even threaten your home foundation. We’ll show neighbor-tested ways to direct water, build coarse-grained soil, and use pea gravel or rocks to help moving water through spaces instead of pooling.
Start with quick grading tweaks, downspout adjustments, and small DIY systems like a French drain or dry well. Sometimes a pro is needed—remember to call 811 before you dig. By the end, you’ll have calm, practical steps that protect your yard and make beds feel lively again.
Key Takeaways
- Simple weekend fixes can turn muddy beds into springy, usable spaces.
- Use coarse-grained soil and pea gravel to help water move through the soil.
- Small grading changes and downspout moves protect your home and yard.
- DIY options like French drains fit many plots; call 811 before digging.
- Tweak placement of plants so thirsty edibles and companions thrive.
Read the Signs: How to Spot Poor Drainage in Your Beds
After a heavy shower, take a slow walk and note where puddles linger and where the ground soaks in quickly. This gentle check helps you find problem spots without tools.
Visual clues after rain
Scan for standing water that lasts more than 24–48 hours. Shiny, slick soil or puddles near beds are clear signals of poor drainage.
Touch and smell
Pinch a bit of wet soil. If it smears like butter and sticks, you likely have heavy clay in that area.
Follow your nose. Sour, swampy odors or moss on the ground mean low oxygen and constant moisture.
Timing test
Note when the rain stops and check every few hours. If water is still pooled the next day, you have a drainage issue to address.
- Watch plant leaves for droop or yellowing even when the soil is wet.
- Map patterns across your yard—low corners, shaded beds, and spots below downspouts often stay wet.
- Keep a quick photo log or notes so you can track conditions and pick the right fixes.
Quick Bed Fixes You Can Do This Weekend
Spend a couple of hours and you can steer excess water away from problem beds using easy tools and tidy touches.
Start by carving gentle, shallow channels with a flat shovel. Aim the channels so surface water runs to a lawn edge or a mulched swale. A soft slope keeps water moving without eroding soil.
Line small swales with a ribbon of rocks or pea gravel. The faint crunch under your boots is a good sign that the path is porous and working. Tuck low groundcovers along the edge for a neat, natural look.

- Snap on a downspout extension to send roof runoff away home, directing flow past beds toward a safe dispersal spot.
- Feather mulch a few inches from stems to slow splash and help water soak in evenly.
- Rake low spots and top compacted paths with wood chips so water stops funnelling into planting areas.
| Fix | Tools | Time | Best for |
|---|---|---|---|
| Shallow channel | Flat shovel, rake | 1–2 hours | Surface runoff, small low spots |
| Rock or pea gravel swale | Wheelbarrow, gloves | 2–3 hours | Paths for water, decorative edge |
| Downspout extension | Pliers, extension pipe | 30 minutes | Roof runoff near foundation |
Test as you go with a watering can. The goal is a smooth path for surface water that won’t erode or drown seedlings. If a corner still floods, stack a few flat stones to guide flow like a tidy creek.
These small projects add charm and often fix problem areas without heavy digging. Keep it simple and enjoy the satisfying crunch of gravel underfoot.
Build Better Soil: Compost, Texture, and Air Pockets
Think of soil as a living sponge. Small, steady work adds tiny pores that let roots breathe and let water move where it should.

How much and when: Spread 2–3 inches of finished compost over each bed and mix it into the top 6–8 inches. Do this every spring or fall. You will feel sticky soil turn crumbly and smell the sweet, earthy scent of active microbes.
Blend smart, avoid layers
Mix coarse materials like composted bark or leaf mold evenly through the soil. Do not dump a single layer of sand or gravel; that can create a perched water table and hurt garden drainage.
- Add organic matter yearly for heavy clay—gentle progress beats big one-time fixes.
- Match plants to moisture: put water-loving plants lower and thirstier plantings up-slope.
- Top with 1–2 inches of mulch and refresh seasonally to protect structure.
| Action | Amount | Depth | Best for |
|---|---|---|---|
| Finished compost | 2–3 inches | Mix into 6–8 inches | Open pore spaces, improve soil |
| Composted bark / leaf mold | Mix evenly | Top 6 inches | Lighten heavy clay |
| Mulch | 1–2 inches | Surface | Protects structure, reduces splash |
Quick tip: Keep a simple notebook of what you add and when. Over seasons you’ll see steady gains in soil and yard health.
Raise It Up: Simple Raised Beds for Soggy Spots
A small raised bed changes a wet patch into a neat, productive space in a single weekend.
Build 8–12 inches high so roots sit above soggy soil and water moves away naturally. Use rot-resistant materials like untreated cedar boards or composite kits for a long-lasting frame.
Set the box on a base of cardboard and coarse sticks to make tiny air channels. This simple base helps with moisture balance from the first rain.
Fill with a mix of native soil and finished compost for dependable texture and porosity. Keep beds about 3–4 feet wide so you can reach across without stepping on the soil.

- Edge paths with pea gravel or wood chips so water won’t sheet back into beds.
- Group thirstier plants at the lower end and fussier crops up top to use the bed’s gentle slope.
- Start this project on a dry weekend; spring and fall are ideal times.
| Task | Materials | Time |
|---|---|---|
| Frame build | Untreated cedar or composite boards | 2–4 hours |
| Base prep | Cardboard, coarse sticks | 30–45 minutes |
| Fill and plant | Native soil + finished compost | 1–2 hours |
Why it helps: Raised beds make your yard look tidier and keep plants healthier. They’re an easy, low-stress project that improves garden drainage and gives your plants a breathable home.
Set the Grade: Create a Gentle Slope Away from Your Home and Beds
A small change in slope can keep water moving where it belongs and protect your foundation. Work slowly and check often so you get a steady, subtle fall that guides runoff away home and out across the lawn or landscape.

Target slope and how to check it with a level
Sight along the bed toward the house and run a string line between two stakes to mark your intended fall. Use a 2–4 ft level so the bubble makes a crisp, reassuring kiss of alignment when the line tilts gently.
As a rule of thumb, aim for about a 2% slope (roughly a quarter inch per foot) away from the foundation. Walk the area; firm footing and an even line from your level are simple sensory checks that show you’re on track.
Backfill choices for wet areas and why coarse-grained soil helps
Use coarse-grained soil as backfill in saturated spots. Chunky material—gravelly loam or coarse sand mixed with native topsoil—lets water move down and sideways instead of pooling.
Feather any added soil into the lawn so there’s no sharp lip that pushes water back toward the house. After the first rain, watch how water travels across the yard and tweak low spots with a few wheelbarrows of materials if needed.
- Tools: stakes, string line, 2–4 ft level, shovel, wheelbarrow.
- Keep mulch pulled back from the foundation and point downspouts toward safe dispersal areas.
- If conditions around your foundation worry you, get a quick pro check—small grading fixes prevent big problems.
Manage the Source: Gutters, Downspouts, and Rain Barrels
Control starts at your roofline—clear gutters, size spouts correctly, and aim flowing water to safe spots. These simple acts protect your home and keep beds and paths from becoming soggy.
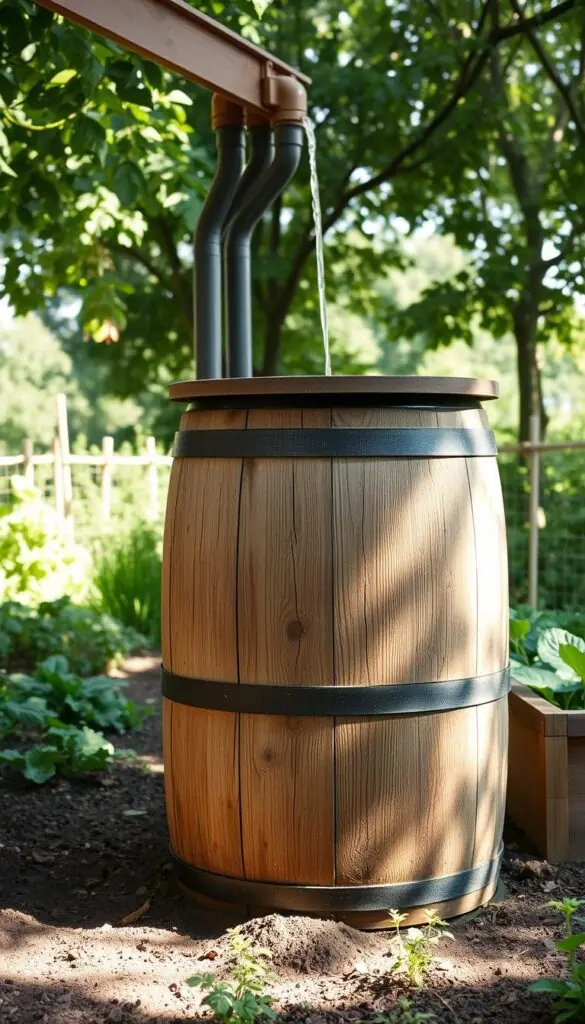
Clean, size, and place downspouts to protect the foundation
Keep gutters clear each season so water runs smoothly and does not spill over edges. A crisp trough prevents it from carving channels into beds.
Check each downspout for clogs and make sure it points at a safe lawn or planting spot—not at your foundation or along bed edges. Add an extension or two elbows to route flow well beyond your dripline.
Use a rain barrel to capture excess water for later irrigation
Add a rain barrel at a downspout to catch roof water for weekend watering. Check local rules first, then place the barrel on a sturdy stand and fit a screened inlet to keep leaves out.
- Let overflow go to a mulched swale or lawn so it doesn’t form new puddles.
- Consider a simple diverter so you can switch between barrel and yard during big storms.
- Winterize barrels before hard freezes and reconnect in spring for free, clear water.
| Item | Tip | Why |
|---|---|---|
| Downspout | Extend 6–10 ft away | Protects foundation and beds |
| Rain barrel | Screen inlet, short hose | Easy filling and leaf-free water |
| Stand | Elevate 12–18 in | Better flow to watering can |
Walk your yard during a storm and watch where water runs. Tiny tweaks to spouts and barrels now are a tidy, neighborly solution that helps keep your garden healthy and dry.
French Drains 101: A DIY-Friendly Way to Move Surface Water
A simple buried drain can quietly move surface water away from a soggy bed and give plants a drier, happier home.
Where it helps: A French-style run shines along low fence lines, the down slope of raised beds, or paths that puddle after rain. It works best when you can route water to a safe outlet like a lawn or swale.
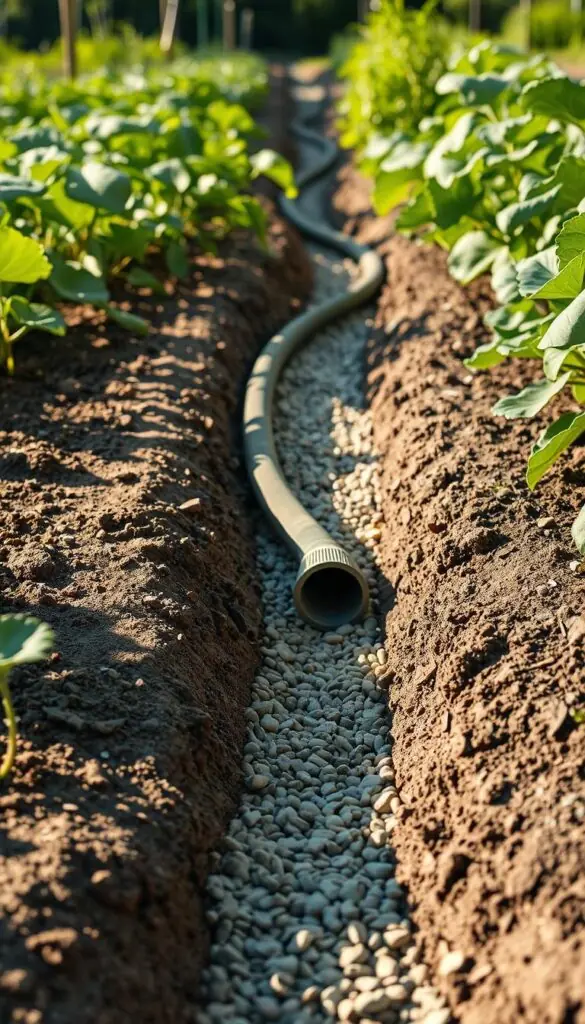
Step-by-step
- Mark your route from the wet spot to a safe discharge, then call 811 to have utilities marked before you dig — non-negotiable.
- Dig a trench about 18 inches deep with a gentle slope so water flows. Use a level to check the fall as you go.
- Place a few inches of gravel in the bottom. You’ll hear the soft rattle as stones settle — a good sign.
- Lay corrugated perforated pipe with the holes facing down, then cover with more gravel so soil can’t clog the holes.
- Backfill to grade with topsoil, then reseed or mulch so the system blends into your yard and garden.
Outlet protection and upkeep
Nestle stones or a hardy groundcover at the outlet to stop erosion. Add wire mesh over the pipe end to block critters and leaves. Check the outlet after storms and clear debris as needed.
| Task | Tools / Materials | Why it matters |
|---|---|---|
| Mark route & call 811 | Spray paint, stakes, phone | Prevents utility strikes and keeps work safe |
| Dig trench & set slope | Shovel, level, tape measure | Proper slope ensures steady flow |
| Install pipe & gravel | Perforated pipe, gravel, gloves | Protects holes and keeps water moving |
| Protect outlet | Stones, groundcover, wire mesh | Prevents erosion and critter entry |
Quick tip: Keep the run straight and smooth where possible. If your route crosses complex terrain or utilities, hire a pro. A well-built system moves water quietly for years — and gives you one less thing to worry about.
Dry Wells and Catch Basins: Handling Large Volumes of Runoff
When heavy storms keep pooling in one place, it's time to consider a larger, hidden solution that tucks water safely underground.
When to add a catch basin and how it ties into your system
Catch basins scoop up fast flow from roofs, patios, or low corners and send that water through a short pipe to a safer spot.
They are a good option when a hardscape dumps a steady stream into one area or when corners flood after heavy rain.
Underground dry wells to collect and percolate surface water
A dry well is an underground vault filled with gravel. It stores runoff and lets it trickle into the ground over time.
Tie a yard drain or French-style run into a catch basin, then direct the pipe to the dry well so the whole system works together.
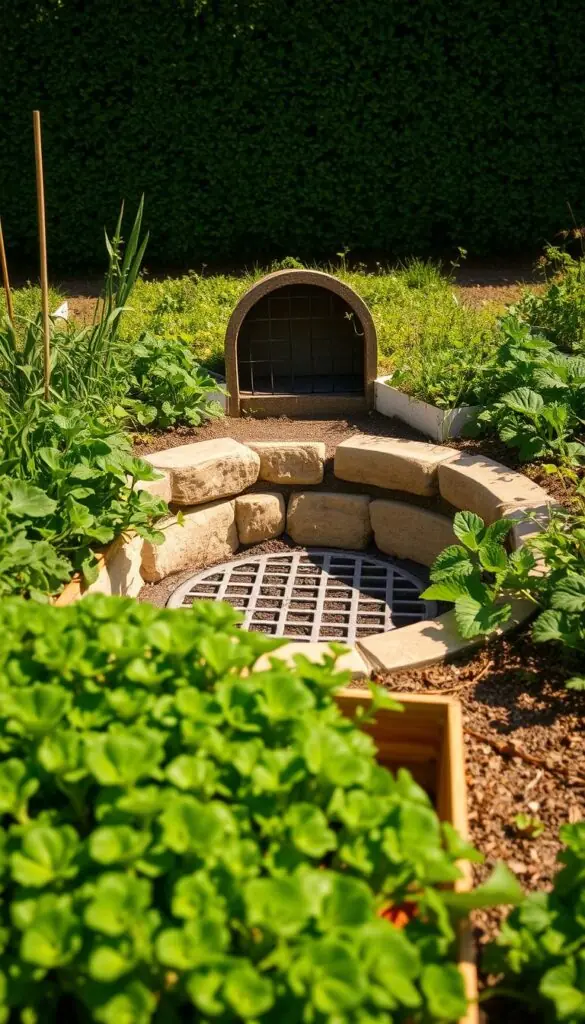
Place the dry well down‑slope, away from buildings and beds, where soil percolates easily. Use geotextile over the top and mulch to blend it into the yard.
| Component | What it does | Best placement |
|---|---|---|
| Catch basin | Collects surface flow | Low corner, below hardscape |
| Solid pipe | Moves water to vault | Direct run to dry well |
| Dry well (gravel) | Stores and percolates water | Down‑slope, away from foundation |
If you see excess water across a wide area or repeated flooding, this approach is a smart way to manage big storms. For complex sites, get a quick consult from a contractor so your new system works long term.
Nature-Based Solutions: Rain Gardens and Water-Loving Plants
Let a low, saucer-shaped bed become a living filter that welcomes and slows stormwater.
Plant a rain garden in a natural low spot where water pools briefly after a rain, then soaks away within a day or two. Line the base with compost-rich soil so roots establish quickly and conditions stay healthy.

Designing a simple, beautiful rain garden
Shape a gentle saucer with a shallow outlet spillway. Keep the bowl shallow so it drains within 24–48 hours. Add a rim of deep-rooted grasses to hold the edge and simmer runoff into the center.
Plant picks for wet areas
Choose showy, native plants that tolerate moist soil. Try blue flag iris (Zone 3–9), swamp milkweed (Zone 3–9), and cardinal flower (Zone 3–9) for color and wildlife value.
- Layer plants: grasses on the rim, bloomers like iris and milkweed in the center.
- Include marsh marigold or turtlehead for early spring shine and habitat.
- Add stepping stones or a short boardwalk so you can enjoy the area when the yard is still drying.
- Position the feature at least 10 feet from buildings and route overflow to turf or a second bed.
| Feature | Plant example | USDA zones | Best placement |
|---|---|---|---|
| Rim grasses | Blue‑joint grass, switchgrass | 4–8 | Edge, above bowl |
| Showy bloomers | Blue flag iris, swamp milkweed | 3–9 | Center, moist soil |
| Pollinator draw | Cardinal flower, turtlehead | 3–8 | Mid‑bowl for summer color |
Why it helps: A rain garden adds seasonal beauty and boosts biodiversity. It soaks up roof and path runoff, eases pressure on nearby beds, and improves overall garden drainage while inviting pollinators into your landscape.
Seasonal Care, Tools, and Safety for Lasting Drainage
Set aside an hour in spring and fall to inspect your yard and tidy systems before storms.
Walk the lawn after a rain and note low spots, clogged outlets, or mushy paths. Aerate the lawn to punch clean holes so air and water reach roots. Follow with a light compost top-dress to feed soil and strengthen turf.
Refresh pea gravel in swales and outlets so water slips between stones. Rake gravel smooth and replace any worn materials at pipe outlets. Cover outlet ends with stones or a bit of groundcover and wire mesh to stop erosion and block debris.
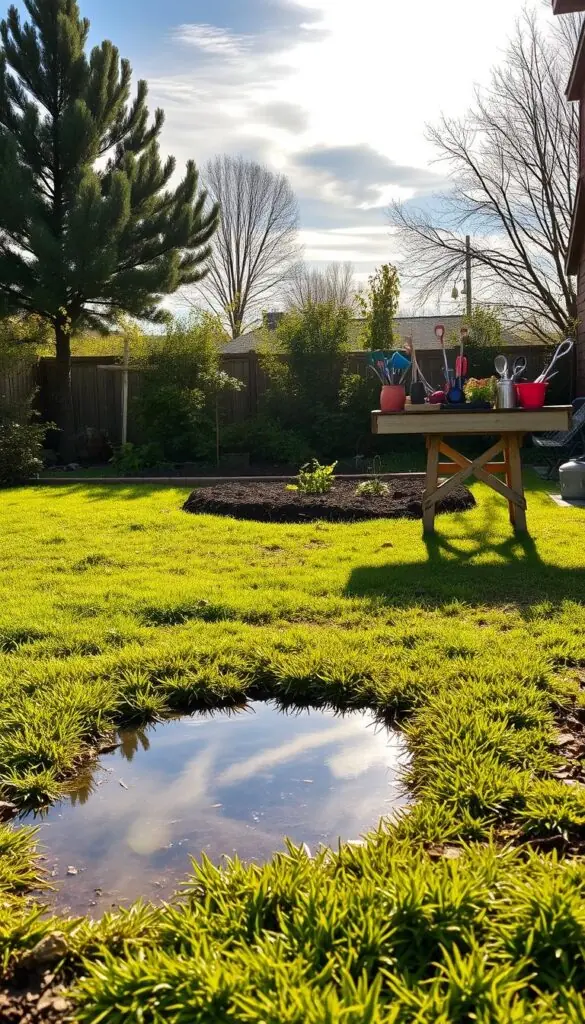
Essential tools and materials
- Sturdy shovel and metal rake
- Wheelbarrow and 2–4 ft level
- Landscape fabric, pea gravel, corrugated perforated pipe
- Gloves, wire mesh, and a hand aerator
Safety and when to call a pro
Always call 811 before any digging—it's free and prevents utility strikes. For trenches and buried pipe runs around 18 inches deep or complex systems, hire a pro. A short consult can save time and prevent costly fixes to your home and yard.
| Season | Task | Why |
|---|---|---|
| Spring | Aerate lawn, check outlets, refresh gravel | Prepares turf and clears flow paths |
| Fall | Clean gutters, winterize barrels, regrade sags | Prevents winter damage and frozen clogs |
| As needed | Call 811 before digging; hire pro for complex work | Protects utilities and ensures lasting systems |
Conclusion
A few steady habits and a couple of focused fixes give you real control over standing water and soggy beds.
You’ve got a clear path: simple grading, tidy downspout tweaks, and steady soil care are practical solutions that keep water moving the right way.
For bigger needs, a tucked‑away system — a short trench with a drain or a dry well — can quietly handle surface water without stealing beauty from the landscape.
Choose the option that fits your space and conditions, keep seasonal checkups and light cleanouts, and your yard will stay resilient through storms and sunlit weeks.
Most of all, enjoy the change: firm ground after rain, leaves that gleam instead of droop, and the calm confidence that your home and foundation are better protected. When a project grows beyond your comfort, it’s perfectly fine to call for help — your garden deserves the best care.
FAQ
How can I tell if my vegetable beds have poor drainage?
Look after a heavy rain for standing water, soggy patches, or plants that wilt despite wet soil. Check soil texture by touching and smelling it — sticky clay or sour odors and mossy surfaces mean water isn't moving. Do a timing test: dig a small hole, fill with water, and see how long it takes to drain; more than 24 hours signals a problem. These signs help you decide whether to add compost, adjust slope, or install a trench or pipe.
What quick fixes can I try this weekend to move excess water away?
Create shallow channels or small swales to guide surface runoff away from beds, and extend downspouts so roof water discharges farther from roots and your foundation. Mulch beds lightly and avoid compacting soil; this keeps pore space open. For low spots, a short trench with gravel and a perforated drain pipe can give immediate relief without a big project.
How much compost should I mix into beds to improve soil texture?
Work in several inches — typically 2 to 4 inches — of well-aged compost across the planting area and fork it into the top 6 to 8 inches of soil. This adds organic matter that opens pore spaces and helps water move through instead of pooling. Avoid layering coarse materials that create barriers; blend amendments evenly to keep water flowing.
When should I use raised beds for soggy spots?
Raised beds are a great option if low-lying areas stay wet after storms or if you have heavy clay soil. They lift roots above saturated ground, allow you to control fill (use a mix of topsoil, compost, and coarse sand or gravel for drainage), and make maintenance easier. They work especially well for vegetables that need well-drained soil.
How do I set the right slope to move water away from my house and beds?
Aim for a gentle slope of about 1 inch drop per 8 to 10 feet away from your foundation and planting areas. Use a line level or a straight board with a level to check grade as you add or remove soil. Backfill wet spots with coarse-grained soil or a mix that drains faster than native clay to keep water flowing downhill.
What role do gutters, downspouts, and rain barrels play in managing runoff?
Clean, properly sized gutters and downspouts direct roof water away from beds and the foundation. Add downspout extensions to carry runoff beyond problem areas. A rain barrel captures excess water for later irrigation, reducing immediate runoff. Combine these with landscape grading or a small trench to keep surface water controlled.
Is a French drain a good DIY solution for vegetable plots?
Yes—French drains work well to move surface and shallow groundwater away from planting areas. Dig a trench sloped toward an outlet, lay landscape fabric, add a base layer of gravel, place a perforated pipe, cover with more gravel, then backfill with soil and top with mulch. Protect the outlet with stones or wire mesh and use groundcover to conceal it. Keep the slope consistent so water flows freely.
When should I consider a dry well or catch basin?
Install a catch basin when concentrated runoff collects in one spot, such as below a downspout or low corner. Tie it into a pipe that leads to an underground dry well if you need to store and slowly percolate larger volumes. Dry wells are useful when you can't move water far away; they require proper sizing and soil that can absorb water.
Can I use a rain garden or water-loving plants to solve soggy patches?
Absolutely. A rain garden collects and filters runoff while supporting native wetland plants like blue flag iris, swamp milkweed, and cardinal flower. Place it where water naturally flows, shape it to hold a few inches of water after storms, and use soil mixes that balance retention with drainage. It's both effective and attractive.
What seasonal care keeps my system working year-round?
In spring and fall, check and clear gutters, refresh gravel in trenches and French drains, and aerate compacted lawns. Remove debris from catch basins and clean rain barrels. Keep essential tools on hand: shovel, rake, level, and pea gravel. Before digging new trenches or installing pipes, call 811 to locate utilities and know when to hire a licensed contractor for complex work.