Imagine the soft sheen of sunlit grass and a steady, quiet sweep as a roller follows your mower. You might picture a small front yard transformed into a tidy, showpiece view from the porch.
When you try lawn striping, you bend grass blades so light plays dark and light across the surface. This simple trick creates crisp lines and a neat pattern that lifts curb appeal without fuss.
We’ll walk you through calm, practical steps: start with a clean perimeter, use a straight edge like a driveway for your first pass, and overlap slightly as you alternate directions. A basic roller behind a mower gives the final, defining touch.
Cool-season grass often responds quickly, while warm-season types may need a bit more roller weight. Avoid mowing wet grass and keep blades sharp for a clean look.
Key Takeaways
- Striping bends grass so light creates contrasting lines.
- Start with a straight perimeter pass to guide your pattern.
- Use a roller after mowing to deepen definition.
- Cool-season grass stripes easiest; warm-season may need weight.
- Avoid wet mowing and use sharp blades for clean results.
Understand how lawn striping works and why it boosts curb appeal
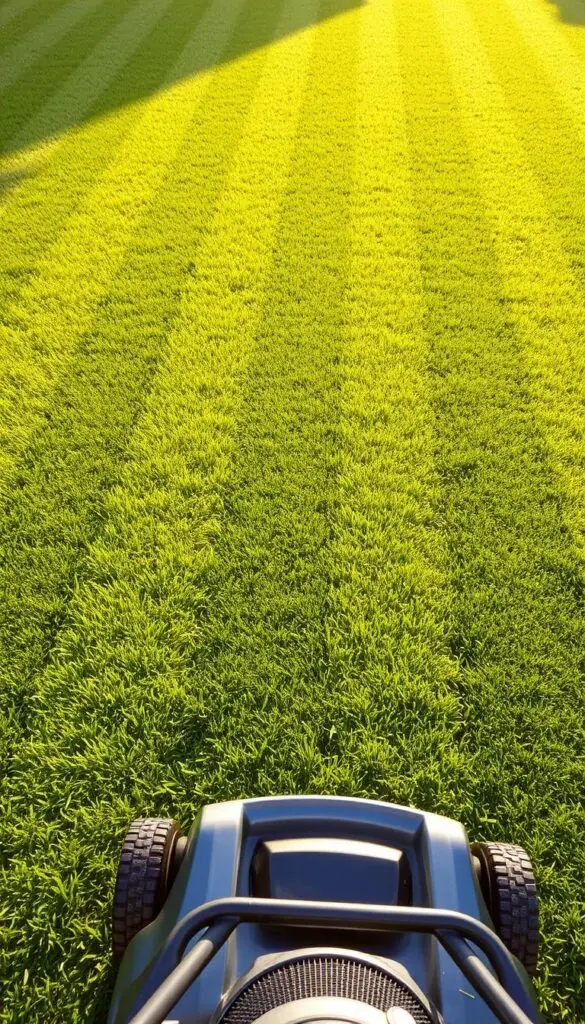
Watch how gentle bends in the grass create a striking pattern when sunlight catches each blade. The trick is simple: blades tilted away from you reflect more light and read as lighter, while those tilted toward you absorb light and read as darker. That contrast is what gives a neat, professional look.

Light vs. dark: how bent grass blades create crisp lines
Use a roller or a rear attachment to bend grass in opposite directions along each pass. The mower’s forward motion and a smooth roll create a distinct line where one side faces light and the other faces shade.
Tip: Taller cutting heights often increase contrast because blades have more surface to catch the sun.
Health perks of changing your mowing direction
Alternating your mowing direction spreads wear across different areas and prevents ruts from repeating wheel paths. That reduces compaction and helps grass grow more evenly.
Switching direction also encourages upright growth and thicker turf. Keep mower blades sharp and avoid crushing the plants—gentle bending, not force, is the goal.
- Roller or kit bends grass—no paint needed; just light and angle.
- Cool-season types show stronger contrast in spring and fall; warm-season turf may need extra roller weight.
- Watch your viewing angle: light behind you makes lines pop best.
Gather simple tools and prep your lawn for standout stripes
A few well-chosen tools and clean prep are all you need for a crisp, professional finish. Start by tuning your mower: set an adjustable height for your grass type, clean the deck so clippings won’t clump, and make sure the mower blades are sharp for a clean cut.
Roller attachment options work with many walk-behind and riding models. A roller or rear attachment adds weight and sets clear bands as you pass. Most kits are brand-neutral and bolt on easily; a proper fit helps keep lines straight across wider areas.
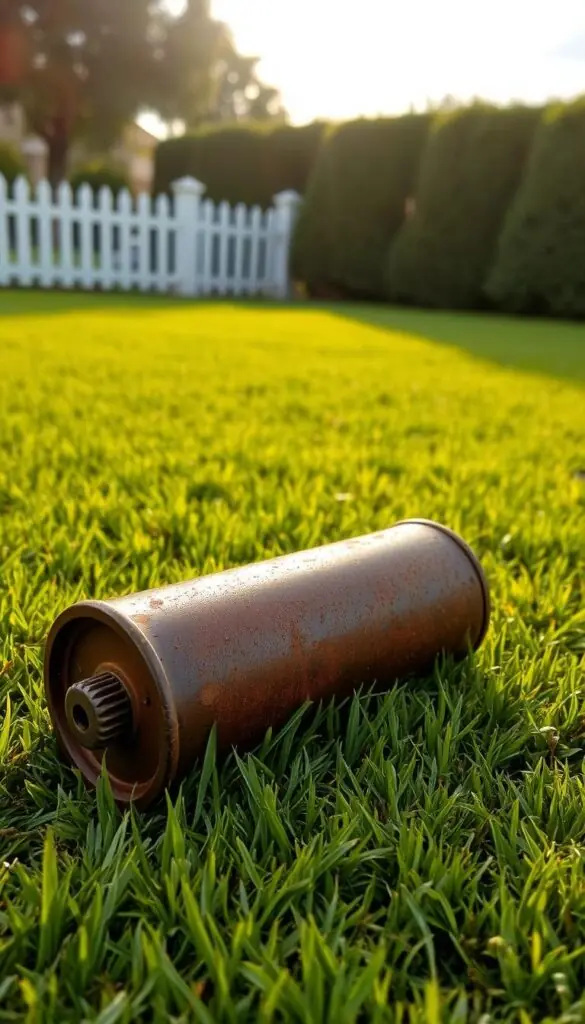
If you’re testing this, try a sturdy push broom after mowing. Walk the same paths and gently press the grass in alternating directions. A homemade roller (a PVC pipe filled with sand) can also do the trick for small plots.
"Keep a small kit of tools—blade wrench, file, rag, and a hose—to stay ready and keep machines running clean."
- Work in dry conditions to avoid matting and muddy marks.
- Fertilize seasonally, spot-treat weeds, and core-aerate for denser growth.
- Listen for a smooth hum and check bolts if the roller chatters.
| Tool | Purpose | Fit | Notes |
|---|---|---|---|
| Mower | Cut at recommended height | Universal for walk-behind and riding | Keep blades sharp; clean deck |
| Roller | Press grass for contrast | Many bolt-on attachments available | Check attachment bolts and tire pressure |
| Push broom / DIY roller | Budget-friendly bending | Works for small yards | Use firm, even pressure |
| Tool kit | Maintenance and adjustments | Compact, portable | Include wrench, file, rag, hose |
Plan your pattern and viewing angle before you stripe lawn
Pick a viewing point first — then choose a pattern that shows best from there. Decide whether you’ll admire the result from the porch, driveway, or patio. Your chosen point guides every pass.
Pick a pattern
Start simple with straight lines. They give a clean, classic look and teach control.
When ready, try a checkerboard or a diamond by adding a perpendicular or angled set of passes. For a relaxed feel, sketch gentle waves or a circular bulls-eye.
Line of sight and light
Run your lines parallel to the main view so each pass reads as intended. Mowing with the sun behind you usually makes the contrast bolder from that point.
Layout tips
- Mark a starting point using the driveway edge, curb, or a taut string as an anchor line.
- Keep turns at the perimeter to avoid scuffing the center pattern.
- Split long runs around trees or beds and rejoin to keep the flow natural.
| Tip | When to use | Why it helps |
|---|---|---|
| Straight first pass | First time striping | Creates a guide line for even, steady repeats |
| Perpendicular second pass | Try checkerboard | Adds depth and visual interest |
| Driveway or string guide | Tight or sloped yards | Improves straightness and saves time |

Step-by-step: start mowing and lay down stripes across lawn
Start with a single, calm perimeter pass to frame the space and set your rhythm. This gives you turning room and a neat edge to aim for as you work inward.
Set up: Check your lawn mower height, sharpen blades, and avoid wet grass. Take a breath and pick a straight reference—driveway or curb—for your first line.
When you start mowing, go slow and steady on that first pass. Follow your guide so the line stays true. Come back with a slight overlap to prevent thin gaps between bands.
- Begin with one clean perimeter loop.
- Make a straight first pass using a fixed reference.
- Overlap each return pass slightly and alternate direction every row.
- Keep turns on the perimeter with wide, gentle arcs.
- Finish by snapping on a roller attachment and making one last pass to press and define the pattern.
Listen for a steady engine hum, feel the breeze, and note the gentle press of the roller at your back. Watch 8–10 feet ahead to avoid obstacles and hold a steady line.
Quick tips: Use a clip catcher or mulch, but break up clumps so the surface stays even. Step back when you’re done and admire the soft bands of color that run across lawn like satin.
Match grass type, height, and season for pro-level lawn stripes
Choose the right grass type and height first—those choices decide how bold your pattern will read. Different grasses respond in their own way when you bend them with a roller or a steady pass.
Cool-season grasses like Kentucky bluegrass, perennial rye, and tall or fine fescue have flexible blades. They take a clean bend with lighter pressure and show strong contrast in spring and fall. Aim for these heights: Kentucky bluegrass 2.5–3.5 in., perennial rye 1.5–2.5 in., tall fescue 3–4 in., fine fescue 2.5–3 in.
Warm-season species such as Bermuda, zoysia, St. Augustine, centipede, and bahiagrass often need a bit more roller weight so the bend holds. Suggested heights: zoysia and Bermuda 1–2 in.; St. Augustine 2–3 in.; centipede 1–2 in.; bahiagrass 3–4 in.

Raise height slightly during hot months to reduce stress and protect roots. In cool regions, pick spring or fall for your main striping time. For warm-season yards, start early on summer mornings when the air is cool and the sun is soft, then finish before midday heat.
- Keep mower blades sharp and avoid scalping—clean cuts keep edges neat.
- Use a lighter touch on flexible grasses; add weight or a second light pass for firmer types.
- Watch how quickly grass springs back to plan your next cut and keep the pattern consistent.
Conclusion
A steady, mindful pass can turn simple mowing into a small daily ritual that brightens your yard.
You’re ready to try lawn striping one calm pass at a time. Start with a clean perimeter, make a straight first pass, overlap slightly, then finish with a roller or a steady push. Alternate direction each session to keep turf healthy.
Keep blades sharp, avoid wet cutting, and pick a mild season day. If you want to level up, test a gentle checkerboard next weekend—it's an easy step beyond straight lines.
Step back, enjoy the view from your favorite point, and take a quiet moment to feel proud. Great patterns come with practice, and your lawns will thank you.
FAQ
What makes striping work — why do I see light and dark lines?
The effect comes from bending grass blades. When blades are bent toward you they reflect more light and look lighter; bent away they appear darker. Using a roller or weighted attachment after mowing helps bend the blades consistently for crisp contrast.
Does alternating mowing direction actually improve turf health?
Yes. Changing direction reduces soil compaction and wear in one spot, promotes upright growth, and helps turf build a denser root system. This leads to more resilient, even coverage that holds a pattern better over time.
What mower features matter for clean lines?
Look for an adjustable cut height, sharp blades, and a clean deck. Sharp blades give an even cut, an adjustable deck helps you pick the right height for your grass type, and a tidy deck prevents clippings from clogging and tearing the grass.
Do I need a striping kit or roller attachment?
A striping kit or roller attachment makes it easier, especially on riding mowers. Walk-behind mowers can use lightweight rollers. For a budget option, a homemade roller or even a push broom used after cutting can bend blades enough to create visible lines.
How should I prep my yard before trying patterns?
Start with a dense, even turf: fertilize appropriately, control weeds, and aerate compacted areas. Mow regularly to keep a uniform height and repair thin spots so the pattern reads clearly across the surface.
Which patterns are easiest for beginners?
Straight parallel lines are the simplest and most forgiving. Checkerboard or diamond patterns take a bit more planning and precise passes, while waves or circles require steady steering and a good visual reference.
How do I choose the best viewing angle for stripes?
Run your first pass parallel to the main viewpoint — like your porch, street, or patio. Lines seen head-on look bolder, while ones viewed along their length emphasize depth. Experiment with short test passes to pick the most pleasing orientation.
Any tips for keeping straight passes?
Mark a starting line using the driveway edge, a stake, or a string. Keep a steady speed, overlap each pass slightly, and use the mower’s wheel track as a guide. A perimeter pass first gives a clean border to work from.
How do grass type and height affect striping?
Cool-season types like Kentucky bluegrass and perennial ryegrass bend easily and show patterns well at moderate heights. Warm-season types such as Bermuda and zoysia may need heavier rollers or lower heights for definition. Follow ideal mowing heights for your species to avoid scalping while maximizing contrast.
When’s the best time of year and day to stripe?
For cool-season turf, spring and fall give the best results. Warm-season grasses respond well in summer mornings when dew has dried and heat stress is low. Mow during calm, dry conditions for the cleanest finish.
What mowing routine creates the most consistent stripes?
Start with a perimeter pass, then make your first straight pass as a reference. Overlap slightly on each subsequent pass, alternate direction each session, and finish with a gentle roller pass to sharpen the lines.
How do I avoid damaging the grass when using a roller?
Use an appropriately weighted roller — too heavy can compact soil or crush blades. Roll gently, avoid wet ground, and don’t repeat heavy rolling in the same spot. Regular aeration helps relieve any compaction over time.
Can I stripe a small yard or tight spaces?
Yes. Shorter passes and smaller patterns like checkerboard squares work well in compact areas. Use a walk-behind mower or manual tools for more control, and plan your layout to minimize tricky turns.
What maintenance keeps patterns looking fresh between cuts?
Mow on a regular schedule, keep blades sharp, and address weeds or bare patches quickly. Light fertilization and proper watering help grass recover and maintain even color so your pattern stays visible longer.