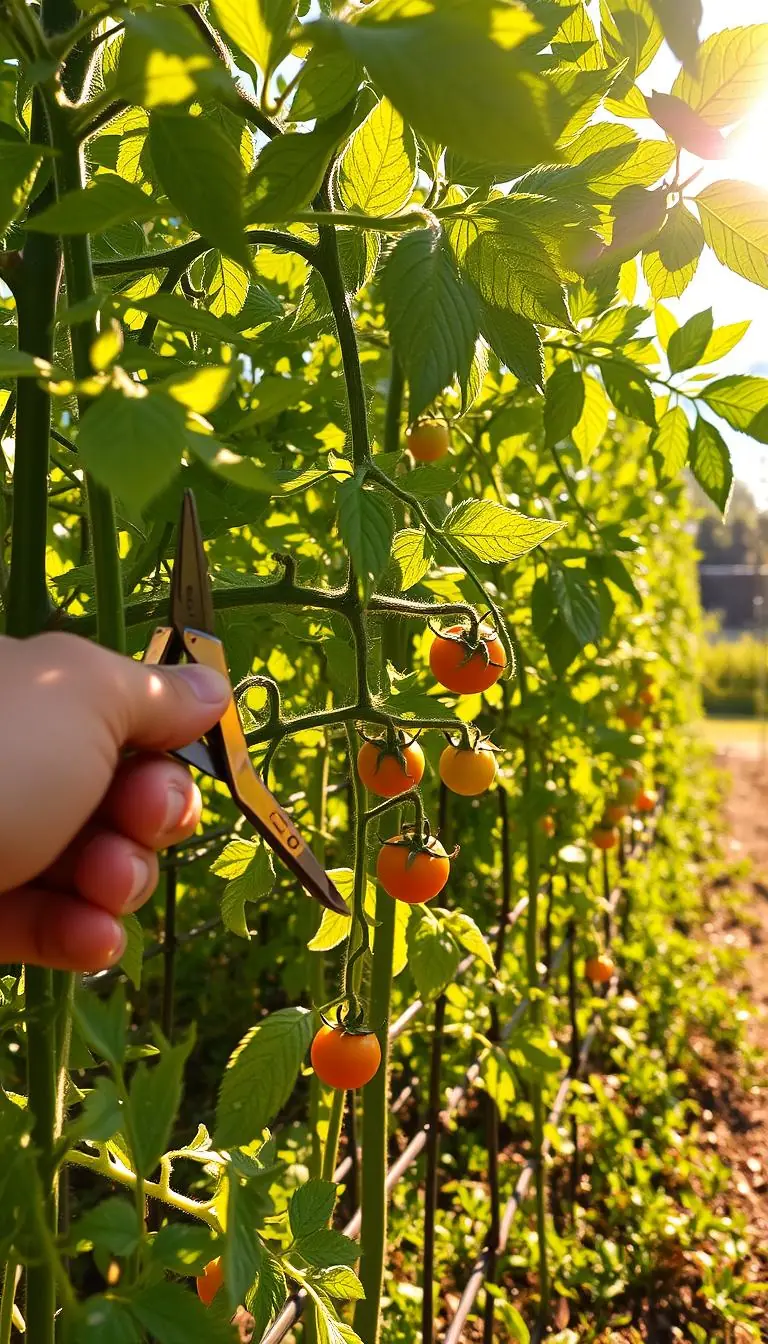
Imagine warm light on your kitchen window and the faint scent of lavender as you sip morning coffee. You notice a patch of soil by the porch that could feel more alive. What if a few simple steps turned that spot into a thriving, low-effort oasis?
This guide shows you the clear, friendly way to start. We give practical how-tos—like 2–3 inches of mulch, morning watering, and using a watering can—to make plants and flowers look lush while cutting your footprint.
You’ll find real examples for sun, shade, clay, and containers, and tools you likely own: planters, lights, a compost bin, hand fork, and pruners. Seasonal notes help you plant trees in fall, sow hardy annuals in late winter, and water deeper but less in summer.
Small actions at home add up across millions of gardens. By mowing less, collecting rainwater, and composting, you lower carbon impact and protect nature. We’ll walk you step by step so your home landscape feels calm, useful, and beautiful.
Key Takeaways
- Ten simple practices deliver visible difference fast, from no-dig soil care to reusing materials.
- Exact measures and timings (mulch depth, watering times, seasonal tasks) make each step easy.
- Practical tools like a watering can, compost bin, and pruners keep work simple and effective.
- Small changes—one native tree or a rain barrel—cut carbon and support wildlife.
- Common mistakes—overwatering, tilling, bagging leaves—are flagged with better alternatives.
Start with the soil: no-dig, peat‑free, and living mulch for healthy, low‑maintenance beds
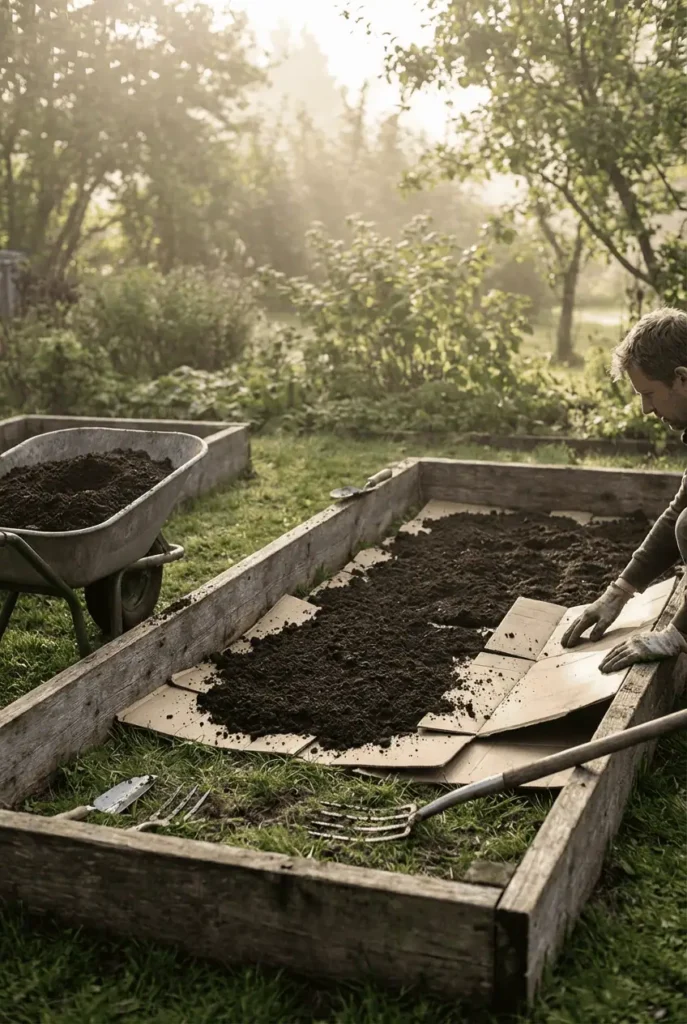
Healthy beds start below your feet — with simple soil care that saves time and carbon. Begin gently: clear surface weeds, lay cardboard (remove tape), and top with 4–6 inches of peat‑free compost. The soil life will remade the bed for you over time.
No-dig basics
- Hand-weed after rain when roots slip out cleanly; this protects soil structure and tiny air pockets roots love.
- Avoid tilling: leaving soil intact keeps stored carbon in place and helps water move through more evenly.
Choose peat‑free compost
Look for bags labeled “Peat‑Free.” Peatlands store vast carbon; using peat‑free blends reduces harm to this global resource.
Home compost made easy
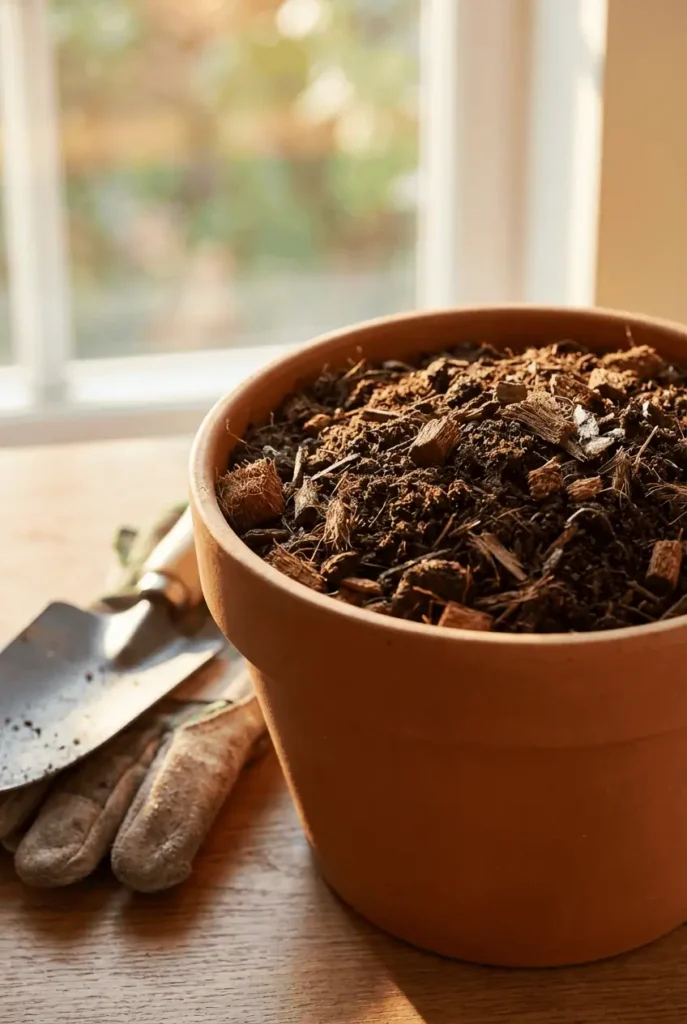
- Build in a bin or pallet stack: 1 part greens (kitchen peelings, grass) to 2–3 parts browns (shredded cardboard, leaves).
- Keep it moist like a wrung-out sponge and turn monthly with a garden fork; finished compost smells earthy and crumbly.
Mulch to lock in moisture
Apply 2–3 inches of shredded leaves, wood chips, or leaf mold. Keep mulch a couple inches from stems to avoid smothering crowns. Leave 6–12 inch bare pockets for ground‑nesting native insects and bees.
- Tools: garden fork, tarp, and a compost bin make these steps easy.
- Avoid overworking wet soil and stepping on beds; use a plank to spread weight if needed.
Water wisdom: capture rainwater, slow the flow, and hydrate plants efficiently
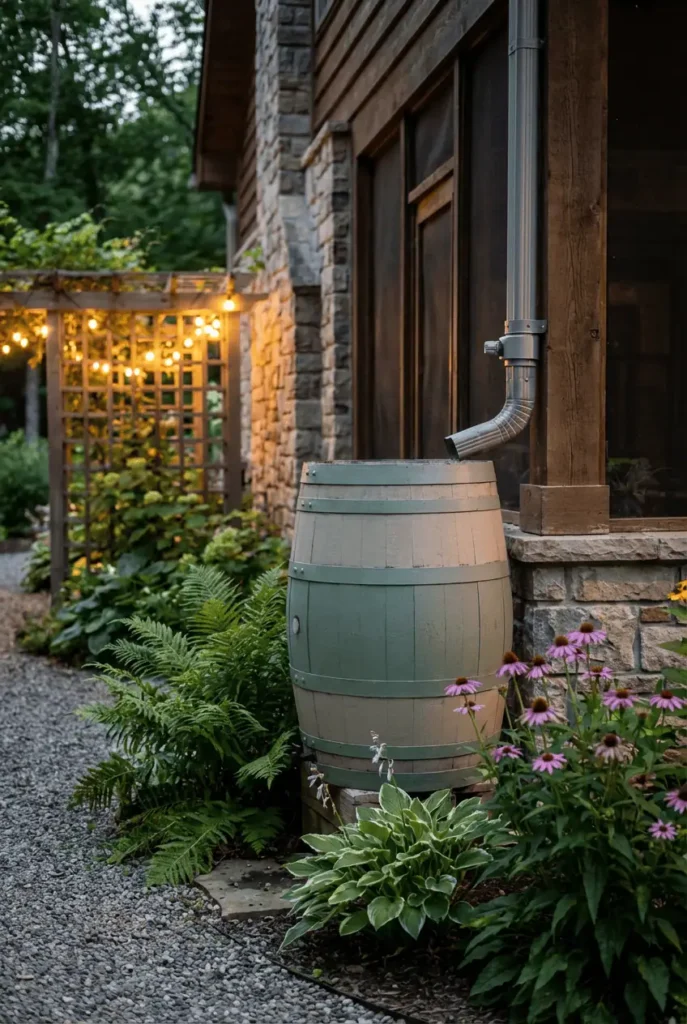
Capture, slow, and target — that three-step approach gets the most from each drop. Start by placing a 50–65 gallon rain barrel under a downspout with a diverter. Set it on cinder blocks for better pressure and add a mosquito-proof screen.
Install barrels and winterize
Overflow routing: attach a hose from the barrel to a mulched bed or lawn area that can absorb excess. Never let overflow run toward foundations.
Before hard freezes, drain barrels, disconnect hoses, and store flexible lines.
Watering technique
Water early in the morning with a watering can or a low-flow wand. Aim water at the soil, not leaves. Use the finger test: if the top 2 inches are dry, water until 6–8 inches are moist.
Avoid shallow, frequent spritzing; fewer deep sessions build stronger roots and save time and footprint.
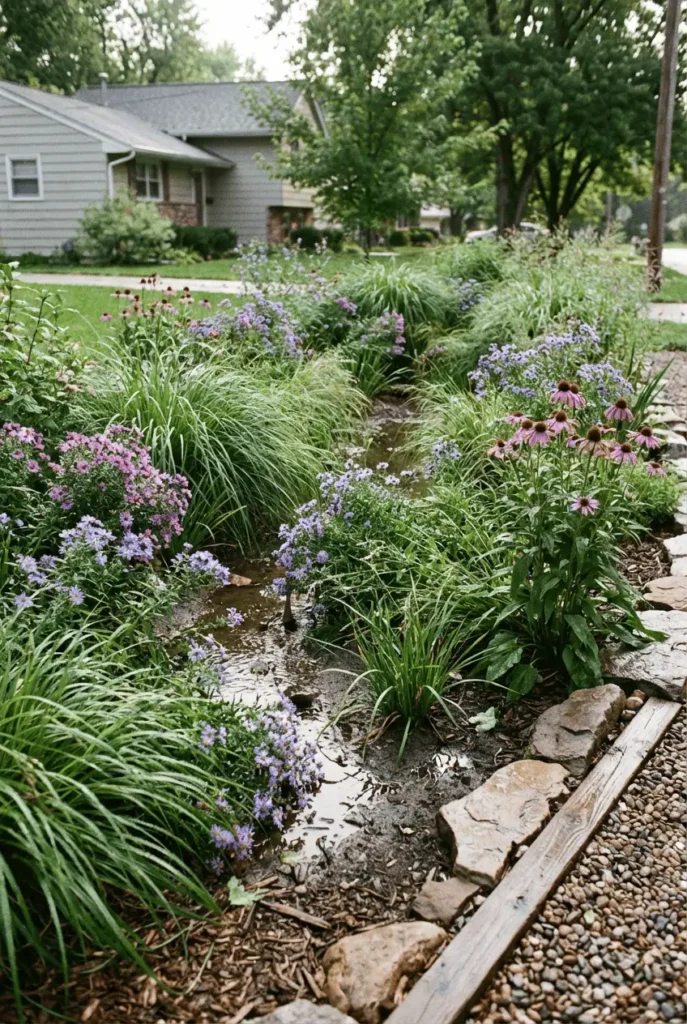
Build a simple rain garden
Place a basin downslope from a downspout, 3–6 inches deep and about 10–20% of the roof area. Line with compost, mulch, and plant native sedges, asters, and coneflower in drifts to attract pollinators.
| Action | Why it helps | Quick how-to |
|---|---|---|
| Rain barrel | Stores rainwater for plant use; lowers mains use | 50–65 gal, cinder block base, diverter, screen |
| Morning deep watering | Reduces disease, builds deep roots | Use can/wand; aim soil; 6–8" moist |
| Mini rain garden | Soaks stormwater and supports pollinators | 3–6" deep, 10–20% roof area, native palette |
Plant choices that thrive: right plant, right place, with natives, trees, and hedges
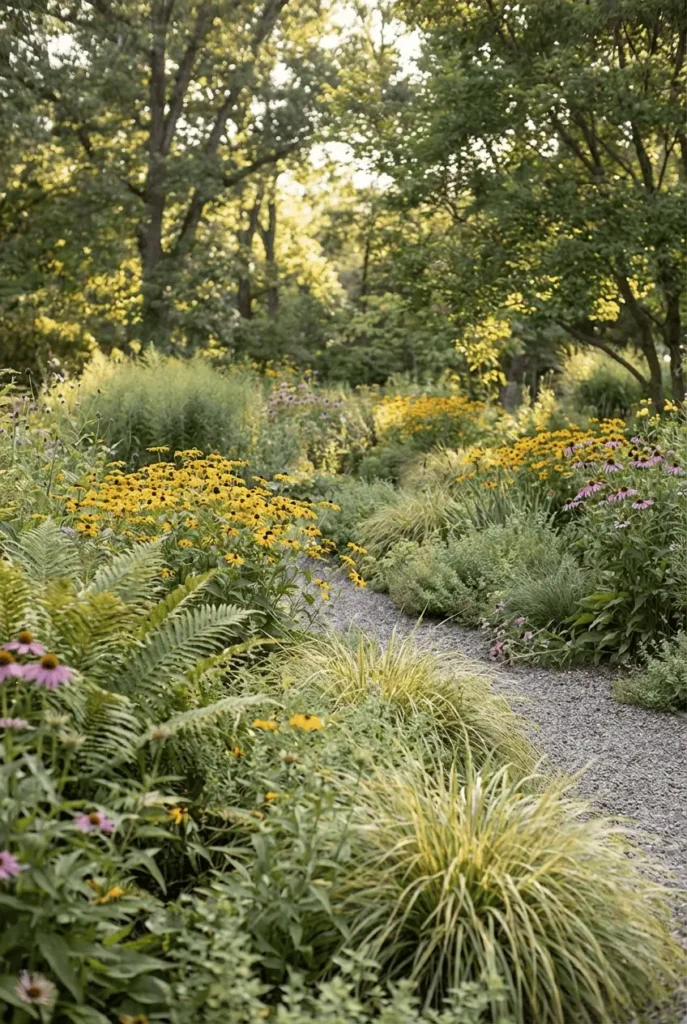
Choose plants that match the light, soil, and space you have, and they will reward you year after year. A little planning saves time and helps biodiversity in your yard.
Right plant, right place
Full sun, hot beds: echinacea, black‑eyed Susan, nepeta, and verbena — drought‑tolerant and pollinator‑friendly.
Heavy clay: switchgrass, Joe Pye weed, daylilies. These tolerate compacted soils and still bloom.
Part shade: ferns, coral bells, foamflower, plus spring bulbs like snowdrops for early color.
Plant a tree for year‑round impact
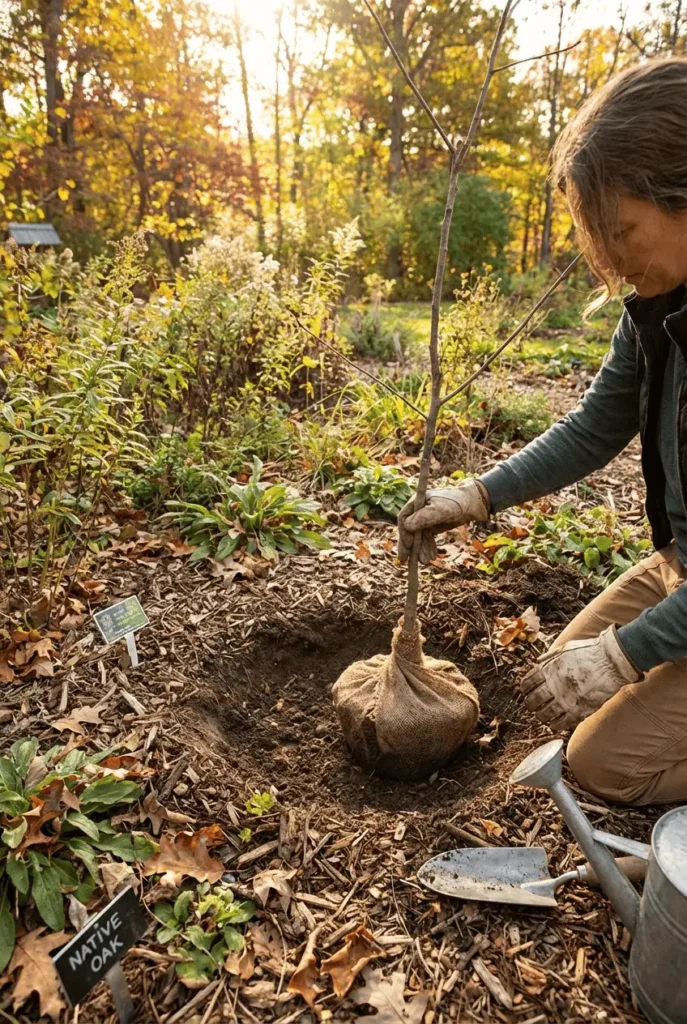
Plant in fall when roots settle. Dig a hole 2–3 times wider than the root ball and keep the root flare visible. Site trees away from overhead lines and foundations.
| Tree size | When to pick | Best use |
|---|---|---|
| Small (15–25 ft) | patios, tight spaces | serviceberry, redbud |
| Medium (25–40 ft) | yards, street trees | crab apple |
| Large (40+ ft) | open areas | birch, oak |
Swap fences for hedges
Mixed native hedges—American holly, viburnum, ninebark—offer privacy, shelter for birds and bees, and clean the air while adding habitat.
"Layer canopy trees, shrubs, perennials, and groundcovers to create a living tapestry that supports wildlife."
Common mistakes: planting too deep, choosing thirsty species for dry sites, or siting in waterlogged spots. Get the siting right and enjoy more color, scent, and wildlife all year.
Wildlife‑friendly care: small shifts that boost biodiversity all year
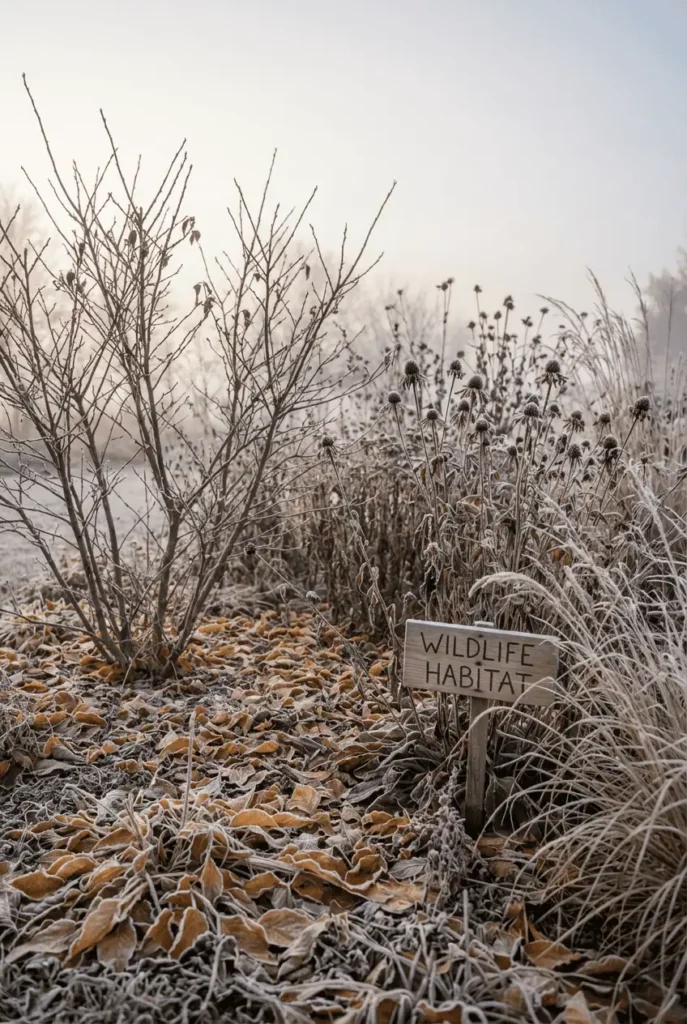
A few careful shifts in leaf and grass care invite more birds, bees, and beneficial insects into your yard. Keep steps simple and seasonal so plants and wildlife thrive without extra work.
Leave the leaves
When to keep them: Leave a light, airy layer under shrubs and perennials as natural mulch. Whole leaves shelter insects and feed soil life.
When to move them: Rake thick leaf mats off the lawn into beds or corners so grass can breathe. Avoid shredding if you want to protect overwintering insects and butterflies.
Let stems stand through winter
Seedheads and hollow stems feed birds and house native bees. Enjoy the frost‑rimmed textures and rustling sound of fallen leaves and stems in cold air.
Cut back in spring when nights reach about 50°F — trim stems to 18 inches and chop‑and‑drop to feed the soil.
Mow less and make pocket meadows
Try No Mow May or raise your mower to 3–4 inches to encourage clover and violets for early pollinators. To make a pocket meadow, remove turf, lay cardboard, add compost, and seed with a native mix.
Create habitat piles and snags
Stack prunings into a tidy pile for shelter and nesting. Leave a short snag where safe; it draws woodpeckers and other birds while providing shelter for small wildlife.
"Keeping fallen leaves supports soil organisms and overwintering beneficials; small changes protect life we hardly see."
Grow your own, beautifully: food, herbs, and flowers with a lighter footprint
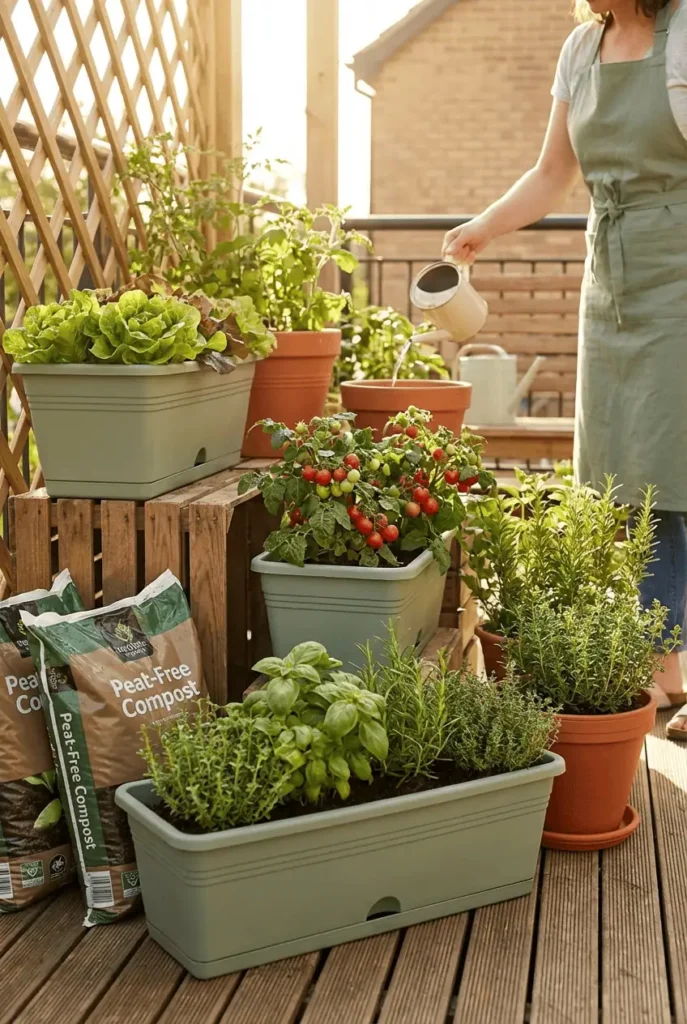
With simple containers and a little planning, you can harvest tasty food and cut flowers all year from a small space. Growing at home reduces transport and packaging, and fills your porch with scent and color.
Beginner edibles in small spaces
Container recipes & sizes:
| Crop | Pot size | Sun |
|---|---|---|
| Tomatoes | 14–18 in | Full sun |
| Peppers | 10–12 in | Full sun |
| Lettuce | Shallow bowl | Partial sun |
Use a peat-free potting mix with a handful of compost. Water when the top inch is dry; most pots need checking every 1–3 days in heat. Hang cherry tomatoes or strawberries in sunny spots and feed with diluted comfrey or fish fertilizer every 2–3 weeks during peak growth.
Cut-flower success from seed
Sow zinnias, cosmos, calendula, and sweet peas for long-season blooms. Add filler like basil (it smells amazing) and ammi for airy texture. Plant cool-season pansies and snapdragons in early spring; wait until after frost for zinnias and sunflowers. Rotate pots so every plant gets even sun.
Save seeds and direct-sow hardy annuals
Save seeds only from open-pollinated varieties; they come true to type. Do not save seeds from F1 hybrids—they won’t reliably reproduce parent traits. Label envelopes with name and year and store cool, dry, and dark.
Direct-sow hardy annuals—calendula, nigella, poppies, and larkspur—in late fall or very early spring for early blooms next year. Use vertical supports (bamboo canes, trellises, or string lines) to save space.
Mistakes to avoid: tiny pots that dry out, overcrowded seedlings, and overfertilizing that creates weak, floppy growth. Arrange pots by height and color to make your small space feel like home.
eco garden tips for reusing, recycling, and reducing waste
Keeping materials on site makes the biggest, simplest difference for soil and wildlife. Small reuses save money and cut waste while building habitat and holding water where plants need it.
Creative, safe reuses
- Turn a pallet into a vertical strawberry planter: staple landscape fabric to form pockets, add a peat‑free mix, and tuck runners into the pockets. Use galvanized staples and a few screws for stability.
- Make cloches from halved milk jugs: cut a door, punch a few vent holes, pin them with landscape staples, and remove on warm afternoons to avoid overheating.
- Build a leaf‑mold cage with four stakes and welded wire. Stuff it with autumn leaves, let rainwater settle in, and harvest silky leaf mold the next year for mulch.
- Line wooden boxes with old compost bags to slow rot. Punch drainage holes and press the liner to edges for a neat look.
Close the loop on plant waste
Compost kitchen scraps and prunings on site to cut landfill emissions. Practice chop‑and‑drop: cut spent stems and leave them as a light mulch to feed soil life and retain water.
Add a shallow dish mini‑pond for insects and birds. Nest a few stones for gentle edges and refill with collected rainwater. This small feature gives shelter and brings species close.
| Reuse | Quick steps | Tools |
|---|---|---|
| Cardboard paths | Lay wet cardboard, top with wood chips | Box cutter, wheelbarrow |
| Seed starting | Use trays, toilet rolls, old pots | Scissors, labels |
| Habitat bundles | Store offcuts under hedges | Pruners, twine |
"Small reuses keep resources working and make a visible difference in your yard."
Think before you buy: tools, materials, and maintenance that last
Good tools and habits turn chores into short, satisfying sessions. Borrow when you can, choose repairable items, and keep a small core kit that covers most jobs. Good choices save you time, water, and money.
Borrow or buy second‑hand
Borrow rarely used items—lawn aerators, stump grinders, and pole pruners— from neighbors or a local tool library to save space and cost.
- Look for forged pruners, a sturdy digging spade, a hand fork, a watering can, and a hose with a shutoff when buying.
- Estate sales and online marketplaces often offer high‑quality secondhand finds that outlast cheap new tools.
Care after each use
After work, brush off soil and dry metal parts. A clean tool lasts longer and works better.
- Plunge metal ends into a bucket of sand mixed with a little linseed or mineral oil to clean and protect.
- Sharpen pruners and hoes monthly—sharp edges make cleaner cuts and save you effort.
- Coil hoses out of the sun, drain before freezes, and store watering cans and sprayers dry to prevent cracks.
"A short tidy-up at the end of each session prevents rust, reduces repair time, and keeps your space ready to use."
Final practical kit: forged pruners, spade, hand fork, watering can, hose with shutoff, file, and a small caddy with gloves, twine, labels, and a pencil. Keep mower blades sharp and raise the deck—this cuts mowing frequency, saves water, and uses less energy.
End each session by returning gear to a dry, shaded rack. These simple habits extend tool life and make time in your yard calmer and more productive.
Design for resilience: dense planting, microhabitats, and smart spacing
Dense planting and a few microhabitats strengthen beds so they need less water and work. Fill bare spots with living cover to cut erosion, hold moisture, and invite beneficial insects and bees.
Practical spacing and layering
- Stagger plants in triangular groups; leave room for each plant's mature width rather than shoehorning seedlings together.
- Plant in layers — tall, mid, and low — to shade soil, cool roots, and reduce evaporation during heat spells.
- Convert narrow strips of lawn to low‑mow meadow or beds to increase biodiversity and lower irrigation needs.
Groundcover and microhabitat ideas
- Sun: creeping thyme, sedum, or hardy thyme to crowd weeds and protect soil.
- Shade: wild ginger, foamflower, or liriope to keep soil shaded and moist.
- Tuck stones, a shallow water dish, and a mini log pile into corners to give insects and bees shelter and drinking spots.
Soil care and compost topdressing
- Topdress beds each fall with 1–2 inches of compost; do not till — soil life will incorporate it naturally.
- Order a soil test before adding lime or fertilizer; over‑amending can lock up nutrients and harm long‑term soil health.
- Leave a few small bare patches for ground‑nesting bees; otherwise keep leaves or living cover to protect the earth.
"You’ll notice beds stay cooler, hold moisture longer, and hum with life — resilience you can hear and feel."
Conclusion
Start with one gentle step—leave seedheads standing, spread 2 inches of compost, or set a small rain barrel—and watch the space respond.
Through the year, keep resources on site: compost trimmings, mulch with leaves, and use water wisely to build healthy soil and cleaner air.
Plant one tree and a few native perennials to invite wildlife and give your home shade and scent. Care for your tools after each session; tiny habits save time and make gardening feel easier.
Notice the difference: more birdsong, softer soil, less waste leaving your property. Take this calm, steady step now and plan one small next move for next season—gardens and gardeners both grow best a little at a time.
FAQ
What does "no‑dig" mean and why is it better for soil?
No‑dig means you avoid turning over soil with a fork or rototiller. Instead you add compost and organic mulches on top. This protects soil structure, preserves carbon, boosts beneficial microbes and earthworms, and reduces weed seeds coming to the surface. Over time your beds become more fertile and need less water and fertilizer.
How do I choose peat‑free compost and why does it matter?
Look for composts labeled peat‑free or made from green waste, coir, or wood‑based materials. Peatlands store massive amounts of carbon, so avoiding peat lowers your carbon footprint and protects wildlife habitats. Check product labels for certifications and local suppliers to cut transport emissions.
What's an easy way to start home composting?
Use a simple bin or tumbler and follow a green-to-brown ratio: kitchen scraps, grass clippings, and fresh prunings (greens) with dry leaves, straw, or shredded cardboard (browns). Turn or aerate every few weeks if possible, or layer materials and let a cold composting pile break down slowly. Keep it moist like a wrung‑out sponge.
How much mulch should I use and are there places I should leave bare?
Apply 2–3 inches of organic mulch like wood chips or leaf mold around plants to lock in moisture and suppress weeds. Leave small bare patches in sunny spots and around native groundflowers to give nesting bees and solitary insects access to soil for shelter and nesting.
How do rain barrels and diverters work and where do I place them?
Rain barrels collect runoff from downspouts. Install them directly under a downspout using a diverter kit so overflow goes back into drainage when full. Put barrels on a stable base and add a spigot for a watering can. In winter, disconnect or insulate to prevent freezing and damage.
When is the best time to water and what method conserves the most?
Water early in the morning to reduce evaporation and fungal problems. Use a watering can or drip system at the root zone rather than overhead sprinklers. Water deeply and less often to encourage strong roots; frequency depends on plant type, soil, and weather.
How do I build a simple rain garden to help with stormwater?
Choose a low spot that receives runoff but is at least 10 feet from your house. Dig a shallow bowl, amend with compost for infiltration, and plant water‑tolerant natives like asters, switchgrass, and sedges. The garden will slow flow, filter pollutants, and attract pollinators and birds.
How do I pick the right plant for a sunny, drought‑prone spot?
Match a plant’s needs to your site: full sun, low water, poor soil—choose drought‑tolerant species such as lavender, ornamental sages, or native grasses. Read plant tags for mature size to avoid overcrowding and mulch to retain moisture. Consider soil type—clay lovers like daylilies or switch to raised beds with amended soil.
What should I consider before planting a tree for wildlife value?
Pick native trees suited to your space and soil—oaks, maples, and serviceberries support many insects and birds. Plan for mature height and root spread, avoid utility lines, and plant with a mulch ring. Trees provide year‑round food, shelter, carbon sequestration, and cooler microclimates.
Can hedges really replace fences and help biodiversity?
Yes. Dense native hedges like hawthorn, holly, or native privet create living boundaries that offer nesting, shelter, and food for birds, bees, and beneficial insects. They also improve air quality, store carbon, and soften the landscape while requiring less hard maintenance than some fences.
When should I leave fallen leaves and when should I clear them?
Keep leaves as mulch under shrubs and in borders to feed soil life and protect overwintering insects. Rake or remove leaves from lawns if they form a thick mat that blocks light. Use collected leaves for leaf mold or add them to your compost pile to close the organic loop.
Why leave stems standing through winter and when to cut them back?
Standing stems provide seeds and shelter for birds and insects through winter. Cut them back in spring once nights consistently reach about 50°F, or when new growth begins. This preserves habitat while keeping beds tidy at the right time.
How can I reduce lawn mowing and still have a pleasant yard?
Raise mower height and cut less often to encourage deeper roots and biodiversity. Try No Mow May or designate pocket meadows with native grasses and wildflowers. Replace some lawn with low‑maintenance groundcovers, edible beds, or hardscape to reduce time and emissions.
What makes a good habitat pile or snag feature from prunings?
Stack branches and logs in a sheltered corner to create shelter for amphibians, hedgehogs, and insects. Include a mix of thick and thin pieces, leave some bark intact, and avoid short‑lived tidy piles. Standing deadwood or a secured snag offers nesting sites for birds and beneficial insects.
What are easy edible crops for containers and small spaces?
Try cherry tomatoes, leaf lettuce, salad greens, herbs like basil and parsley, and dwarf beans. Use pots or hanging baskets on sunny patios, rotate crops, and enrich containers with peat‑free compost for better water retention and nutrition.
Which flowers are best for cut bouquets and pollinators?
Choose seasonal, bee‑friendly bloomers such as cosmos, calendula, zinnias, and borage. Sow from seed in succession for continuous color and fragrance. Cut flowers grown at home reduce waste and bring wildlife‑friendly blooms into your home.
How do I save open‑pollinated seeds and why does it help biodiversity?
Let some plants go to seed, harvest once pods or heads dry, and store seeds in a cool, dry place. Saving seeds preserves locally adapted varieties, reduces the need to buy new seed, and supports genetic diversity in your neighborhood.
What are creative reuses for household items instead of buying new planters?
Repurpose old buckets, wooden crates, and wine barrels as planters. Use clear plastic bottles as mini cloches, and old pallets for vertical growing. Line wooden boxes with breathable fabric to extend life and avoid toxic treatments.
How do I "close the loop" with plant waste and on‑site carbon?
Compost remaining plant material, practice chop‑and‑drop to return nutrients to beds, and use woody prunings as mulch or habitat piles. These steps keep carbon on‑site, improve soil health, and reduce waste sent to landfill.
Should I buy tools new or second‑hand?
Borrow or buy second‑hand when possible to cut impact and cost. Choose durable, repairable brands like Fiskars or Haws, and avoid disposable tools. A well‑made spade, hand fork, and pruning shears will last many seasons with proper care.
How should I care for tools to make them last?
After each use, remove dirt, dry tools, oil metal parts lightly, and sharpen blades. Store in a dry shed or garage over winter. Regular maintenance saves money and reduces waste from replacing rusty or broken tools.
What does "dense planting" and smart spacing mean for resilience?
Dense planting fills gaps to shade soil, reduce weeds, and conserve moisture. Use varied heights and layers to create microhabitats for insects and birds. Give plants room to mature—crowding can stress them—so check mature sizes and do a soil test before major amendments.