Imagine stepping onto soft, sun-warmed grass that smells like fresh spring rain. Have you noticed pale patches or thinner growth near the driveway? Many homeowners spot these cues and wonder what to do next.
We’ll walk you through seven real-world cues so you can act with calm confidence. This short guide gives clear information on what each cue means, which basic tools to keep handy — gloves, a broadcast spreader, a hose, and a soil test kit — and the right seasonal timing for U.S. zones.
Simple tests and gentle control steps help your grass recover without fuss. A quick soil test often directs the correct fertilizer choice and saves time. We also share safety tips so you know when to keep kids and pets off treated areas.
Key Takeaways
- You’ll learn to recognize seven clear cues for healthier grass.
- Keep basic tools on hand: gloves, spreader, hose, soil test kit.
- A simple soil test guides the right feeding and control choices.
- Seasonal timing and gentle steps help your landscaping thrive.
- Follow safety basics to protect kids, pets, and plants.
Spot the 7 lawn fertilizer signs in real life
Look closely: everyday textures and colors reveal whether your turf is hungry for nutrients.
Color fade
If blades turn straw-yellow or bronze and feel papery when you rub them, low nitrogen is a likely cause. Rub a blade between your fingers—supple and green means good; brittle and lemony points to feeding time.

Slow growth
Healthy grass often adds close to an inch per week. If clippings are sparse and you mow less, that slow growth is a clear sign to test and act.
Weeds moving in
Dandelions and crabgrass outcompete weak turf. Hand-pull small patches, then plan a light feeding so the grass can control invaders naturally.
Pest pressure
See more chinch bugs or grubs? Part the turf by hand to check roots—spongy, lifted spots mean pests favor weak plants. Treat targeted areas and bolster root health.
Thinning, poor response, and uneven bands
Thin patches with soil peeking through, limp response to heat or foot traffic, and odd dark-light bands usually point to uneven care or coverage. Rake gently, water deep with a screwdriver check, and calibrate spreader to improve evenness.
Quick monitoring tip: Walk your yard weekly, note color and growth by hand, and do a simple test before you use any product. Small checks help you choose the right control and get your grass responding again.
Confirm what your soil needs before you feed
Start with a simple soil check so you feed with facts, not guesses. A quick test tells you about nitrogen, phosphorus, potassium, pH, and how well your ground holds nutrients. That information removes the guesswork and guides smart management.
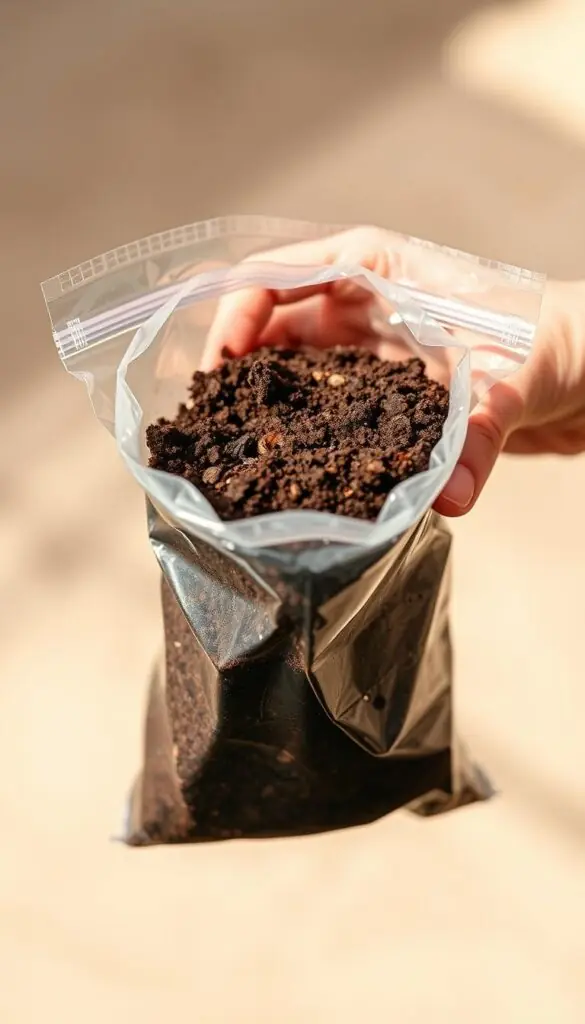
How to take a good sample. Scoop several small cores by hand from across your lawn with a trowel. Mix them in a clean bucket, spread the mix on newspaper, and let it air-dry until crumbly. Mail the dry sample to your state lab or use a reliable home kit.
- Your report lists N, P, and K, plus pH and nutrient-holding capacity. Use that information to pick the right product and rate.
- Choose a complete NPK when multiple nutrients are low. Pick nitrogen-only to quickly green up pale but otherwise healthy grass. Use an N+K blend when color is off and stress tolerance needs a boost.
- Feel the texture: crumbly loam drains well; heavy clay will smear and needs slower, smaller applications and careful watering to move amendments into the root zone.
Timing matters. For cool-season turf in Zones 3–6, test in early spring or early fall and feed light in spring and heavier in fall. For warm-season grass in Zones 7–10, test in spring and feed from late spring into summer as soils warm.
Quick tips: Don’t skip testing, avoid heavy rates, and don’t apply just before a big rain. Keep a notebook with the lab’s name and results so future management is easy and confident.
Apply fertilizer and manage pests safely, simply, and by the book
A careful, step-by-step application helps you avoid waste, runoff, and accidental harm to family or plants. Start by laying out tools: a broadcast spreader, gloves, a hose with a sprinkler head, a soil test kit, and reusable state-specific warning signs.
Calibrate first. In the driveway, pour a measured amount onto a tarp and walk the spreader to match the product rate. Set the dial and practice steady passes.
Apply on a dry, crisp surface. Walk north-south then east-west for even control. Overlap one tire width and avoid treating when rain is expected, during winter dormancy, or in extreme heat.
Water in gently. After application, water until the top 3–4 inches of soil feel damp. This helps product move to roots without puddles or runoff.

Post-application safety and signage. Where required, post visible, rain-resistant signs and keep kids and pets off until the label’s safe-entry time. Minnesota rules require elevated, durable warning signs with the applicator’s name and clear wording.
- Split the rate and crisscross for even coverage.
- Avoid overfeeding nitrogen and skipping a soil test.
- Quick-release shows in days; slow-release may take weeks—pick what fits your schedule and pest management plan.
Conclusion
A five-minute stroll with a cup of coffee reveals what your grass needs next.
Note color, growth, and any odd patches. Jot quick observations and plan a soil test before you feed.
Feed in season and avoid extreme conditions like deep winter or hot, dry spells. Calibrate your spreader or apply by hand for even coverage.
Keep safety simple: follow labels, post visible signs when using a pesticide, and keep kids and pets away until the product allows re-entry.
Blend gentle pest management with thoughtful feeding and watering. With light monitoring, clear notes, and a steady routine, your turf will show steady response and your landscaping will feel calm and welcoming.
FAQ
What are the most visible signs my grass needs feeding?
Look for yellowing or bronzed blades that lack that spring-green pop, slow growth where clippings are shorter than usual, and thinning or bare patches where soil shows through. Those visual cues usually mean your turf is short on nutrients or struggling with root health.
How can I tell if weeds mean a nutrient issue?
If dandelions, crabgrass, or chickweed are moving in and outcompeting your turf, it often signals thin, undernourished grass. Weeds thrive in stressed or low-fertility areas, so patchy weed pressure is a good reason to test soil and consider a targeted feed plus cultural care.
Could pests be causing the decline I see?
Yes. Increased chinch bugs, grubs, or sod webworms indicate pest pressure that worsens when plants lack strong roots from poor nutrition. Inspect roots and thatch, and treat pests based on identification — sometimes improving soil health reduces pest problems over time.
How do I confirm what nutrients my soil actually needs?
Do a soil test that measures nitrogen, phosphorus, potassium, and pH. Many extension offices or commercial labs provide clear reports and recommendations. Testing prevents guesswork and helps you choose the right NPK balance or a nitrogen-only option when appropriate.
When should I test and feed for best seasonal results in the U.S.?
For cool-season grasses, test in early fall and fertilize in fall and late spring. Warm-season turf benefits from late spring testing and feeding through summer active growth. Timing varies by region, so follow local extension guidance for precise windows.
How do I apply product safely and evenly?
Calibrate your broadcast or drop spreader to the product’s label rate, apply on a dry turf surface, and then water lightly to move granules into the soil. Walk at a steady pace, overlap slightly to avoid stripes, and clean equipment after use.
When should I avoid applying fertilizer or pesticide?
Don’t apply right before heavy rain, during winter dormancy, or in extreme heat. Avoid treating stressed turf until it recovers. These precautions protect plant health and reduce runoff or ineffective uptake.
What safety steps should I take after applying treatments?
Post warning signs if local rules require them, keep children and pets off treated areas for the time stated on the product label, store materials in original containers, and wear gloves when handling fertilizers or pesticides. Rinse equipment and wash hands after use.
Are there rules for placement and wording of post-application signs?
Yes. Many states and municipalities require rain-resistant, visible signs with specific wording and minimum height or placement distances. Check your state pesticide regulation or local extension for exact requirements and use reusable, compliant signs when possible.
What tools and materials make the job easier and more accurate?
A calibrated broadcast spreader, a reliable soil test kit or lab service, sturdy gloves, a moisture meter, and reusable, state-specific signage all help. These tools improve coverage, safety, and clarity about what was applied and when.
What common mistakes should I avoid when feeding and controlling pests?
Don’t overfeed nitrogen, skip soil testing, or apply unevenly. Avoid treating without identifying pests first or using products not labeled for your turf type. Following label directions and testing first keeps your lawn healthy and compliant with regulations.