Imagine the smell of fresh earth after a rain and the soft shine of river rock along a gentle swale. Have you noticed puddles that linger more than a day and wonder what's happening to your outdoor space?
You can learn calm, step-by-step guidance—like a helpful neighbor—so you spot problems after a storm and choose simple repairs. We start with quick wins: cleaning gutters and extending downspouts, then move to bigger builds like a French drain or a rain garden.
Expect clear tool lists (string level, trench shovel, aerator) and easy materials: composted topsoil, pea gravel, geotextile fabric, and perforated pipe. You’ll map how water travels across your landscape and plan gentle routes that guide it away without fighting nature.
By the end, your small weekend project will cut standing water, help your garden thrive, and leave your outdoor space feeling lush and livable.
Key Takeaways
- Start with quick wins: clear gutters, extend downspouts, and check low spots.
- Map water flow using a string or line level before digging.
- Use simple tools and local materials for affordable, attractive results.
- Consider aeration, mounding low spots, or a French drain for persistent pooling.
- Plan seasonally: inspect after rain and schedule aeration or seeding at the right time.
- Call 811 before you dig and avoid sending water toward foundations.
Spot the Problem: How to Diagnose Drainage Issues After Rain
Step outside after a storm and follow the wet paths; they map how water moves across your landscape.
Walk the yard the morning after rain while the ground still gleams. Look for standing water that hangs around more than a day, soggy patches, or grass that turns pale.
Press your boot heel into the soil. If it squishes and sends up a sour scent, that spot is likely waterlogged and compacted. Muddy footprints and the earthy smell after a shower are useful clues.
Simple scouting tools
- Use a hose test on a dry day to mimic heavy rain and watch where water flows.
- Stretch a string level or lay a 2x4 with a line level to read slopes and surface flow.
- Flag trouble areas with bright markers so you can map repeat problems by sight.
What to note and when
Check hard surfaces for sheet flow that dumps into lawns. Note repeating wet zones near shrubs, fences, or foundations—those patterns guide whether to add topsoil, aerate, or install a small drain.
Record soil type at each bad spot. Heavy clay or silty ground often needs composted topsoil or aeration to encourage faster drying.
Safety First and Prep: Call 811, Plan Your Route, Protect Your Foundation
Before you lift a shovel, take a moment to mark safety steps and sketch a simple plan.
Start by calling 811 at least a few days before you dig so utility crews can mark gas, electric, cable, and water lines on your property. This quick call protects your household and neighbors, and keeps your project calm and legal.
Call before you dig: marking utilities and safe trenching basics
- Record marks: Photograph painted flags and note them on a paper sketch.
- Plan your trench route to avoid large roots, fences, and lines; keep trenches narrow but safe.
- Never enter deep or unstable trenches; work with a partner and use flags every 10–15 feet on slopes.

Mapping flow paths away from the house, patios, and neighbors
Circle problem areas on your sketch, then draw arrows that guide water away home toward legal low spots. Keep flow off patios and driveways by using gentle curves that match your layout.
If you plan an underground system like a french drain, pick a permitted outlet such as a pop-up emitter or an approved tie-in. For heavy runoff, consider a professional contractor to size pipes and verify capacity.
| Task | Why it matters | Quick tip |
|---|---|---|
| Call 811 | Marks buried utilities to prevent strikes | Do this several days ahead; photograph marks |
| Sketch routes | Visual plan keeps water routed away from your house | Circle problem areas, draw arrows to low points |
| Trench safety | Prevents collapse and protects workers | Flag every 10–15 ft on slopes; never dig alone |
Quick Wins for a Fast Yard Drainage Fix
A handful of fast tasks can stop puddles from lingering and make your outdoor space drier by next weekend. These are simple, low-cost solutions that give instant payoff and protect your foundation.
Unclog gutters and extend downspouts to dry out wet spots
Clear leaves and debris until you hear a smooth drip and see a steady stream of water. Rinse with a hose so there’s no splashing down the wall or pooling at corners.
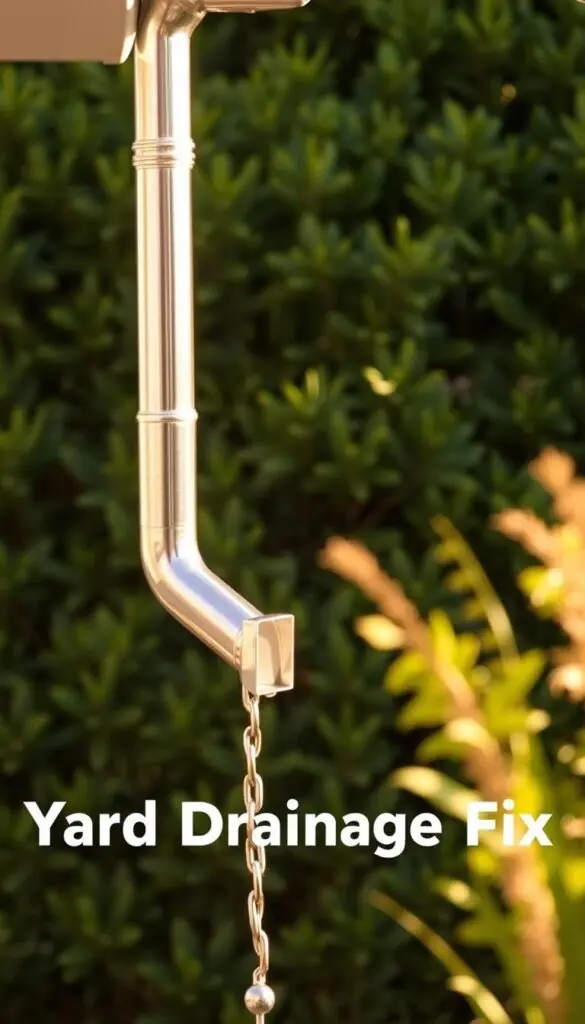
Snap on a flexible downspout extender or use longer downspouts to carry flow away. Bury extenders shallowly to hide them and reduce trip hazards. Add a splash block under each outlet to curb erosion near the foundation.
Loosen compacted mulch and top off low spots with composted topsoil
Rake crusted mulch until it feels springy and the soft crumble soaks in water instead of running onto paths or lawn.
For shallow depressions, mound a 50/50 blend of compost and topsoil, building a slight crown so the ground settles level after a rain.
- Tools: ladder, hose, rake, hand trowel, seed, straw.
- Tip: Overseed bare turf areas and protect seeds with straw until they germinate.
These quick steps ease compacted soil problems and improve lawn health. Small, steady wins add up—your yard looks neater and your drainage improves without a big project. If water still pools, consider a small drain or extend the outlet again.
Relieve Compacted Soil: Aeration for Healthier, Drier Lawns
Compacted soil squeezes out air and water; aeration gives your grass room to breathe and roots room to grow.
Aeration pulls small cores that look like crumbly plugs. They smell faintly of fresh earth as they break down and feed the soil.
Why it helps: Opening channels lets water soak in instead of skating across the surface. That helps your lawn dry faster after a storm and keeps roots fed.

- Use a core aerator when possible—those plugs decompose and improve soil structure.
- For small yards, a garden fork works: rock it gently to reach 3–4 inches deep.
- Try aerator shoes or a spike tool for spot treatments, but core aeration performs best.
- Time aeration for spring or early fall when the grass is actively growing and the soil is moist.
| Tool | Best for | Tip |
|---|---|---|
| Core aerator | Medium to large lawns | Two passes at right angles for compacted paths |
| Garden fork | Small areas, spot compaction | Rock gently to form 3–4" channels |
| Aerator shoes / spike | Quick spot treatment | Use on moist soil; not a substitute for coring |
| Topdressing with compost | After aeration | Brush thin screened compost into holes and overseed |
Water lightly the day before to soften the ground. After aeration, topdress and overseed bare spots so new grass establishes and sheds water better.
Regrade Gently: Create a Slope That Moves Water Away from Your Home
A small handful of soil and a straight 2x4 will tell you if water will run away or gather near your home. A gentle regrade is calm work that protects your foundation and makes the lawn look tidy.
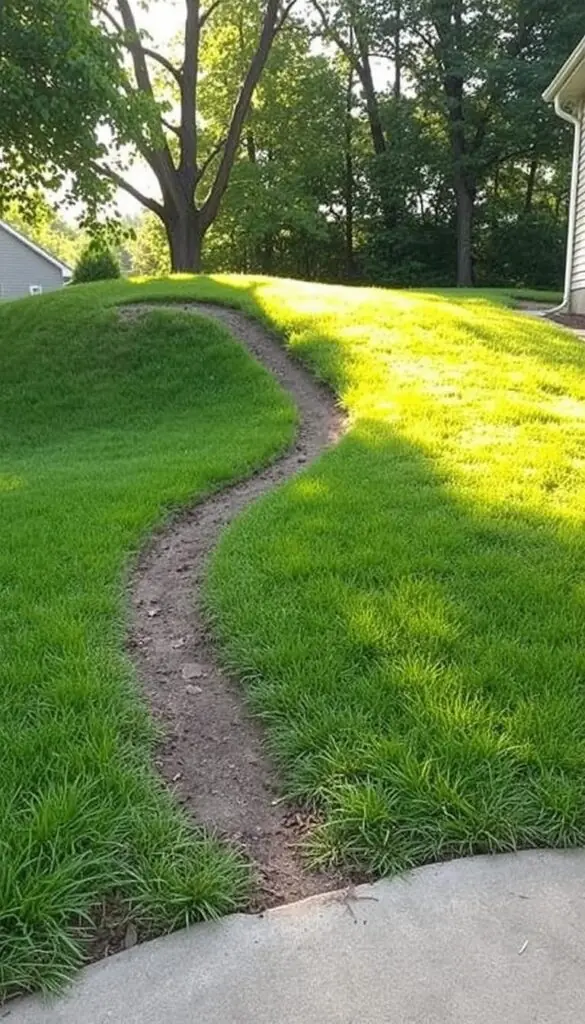
Target slope and where to add clay-type fill vs. topsoil
Aim for about 1 inch of drop per 8–10 feet away from the house. More slope is fine if it blends with your landscape.
Place clay-type fill closest to the foundation to encourage shedding, then cap it with 2–3 inches of topsoil for planting and a smooth grass finish.
How to read your grade with a line level and a long 2x4
Set a 2x4 on edge, add a line level, and adjust soil until the bubble tips gently away from the foundation. Feel the smooth slide of the board over crumbly fill as you work.
- Feather new soil into existing ground—avoid lips that trap water.
- Keep mulch and soil at least 6 inches below siding to protect the house.
- Compact lightly with your feet or a hand tamper, then reseed with matching grass.
"After the next rain, watch the water ribbon away home—small tweaks often finish the job."
Build a French Drain the Smart Way
A well-built French drain quietly redirects water where you want it, using gravity and a simple channel of stone and pipe.
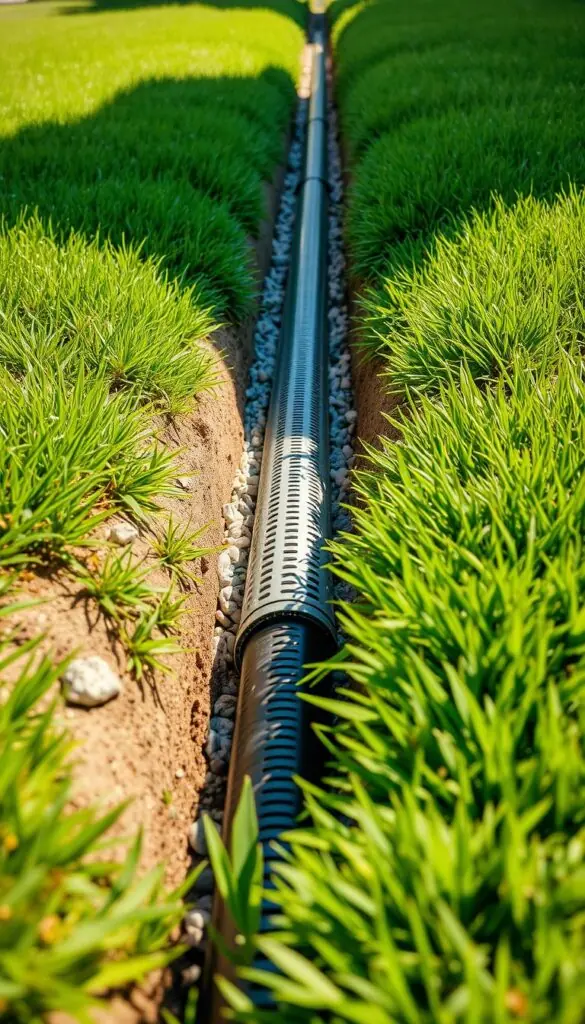
Layout, depth, and pitch: Map from the wet zone to a safe outlet and keep a steady pitch of about 1 inch per 10 feet so gravity does the work.
Trench, fabric, gravel, pipe, and backfill
Call 811, then cut a clean trench up to 2 feet deep and just wide enough for fabric, pipe, and gravel.
Line the trench with geotextile fabric. Leave extra so you can fold it back over the top. The clean line of fabric keeps soil from clogging the channel.
Add a bedding layer of pea gravel, set a perforated pipe with holes facing down (unless the maker says otherwise), and confirm slope with a line level.
Backfill around the pipe with more pea gravel to within a few inches of grade, fold the fabric over, then cover with soil or river rock.
Where to send the water
Keep the inlet higher than the outlet and use gentle curves so the channel looks natural in your yard. Send flow to a dry well, a pop-up emitter, or another approved outlet—never to a neighbor or a sidewalk.
- Tools: trench shovel, line level, tape measure, gloves, and a wheelbarrow.
- Materials: geotextile fabric, pea gravel, perforated pipe, coarse backfill for persistently wet ground.
Test it: Run a hose at the high end or watch during a light rain. You should hear the soft clink of gravel and a faint gurgle at the outlet as the drain moves water away.
"A steady slope and clean stone make a small system that works for years."
If digging deep or sizing for heavy runoff makes you uneasy, a landscape company can design and install the drain to protect your home and ground.
Guide Water, Don’t Fight It: Dry Creek Beds and Swales That Blend In
Let the landscape guide water with simple channels that feel like a natural stream. These small moves add beauty while moving runoff where it belongs. Choose a gentle swale for slow movement or a stone-filled bed when you need quick, clear flow.
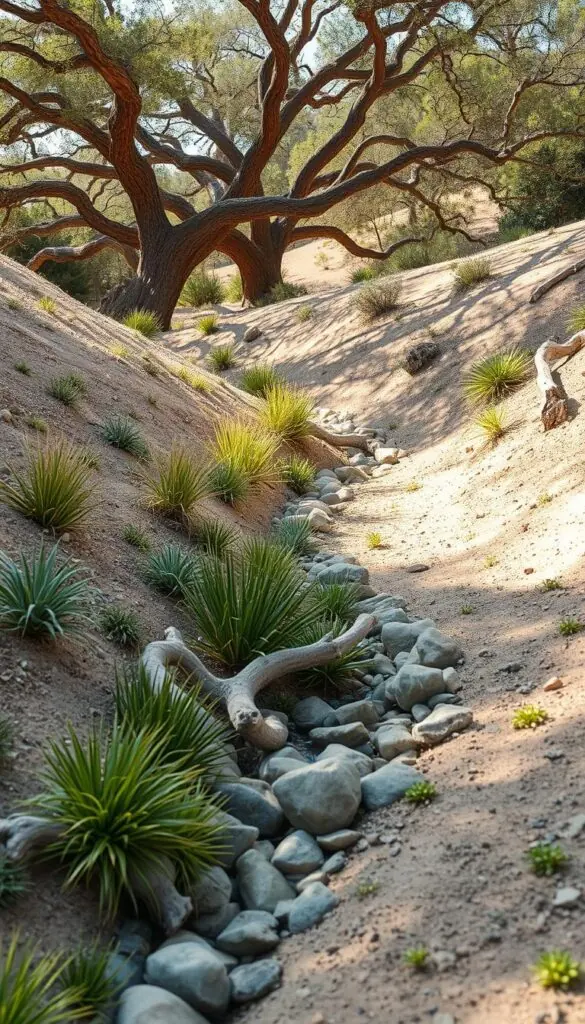
When to choose a swale vs. a dry creek bed
Pick a swale when you want a shallow, vegetated channel that slows water through turf or meadow. It holds and soaks rather than hurrying water away.
Choose a dry creek bed when runoff is fast or concentrated. A shallow trench lined with mixed stone moves water quickly and looks natural in a garden.
Stone sizes, curves, and planting edges for natural flow
Curve your channel softly so water slows and follows a pleasing path. Use mixed river rock—fist-sized stones with smaller pebbles—to lock material together. Add a few larger anchor stones for a creek-like feel.
- Keep the bed shallow with firm edges and a hidden fabric underlayer to stop soil from washing into the rock.
- Plant sedges and low shrubs along the margins, not in the channel, to create a lush ribbon of green.
- Clear leaves and silt each season and check culverts so runoff doesn’t jump the banks.
"In dry spells the stones look like a sunlit arroyo; in storms they quietly carry water where it belongs."
Plant Solutions: Build a Rain Garden That Drinks Up Stormwater
A rain garden turns a soggy hollow into a vibrant basin that drinks stormwater and feeds pollinators.

Site and shape
Pick a low area that already gathers water but stay at least 10 feet from buildings. Aim for a level base so water spreads evenly. For small gardens dig 12–18 inches; larger inflows call for 2–3 feet.
Build a low berm on the downhill side and carve a shallow overflow notch that leads to lawn or another safe outlet. Amend the topsoil with compost but keep the basin able to drain within 24–48 hours.
Plant palette
Use a layered mix for texture and wildlife. Sedges (Carex spp.) shimmer after rain. Bee balm draws humming bees. Cardinal flower and Lobelia offer scarlet pops. Add a river birch for dappled shade.
Space plugs 12–18 inches apart so roots establish without crowding. Mulch thinly with shredded hardwood to hold soil but not float away.
Timing and first-year care
Plant in early fall in hot climates, or spring in colder zones. Water weekly the first season unless natural rainwater keeps soil moist. Edge with stone or a tight mowing strip so grass stays out of the basin.
"Expect butterflies, hummingbirds, and a garden that looks lively, not soggy."
Gutters, Downspouts, and Catch Basins: Control Roof Runoff
A gentle roof can send a surprising amount of water to one spot—let’s tame that flow before it becomes a problem.
Start by keeping gutters clean each spring and fall. Clogged gutters overflow and can send surface water toward your foundation or lawn. Run a hose to confirm water shoots freely through the downspout and doesn't sheet off the eave.
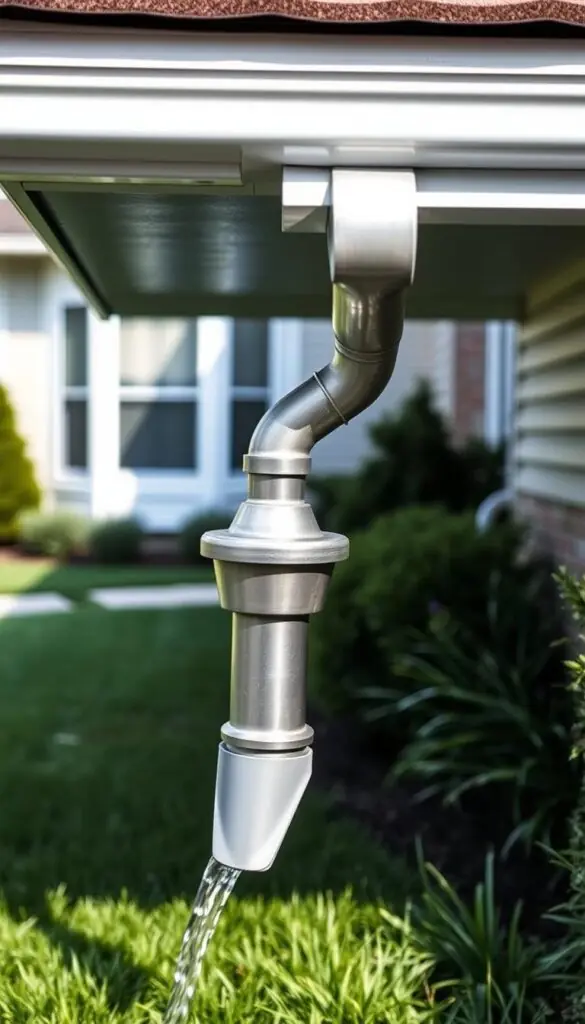
Downspout extensions, splash blocks, and rain barrels
Add a 6–10 foot downspout extension to move flow well into the yard. Bury it shallowly for a neat look and winter protection.
Place a splash block or a pad of river rock at the outlet to stop erosion and muddy corners on the lawn. If one downspout ends in a bed, convert the outlet to a rock splash zone so mulch stays put.
Install a rain barrel at a convenient downspout to capture rainwater for your garden. Use a screened lid and an overflow hose routed to turf. You’ll hear the hollow thump as the barrel fills and see the clear run continue past your house.
Install a catch basin to intercept flow at soggy corners
Set a basin where water pools repeatedly. Trench a pipe from the basin to a pop-up emitter or other approved outlet. Even when the ground is saturated, the basin collects and channels surface flow into the line.
- Keep pipe runs sloped so water keeps moving during steady rain.
- Use gutter guards in leaf-heavy areas but still rinse gutters seasonally.
- After storms, reseat any splash blocks that shifted to prevent new surface puddles.
"A little attention at the roof saves a lot of headaches below."
Yard Drains and Dry Wells: Hidden Helpers for Persistent Wet Spots
A few discreet inlets and a stone-filled pit can tame persistent wet spots without changing your landscape's look.
Point drains work like floor drains outdoors. You place an inlet where water gathers and route a pipe downslope to a safe outlet. After grass grows back, only a neat grid marks the spot.
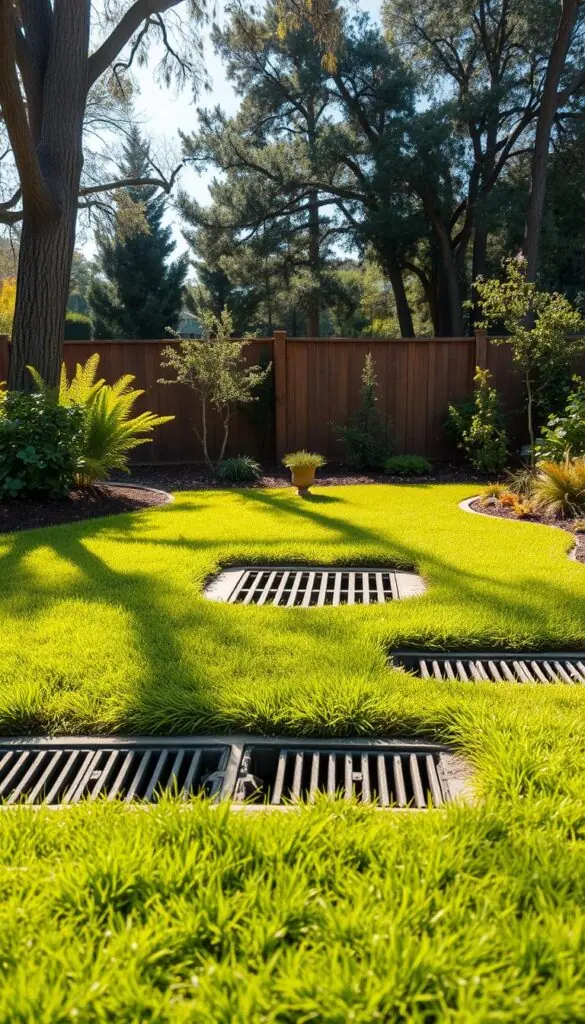
Point drains, pop-up emitters, and tying into other systems
Drop a small point drain at chronic wet spots and run it to a pop-up emitter. You can also tie a downspout or a french drain into a dry well to hold sudden bursts of water.
Dry well basics: excavation, stone fill, and overflow planning
Excavate below frost depth when possible. Line the hole with fabric and fill with clean stone to maximize voids. Add an overflow path to turf or a swale so big storms don’t overwhelm the well.
| Component | Best use | Quick tip |
|---|---|---|
| Point drain | Small, repeated pooling | Set inlet slightly below grade for easy capture |
| Dry well | Temporary storage and soakage | Line with fabric; use clean stone; add overflow |
| Pop-up emitter | Safe outlet for stored flow | Gentle slope and few bends to avoid clogging |
Keep notes: Sketch pipe runs and mark hidden parts on your property plan. That friendly map saves time later and keeps these helpers quiet, out of sight, and working for years.
Materials and Tools: Gravel, Fabric, and the Gear That Makes It Easier
A tidy list of gravel, fabric, and the right tools makes any small water project feel manageable.
Choose pea gravel for trenches. It packs around the pipe, drains fast, and looks neat if left exposed. Coarse-grained soil makes a good backfill in persistently wet zones so moisture won’t sit at the surface.
Tools that matter
The narrow blade of a trench shovel slices clean lines and saves your back. A line level and tape measure keep the correct grade without guesswork. Rent a core aerator for large areas; use a garden fork for spot work.
- Lay non-woven geotextile fabric under stone to stop fines from clogging voids.
- Use flexible perforated pipe in curves; choose solid pipe for final outlet runs.
- Stash extra fabric, couplers, and emitters so you don’t run to the store mid-job.
| Material / Tool | Why it helps | Quick tip |
|---|---|---|
| Pea gravel | Packs well, allows fast flow | Buy washed stone in 3/8"–1/2" size |
| Geotextile fabric | Keeps soil out of voids | Overlap seams by 12 inches |
| Trench shovel & level | Clean trench and steady slope | Check pitch often during installation |
"Good tools and clean materials make a small diy system last for years."
Wear gloves and eye protection. Rinse cut pipe and rock before backfilling so water flows freely from day one.
Avoid Common Mistakes and Know When to Hire a Pro
Small choices now save big headaches later.
Watch for red flags that mean a plan needs to change or a pro should step in. Recurring puddles near the basement, musty smells after storms, or visible erosion along beds all signal problems that can threaten your foundation and landscape value.
Quick warning signs to check
- Water flowing toward the house — regrade or redirect so flow runs safely away home and from the foundation.
- Undersized trenches or pipes that overload during storms — these lead to backups and new problems.
- Blocked culverts under driveways or swales — clear them so runoff doesn’t flood your property or the street.
- Gutters and downspouts that gape or disconnect after heavy rain — inspect and reseat promptly.
When to call a drainage contractor
If your lawn floods in normal rain, if water crosses property lines, or if you face steep slopes and long runs, it’s time to consult a pro. Heavy runoff, repeated basement seepage, or complex tie-ins—like combining a french drain, catch basin, and dry well—require design calculations and experience.
| Problem | Impact | When to hire a pro |
|---|---|---|
| Water toward house | Foundation risk, mold, musty smells | Immediate consultation if near basement or crawlspace |
| Undersized pipe/trench | Backups, erosion, repeating repairs | Hire when pipes overflow during routine storms |
| Clogged culvert/swale | Street or property flooding | Clean first; call a contractor if backups recur |
| Complex system tie-in | Improper slope, failed outlets | Plan with a pro for design and permit needs |
Keep a simple maintenance rhythm: seasonal cleanouts, emitter checks, and quick reseeding of bare spots. These small steps protect your house, your landscape, and the value of your property.
"Addressing problems early keeps your project manageable and your home safe."
Conclusion
Take a quiet moment to imagine your garden after rain—sunlit blades, clean channels, and the soft spill into a barrel—and plan one small step to keep it that way.
With a few neighborly moves you can guide water where it belongs. Start small: clear gutters, extend a downspout, fluff mulch. These steps protect your home and make outdoor spaces more welcoming.
Build toward bigger solutions that suit your space—a curving stone bed, a tidy rain garden, or a hidden line that simply works. Trust simple tools and good materials: a level, a 2x4, pea gravel, and fabric go far.
Watch the weather, refine as you go, and enjoy sunlit grasses and brighter, greener gardens. You’ve got this—peaceful, practical solutions that make your place feel calm and cared for, storm or shine.
FAQ
How do I tell if I have a drainage problem after heavy rain?
Look for standing water, soggy soil, patches of dead or yellowing grass, and musty smells near the foundation. Check low spots, around downspouts, and along slopes. A simple hose test can show where runoff pools, and a string level or long 2x4 helps reveal poor grade. These signs point to poor runoff, compacted soil, or blocked channels that let water sit instead of moving away from your home.
What should I do before digging any trenches or installing a drain?
Call 811 to have utilities marked first. Plan the route so water moves away from your house, patios, and neighboring properties. Protect buried roots and existing landscaping, and choose a safe trench depth that keeps pipe pitch consistent. Marking callouts and mapping flow paths avoids damaged lines and costly repairs.
Can I fix small wet spots myself with quick wins?
Yes. Start by unclogging gutters and extending downspouts or adding splash blocks to redirect roof runoff. Loosen compacted mulch or soil, add composted topsoil to low areas, and aerate the lawn to improve infiltration. These simple steps often dry out soggy corners and reduce standing water.
How does aeration help with waterlogged turf?
Aeration breaks up compacted soil so roots breathe and water soaks in instead of running off. Using a spike or core aerator improves infiltration, encourages healthy grass growth, and reduces surface pooling. Combine aeration with topdressing to fill holes and improve soil structure.
What grade or slope should I aim for to move water away from my foundation?
Aim for at least a 2% slope away from the house — roughly a 1/4 inch drop per foot for the first 10 feet. Use a line level and a long 2x4 or string to measure grade. Where soil is heavy or clay-like, add appropriate fill and topsoil to shape the slope so water naturally flows downhill.
When is a French drain the right solution?
Choose a French drain when you need to collect subsurface water or persistent surface runoff in a linear path. It works well behind foundations, along patios, or across a soggy swale. Proper layout, trench depth, pipe pitch, fabric, and pea gravel backfill get gravity working for you and move water to a safe outlet.
Where should a French drain outlet to?
Direct water to an approved outlet: a dry well, pop-up emitter, storm sewer (with permission), or a properly graded discharge area. The outlet must be downhill, away from foundations and neighboring properties, and have overflow planning in case of heavy storms.
How do dry creek beds and swales differ, and when should I use them?
Use a swale for gentle, grassy channels that move large volumes of runoff across the lawn. A dry creek bed uses stone and curves to slow flow and look natural while directing water. Choose based on flow volume, landscape style, and planting needs — both guide water rather than block it.
Can plants help manage stormwater instead of hard pipes?
Absolutely. Rain gardens and thoughtful plantings soak up stormwater, slow runoff, and improve soil health. Pick native, moisture-tolerant species like sedges, bee balm, cardinal flower, and river birch for wet zones. Design with the right depth, a berm for containment, and an overflow route.
How do I control roof runoff from gutters and downspouts?
Keep gutters clear and attach downspout extensions or splash blocks to move water at least several feet from the foundation. Consider rain barrels for reuse, and install catch basins at chronic soggy corners to intercept flow before it soaks the soil near your home.
What are yard drains and dry wells used for?
Yard drains (point drains) and dry wells collect concentrated water and store or disperse it into the surrounding soil. Point drains tie into piped systems or pop-up emitters; dry wells are deeper, stone-filled chambers that hold water and let it percolate slowly. Both help persistent wet spots when surface fixes aren’t enough.
What materials and tools will I need for a typical drainage project?
Common items include perforated pipe, pea gravel or coarse backfill, geotextile fabric, trench shovels, a trenching machine for larger jobs, levels, and an aerator. Pea gravel provides good drainage; coarse backfill adds stability. Fabric prevents clogging from soil migration.
What are the most common DIY mistakes to avoid?
Avoid sloping soil toward the house, undersizing trenches or pipes, skipping utility locates, and neglecting overflow planning. Blocking natural channels or directing water onto a neighbor’s property creates bigger problems. If runoff volumes are large or grading is complex, hire a drainage contractor.
When should I call a professional drainage contractor?
Call a pro if you notice water flowing toward the foundation, recurring basement seepage, blocked culverts, or large-scale runoff after storms. A contractor can design proper pitch, install dry wells or larger subsurface systems, and handle permits or outlet connections.