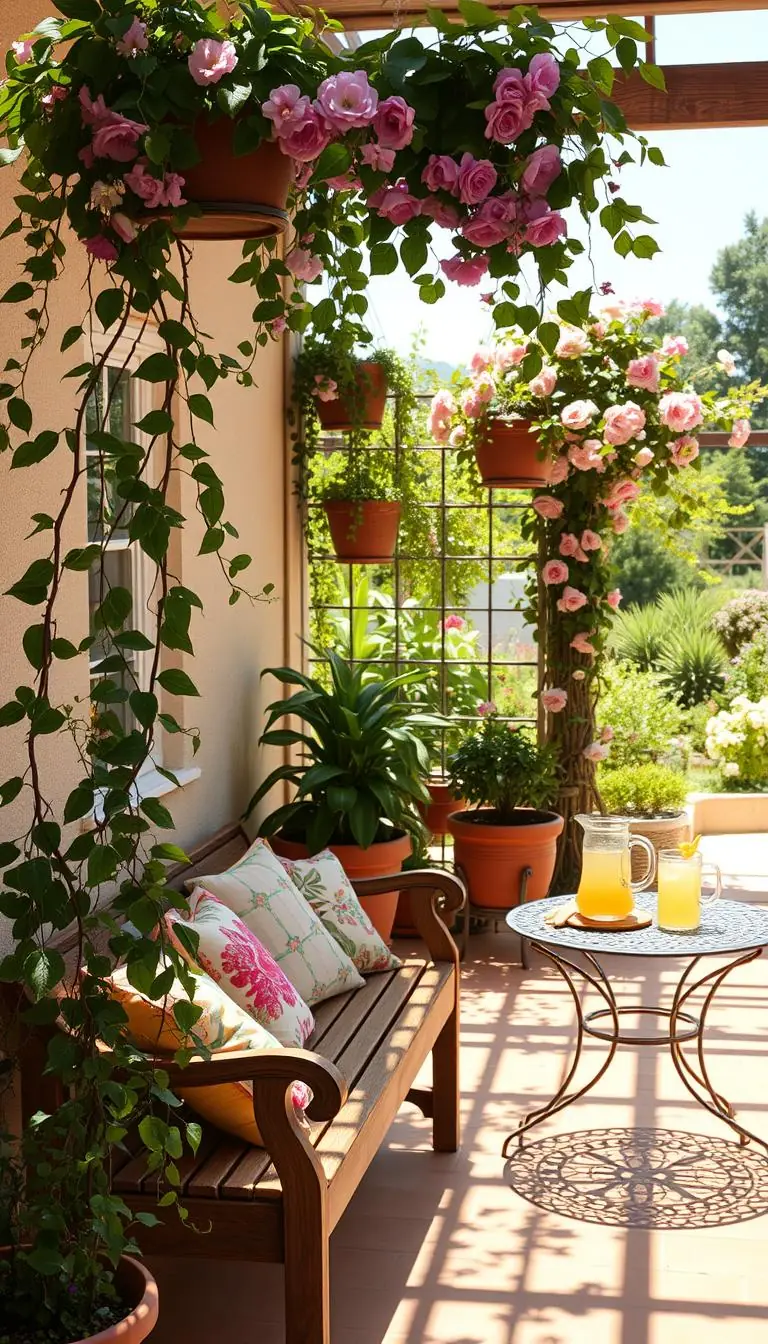
Imagine dappled light across your patio and the faint scent of jasmine on a summer evening. Have you noticed a corner of your backyard that feels unused and wants to become something calm and useful?
A pergola is an outdoor structure of columns with an open roofing grid that frames space without closing the sky. It helps define living, dining, or kitchen zones and makes your patio feel like an intentional part of your home.
You’ll get calm, practical guidance to picture simple designs, pick materials, and plan small upgrades like lights or screens. Many DIY kits run near $1,000–$2,000 in materials, while custom builds can match your home’s finishes for a cohesive style.
Think about freestanding versus attached, vine-covered posts for living shade, and a seasonal checklist to keep wood looking fresh. Start with one small change that excites you and let the space grow into a daily oasis.
Key Takeaways
- Picture how a framed patio can carve out purposeful outdoor living.
- Decide freestanding or attached based on how you move through your yard.
- Plan small electrical upgrades now to avoid rework later.
- Use vines, curtains, or lattice for privacy and gentle shade.
- Keep maintenance simple with a spring wash and fall sealing for wood.
- Begin with one or two small moves to build confidence and momentum.
What is a pergola and how it elevates outdoor living
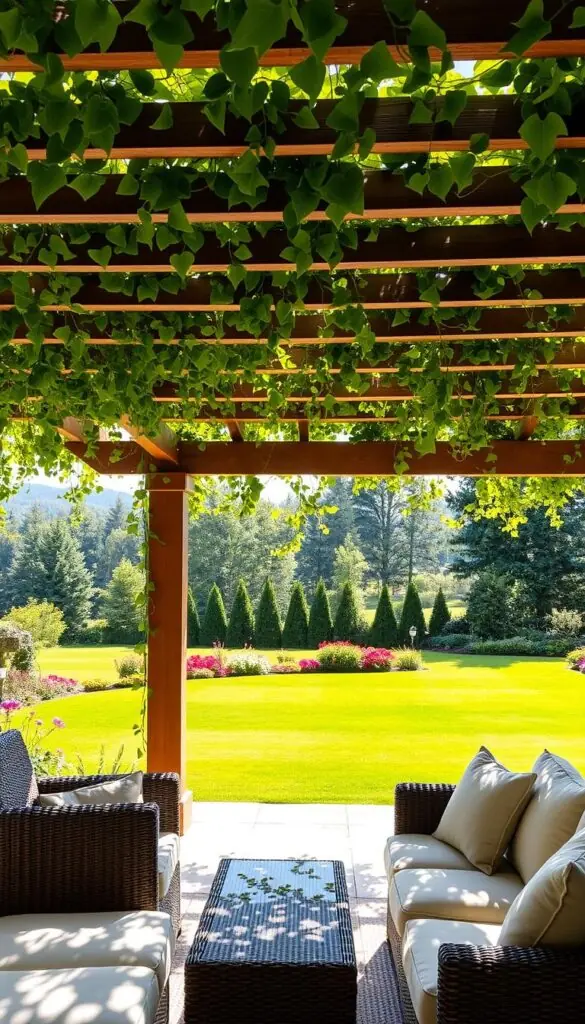
Think of a slim, open-roof frame that turns an unused corner of your backyard into a purpose-built room. This pergola is a light architectural structure of posts and beams that marks a spot on your patio or in the garden while keeping the sky visible.
The open roof of beams and rafters offers partial shade, softens glare, and invites breezes. You can attach one to your house for an easy indoor-outdoor flow, or set a freestanding unit in the yard for a view-focused retreat.
Where it works best
- Dining: place near the grill or kitchen door and allow about 3 feet for chairs to slide.
- Lounge: choose a spot with morning sun for coffee or tempered afternoon shade for naps.
- Pathways & poolside: use a frame to guide movement or create a towel-and-drink perch.
For routine use, think of how you move through your home and yard. Choose attached for easy power and fans, or freestanding for flexible views and a quiet garden nook. Small planning steps make the space feel effortless and ready for daily life with friends and family.
Pergola ideas
Turn a bare corner of your yard into a small, framed room that invites long afternoons and slow dinners.
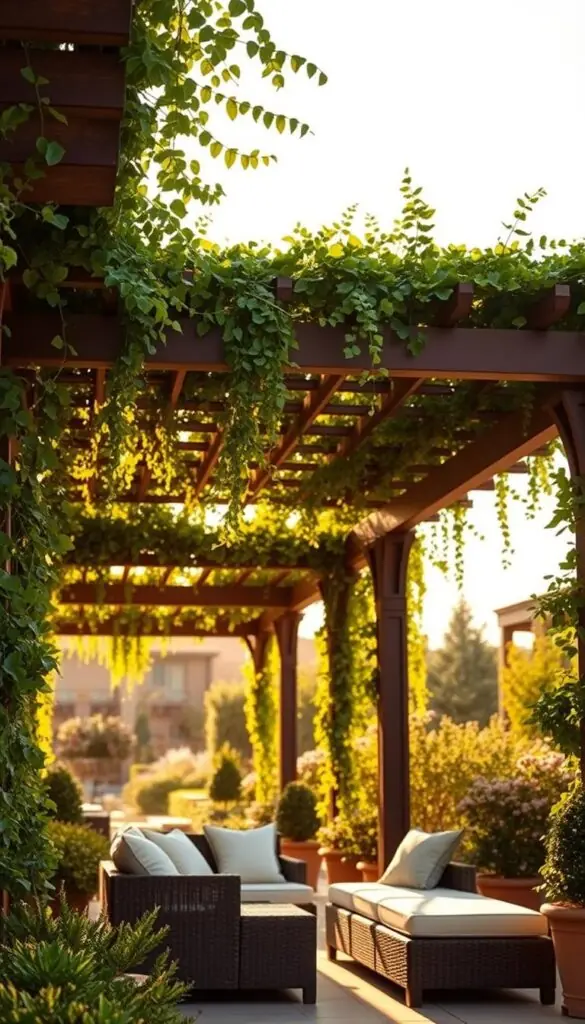
Start with one clear purpose for the spot—dining, lounging, or a work-from-home outdoor living room—and build from there.
Kits and custom builds both work. DIY kits often run about $1,000–$2,000 in materials and give you quick results. A custom structure costs more but matches your home and lasts longer.
Keep these simple options in mind:
- Compact patio frame for a bistro table that changes a corner into a cozy living area.
- Freestanding build on a paver pad to create a calm backyard room away from the house.
- Match paint or stain to your trim, or pick a contrast for a bolder style statement.
- Add a narrow outdoor kitchen run—grill, shelf, and storage—so cooking and conversation flow.
- Place a slim structure by the pool as a breezy landing for towels and cold drinks.
- Hang woven pendants or Edison string lights; run a switch for easy evening use.
These practical touches help you choose a design that fits your routine, budget, and home without overcomplicating the build.
Attached pergolas that extend your home’s architecture
Tying a simple roof frame to your house reshapes how your patio feels and functions. An attached unit uses the same materials and hues as your home to make the new space read as part of the original architecture.
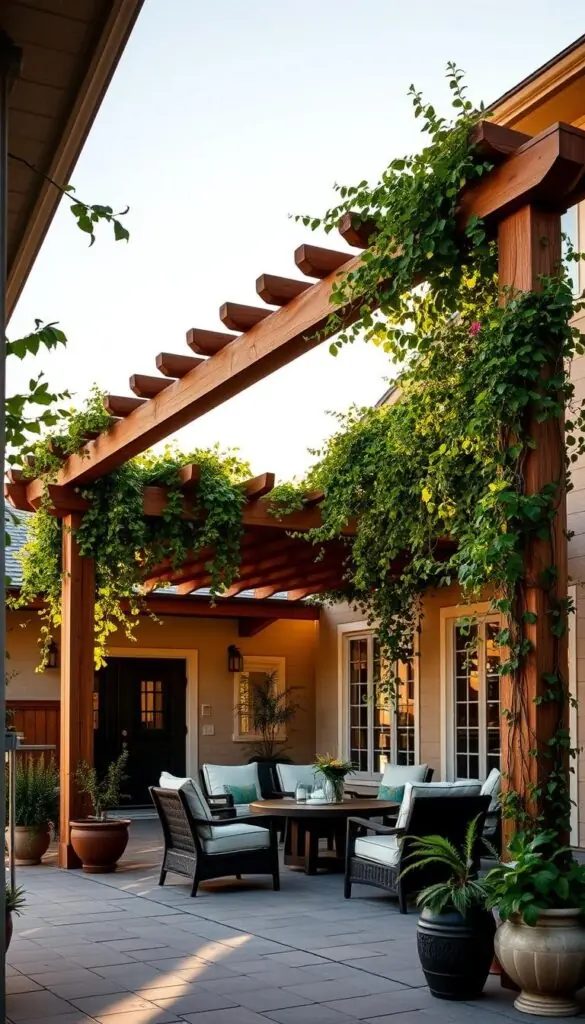
Match finishes and colors for a seamless look
Try paint or stain samples next to your siding before you decide. Echo one trim or deck tone to create a cohesive finish that feels intentional.
Small details matter: matching post color or a single trim line ties the design to the house and softens transitions between roof, wall, and yard.
Tools and hardware to anchor into the house safely
Use structural ledger fasteners rated for exterior loads and anchor into framing—not sheathing—so the connection is rock-steady.
- Have an impact driver, level, and the right drill bits for your wall type.
- Flash the ledger under the weather barrier with flashing tape or a metal strip to keep moisture out.
- Pick corrosion-resistant metal hardware and run conduit before finishing for lights without visible cords.
Space roof slats closer—about 6–8 inches—if your patio gets strong afternoon sun. Choose straight-grain wood for clean lines and seal all end cuts. Work on a dry, mild day so adhesives and flashing seat properly.
Freestanding structures that define a backyard room
A simple freestanding structure can carve out a clear seating area without touching your house.
Stand where you want your backyard room and look toward the best view. The open side should face that view so your seating feels connected to the landscape.
Placement basics: place a freestanding pergola on an 8x8 pad or larger. A 10x10 footprint fits a loveseat, two chairs, and a small table with room to breathe.
Mark corners with stakes and string to test furniture clearances and walking paths. Keep a 36-inch walkway behind chairs so guests move easily with trays or tools.
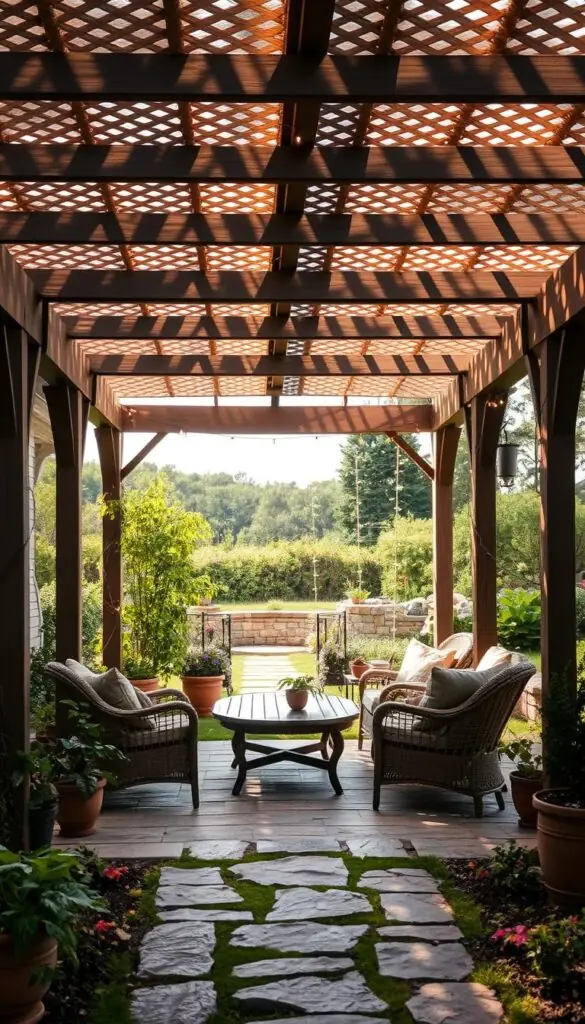
Quick style and surface guide
| Footprint | Style | Underfoot | Use |
|---|---|---|---|
| 8x8 | Straight beams (modern) | Stone pavers | Cozy seating for two |
| 10x10 | Arched beams (classic) | Wood deck | Loveseat + chairs |
| 12x12+ | Lattice railings, built-in bench | Mixed paver & gravel | Dining and lounge area |
Train a vine up one post to form a soft green column. Add a small storage trunk for throws and lanterns so evenings stretch on without trips inside.
Poolside shade and style
Place your poolside frame where you can hear water and feel the breeze, but keep cushions out of the splash.
Set it just beyond splash range so fabrics dry fast while you stay close to the water. Two loungers and a small table fit well; leave about 24 inches between pieces for easy movement with towels and trays.
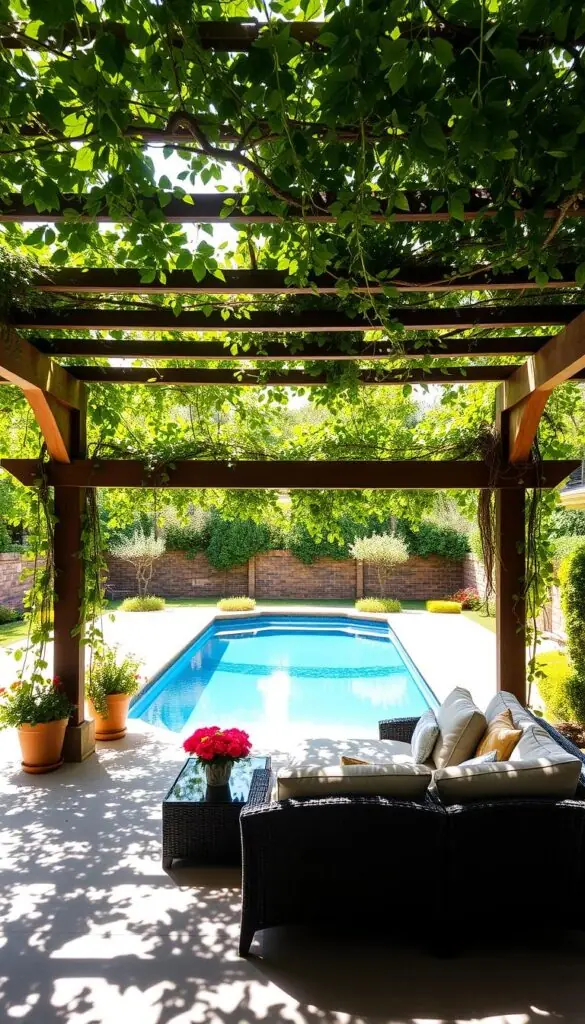
For dependable shade, tighten roof-board spacing and add a neutral, UV-stable canopy panel where afternoon sun hits hardest. Mount subtle lights along inner beams so the pool reflects a soft evening glow without glare.
Choose quick-dry cushions and fade-resistant fabrics; pale colors stay cooler to the touch. Hang light outdoor curtains for privacy and texture, and tie them back to let breezes pass.
"Keep a low bin for sunscreen, rolled towels, and a misting spray—small habits make your poolside oasis feel effortless."
- Plant jasmine nearby for a gentle, vacation-like scent.
- Use weighted hems and outdoor clips in windy yards to keep curtains and cords secure.
- Schedule a mild-morning deep clean: hose off pollen and sweep boards before the heat rises.
| Feature | Recommendation | Why it helps |
|---|---|---|
| Placement | Just beyond splash range | Keeps cushions dry; keeps you close to the pool |
| Shade | Tighter roof boards + UV canopy | More protection in strong afternoon sun |
| Fabrics | Quick-dry, fade-resistant, pale tones | Comfort and longevity in sun and splashes |
Outdoor kitchen under a pergola roof
Designing a cook-and-serve spot outdoors is about clear work zones, safe power, and weather-ready finishes. This short plan shows practical steps so you can cook, chat, and enjoy the yard with ease.
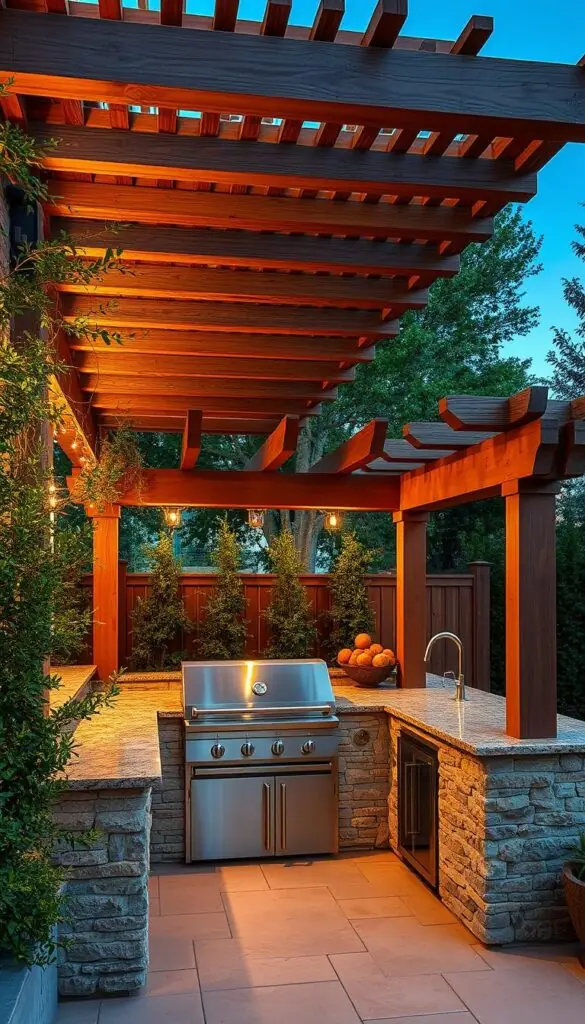
Ventilation, power, and lighting planning
Place the grill at the pergola edge so smoke and heat clear the roof. Keep at least 36 inches from posts and overhead rafters.
Run a dedicated GFCI-protected circuit for appliances and lights. Add covered outlets at counter height for blenders and small tools.
Light the prep zone with damp-rated pendants or integrated LEDs. Use dimmers so task lighting shifts to warm dining light in the evening.
Weather-hardy materials for grills, counters, and cabinets
Choose stainless steel for grills and fasteners. Pick porcelain or stone-look slabs for counters; they shrug off spills and heat.
Use marine-grade cabinets or sealed composite boxes to resist moisture. Seal counter edges and use silicone at splash zones to keep water out.
- Plan prep, cook, and serve zones in a single line with 24-inch landings beside the grill.
- Add two stools or a small seating area so guests can chat while you work.
- Store long tools on a magnetic strip under a beam and keep a fire extinguisher handy.
- If midday heat builds, tighten slat spacing or add a retractable panel above the cook line for extra shade.
Enjoy simple meals outside. A few smart choices on power, lighting, and materials make the space safe and low-maintenance so you can focus on friends, food, and the garden.
Privacy-forward designs with trellis, slats, and curtains
Create a layered plan that blends hard screens, living vines, and soft curtains so your yard feels sheltered but airy.
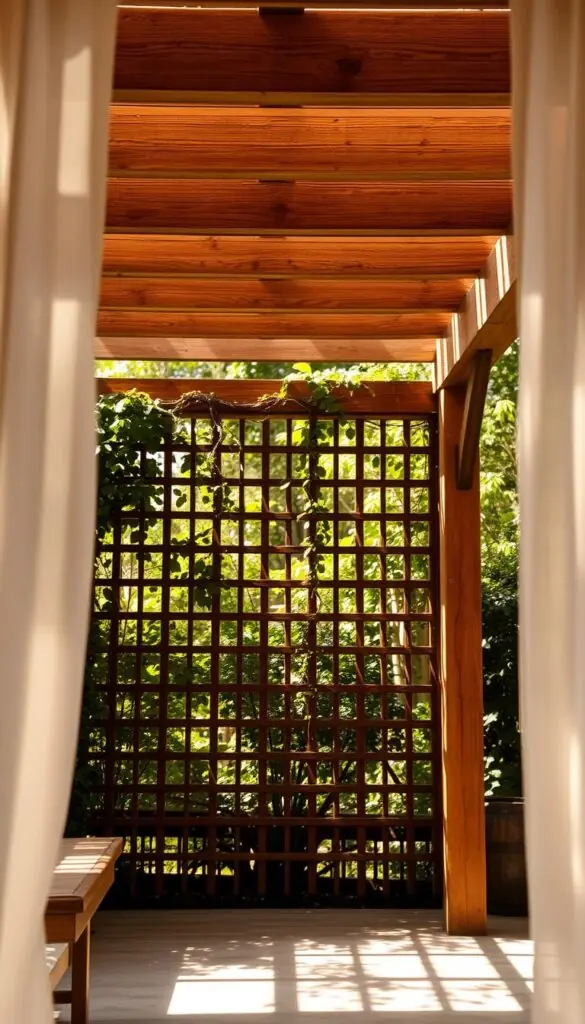
Climbing vines for living walls
Train jasmine or climbing roses up a trellis to form a scented living wall that filters views and cools the air. Boston ivy and morning glory work fast in temperate spots for quick cover.
Guide growth with soft ties and keep vines off gutters and shingles to avoid damage.
Outdoor fabric curtains
Pick fade-resistant outdoor fabric and mount panels on a stainless tension rod or ceiling track so they glide easily.
Rinse salt and pollen from curtains every few weeks to keep color and texture soft on your patio seating.
Lattice and slat panels
Use cedar or composite slats spaced 1–2 inches to block sightlines while keeping breezes and light. Anchor panels tight so they don’t rattle on windy nights.
Layer privacy: fixed lattice on one side and curtains on another gives you control over how the space will feel during day and night.
| Option | Best for | Benefit |
|---|---|---|
| Trellis + vines | Sunny walls | Scent, seasonal blooms, living screen |
| Fabric curtains | Flexible shade | Easy to open, luxe look, stackable |
| Cedar/composite slats | Windy yards | Durable, airflow, soft light |
Add low, warm lights behind slats to let patterns glow after dusk. Small choices in hardware and plants make a big difference in how your pergola structure and space feel.
Lighting that turns evenings into magic
A mix of pendants, string lights, and hidden LEDs makes your outdoor area feel like an extension of the house.
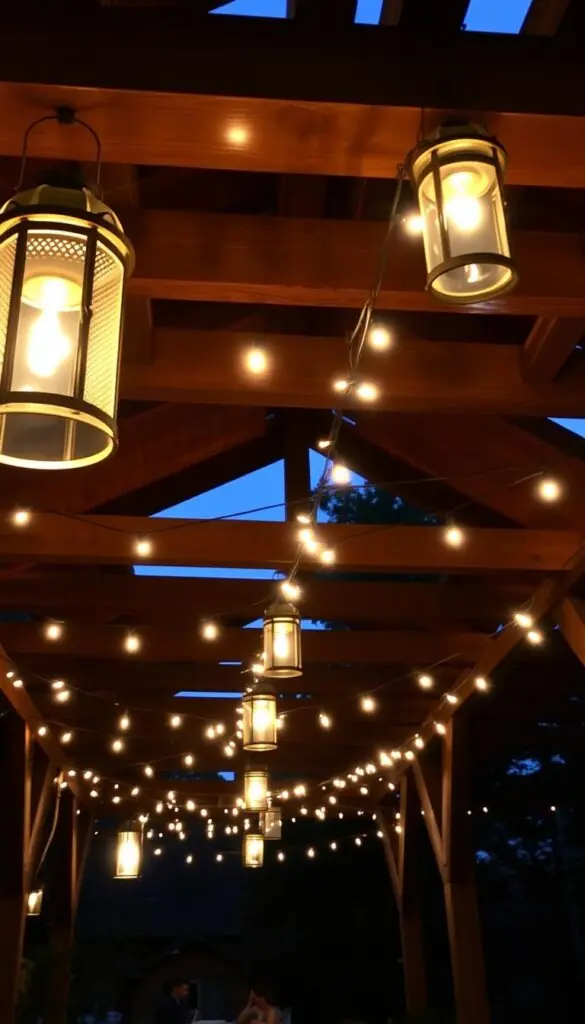
Hang a pendant over a dining table about 30–36 inches above the surface. It gives flattering light for faces and keeps sightlines clear.
Drape string lights along inner beams to create a gentle canopy glow. Use outdoor-rated cords and clips so runs look tidy and stay safe.
Where to use each fixture
- Pendants: over the dining or seating area for focused, warm light.
- String lights: along beams to define the space with soft sparkle.
- Integrated LEDs: under perimeter beams to outline the patio like a living room.
Warm vs. cool color temperature
Choose warm white (2700–3000K) for dinners and conversation. Use 3500–4000K for task areas like a grill station so food prep is clear.
Practical tips: put lights on a dimmer and timer, use GFCI outlets, secure pendants with a safety cable in windy spots, and wipe globes monthly to keep fixtures bright.
Fire pit and fireplace pairings for four-season comfort
A backyard fire brings a gentle gravity to evening gatherings, turning cool nights into cozy conversations.
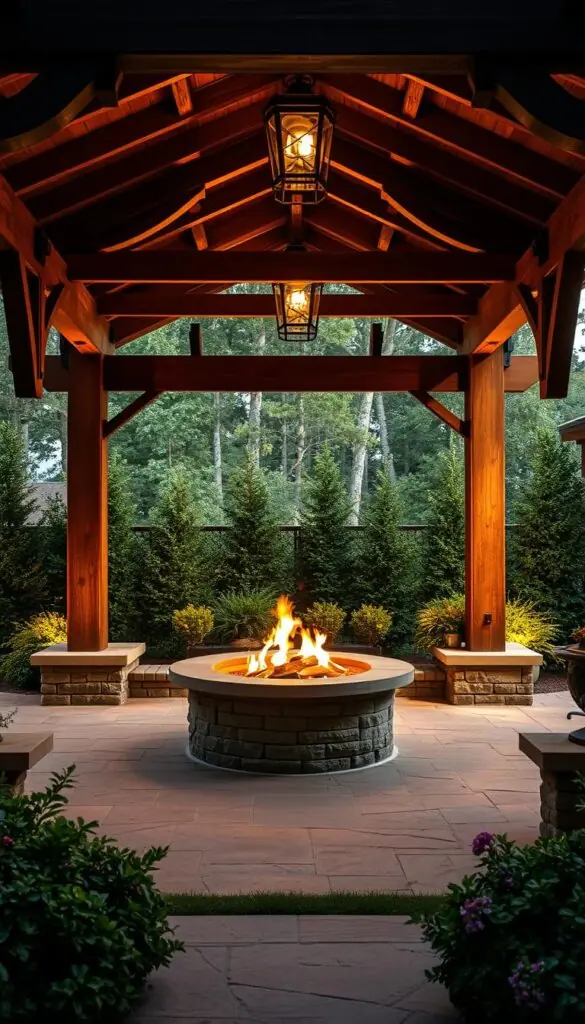
Keep safety first: place open-flame pits at least 10 feet from posts and be mindful of the roof. Sit downwind from smoke so guests stay comfortable.
If you want a covered feel, a gas fire pit works well near a pergola because it’s easier to control. Reserve wood-burning fires for fully open zones with clear vertical space.
Arrange seating in a gentle U around the pit with a clear three-foot walkway behind chairs so people move freely with mugs and blankets.
- Add a low, textured rug rated for outdoor use to warm bare feet and define the hearth area.
- Center the pergola opening toward a fireplace so heat drifts into the living room-style seating zone.
- Store a metal ash bucket, thick gloves, and a small extinguisher nearby; good habits keep your patio neat and safe.
Use wind screens or plant a hedge to calm breezes so warmth lingers on shoulder-season evenings. Add a stone-topped side table for hot cocoa or marshmallow trays.
"Check local codes for open flames, spark arrestors, and required distances before you build."
Materials that shape the look and lifespan
Choose materials that match how you live outdoors—some need gentle fussing, others shrug off weather.
Wood species, staining, and a simple cadence:
Pick cedar for a warm, natural look and built-in rot resistance. Clean gently each spring and plan a late-summer inspection. A fall stain or seal keeps the roof beams and posts protected.
Metal and composite for low maintenance:
Aluminum frames with wood-look finishes give timber warmth with less upkeep. Composite trims handle ground contact and splashback without rotting.
Mixing stone, wood, and metal
Stone plinths at posts add durability and tie the structure to patio pavers. Repeat each material at least twice—stone base and side table, for example—for balance and cohesive style.
| Material | Benefit | Care cadence |
|---|---|---|
| Wood (cedar) | Warm look, natural resistance | Spring wash; fall seal |
| Metal (aluminum) | Low upkeep, mimics wood | Annual check of fasteners |
| Stone | Durable base, ties hardscape | Occasional wash, reseal joints |
Helpful tips: cap post tops, use corrosion-resistant hardware, and check fasteners each spring. These small moves extend lifespan so your backyard space feels like home for years.
Small-space solutions: half-pergolas, banquettes, and slim profiles
When square footage is limited, clever framing and built-in seating let every inch earn its keep.
Try a cantilevered half pergola with two front posts to define a seating area while keeping the rest of your patio open. It reads like a light structure and keeps sightlines to the yard.
Build a slim banquette against the house for tucked dining. Make the bench lift up so cushions and planters hide inside. A narrow 30-inch table and armless chairs fit most small decks.
Privacy and flow: add a partial slat screen on one side to soften neighbors without blocking breezes. Keep a 30-inch traffic path to doors and grills so movement feels easy.
- Use pale wood slats and light cushions to make the area feel airy.
- Mount a single pendant or vertical lights near the top to draw the eye up.
- Add hooks for lanterns and an herb pot; choose glides under furniture for fast rearranging.
These compact approaches help your little outdoor living room work hard and look lovely, every day.
Garden-first pergolas with living shade
Let your garden do the heavy lifting: trained vines can turn a simple frame into cool, scented shade that feels made by the landscape rather than by tools.
Choose climbers that suit your USDA zone and light. For full sun try star jasmine (Zones 8–10), wisteria on strong supports, or disease-resistant climbing roses. In part shade, clematis (Zones 4–9) and honeysuckle bring blooms and scent. Boston ivy works well in temperate spots for fast cooling cover and fall color.
Training vines without damage
Guide stems with soft ties along lattice and posts so the wood and wall stay safe. Keep growth away from the roof edge and gutters; train canes along beams or a side trellis instead. Water at the root, prune lightly after the first flush, and mulch roots for winter protection.
"Stagger bloomers so your outdoor space smells and blooms across the seasons."
Modern minimal to cottage charm: styles for every home
Choose a clear aesthetic path—crisp, modern lines or soft, cottage warmth—and let that choice steer every material and color you pick.
Clean-lined black frames suit modern homes. Dark-stained beams echo window trim and make greenery pop. Use narrow posts and simple fittings so the structure reads like an extension of your architecture.
White coastal classics bring cottage charm. Soft curves, painted posts, and woven textures create a breezy, welcoming outdoor living room feel. Match the frame to trim or fencing to keep the look calm and intentional.
Practical touches that tie a space together
- Repeat one or two finishes from your patio or fence so the new element feels like part of the home.
- Pick plants that fit the look: structured grasses for modern; roses, lavender, and daisies for cottage.
- Use just two or three materials—wood, metal, and a woven accent—to keep the palette simple.
With a clear direction, you’ll find choosing materials and layout feels easy. Let light and landscape lead, then add textiles by season to keep the mood fresh.
Smart, modular, and retractable features
Smart upgrades simplify comfort so your yard reacts to sun, rain, and time of day—without adding fuss.
Motorized louvers on the pergola roof let you tilt slats for sun, shade, or quick rain protection at the touch of a button.
Motorized louvers, solar screens, and rain sensors
Tilted slats control light and airflow so mornings can be bright and afternoons shaded. Add motorized solar screens on the sunny side to cut glare while keeping the view.
A rain sensor closes the roof automatically during pop-up showers so cushions stay dry. These features often pair with RGBW lighting and simple remotes. Use a small stone ledge on a post to store remotes neatly.
"Start with one manual upgrade, then add automation as you learn how you use the space."
Retractable fabric canopies for seasonal shade
Retractable fabric canopies are budget-friendly and easy to remove for winter. Choose soft neutrals to keep a calm look.
Durable frames in powder-coated metal offer long life and wood-look finishes if you want warmth without upkeep. Plan conduit inside posts so wiring for lights and controls stays clean and safe.
- Start small: a manual canopy or single motorized screen.
- Integrate task lights and a fan if you cook or host here.
- Keep a short maintenance log to test sensors and motors each season.
Planning, placement, and code considerations
Good planning saves time, money, and stress. Walk the area at different times of day to note where sun, wind, and the best view fall. That simple habit helps you decide where a structure will be most comfortable and useful.
Orientation for sun, wind, and views
Face openings toward your favorite landscape or backyard sightline so the space feels connected to the view.
Angle roof slats to soften the harshest afternoon sun and place seating where morning light warms the area without glare.
Walk the outdoor space on breezy days to test wind direction. Position dining and lounging areas so wind clears smoke, not guests.
Footings, permits, and local building/zoning rules
Call your local building department early. Ask about setbacks, height limits, and permit timelines—approvals often take weeks.
Mark utilities before you dig and size footings to match soil and frost-depth requirements so posts don’t heave over winter.
Choose post bases and anchors rated for your soil and patio surface; a solid structure starts below ground. If you plan an outdoor kitchen, map gas and electric runs now and reserve GFCI outlets near water.
"Save all approvals and inspection records in a project folder — it makes future updates easier."
- Sketch furniture layouts before final dimensions; a few inches change how an area feels.
- Note drainage so rain moves around, not under, your patio and roof.
- Keep required distances from property lines and use privacy screens where lots are tight.
DIY kit or custom build: choosing your path
Deciding between a ready-made kit and a custom build starts with a clear look at time, skill, and money. We’ll help you honestly assess each option so you choose with confidence.
Budget ranges, tools list, and realistic timelines
Budget: DIY kits typically run about $1,000–$2,000 in materials for a mid-size frame. Custom builds cost more but match your home and can add wiring, lighting, or smart features cleanly.
Core tools: post-hole digger or auger, level, impact driver, masonry and wood bits, saw, safety gear, and exterior-rated fasteners. Add concrete or anchors if soil or frost depth requires it.
- Wood is easy to work with and warm underfoot; metal gives crisp lines and lower upkeep.
- Plan two to three weekends with a helper for a mid-size kit; allow extra days for stain and sealant cure.
- If your backyard slopes or needs deep footings, hire pros for layout and concrete work.
- Order extras for mistakes and future repairs—matching finishes later is hard.
Final thought: pick the path that fits your time and enjoyment. There’s no wrong choice, only the one you’ll use and love on your patio and outdoor space.
Finishing touches that set the mood
The last details turn a framed outdoor spot into a true living room you reach for every evening. Soft textures, a simple color story, and careful lighting make the space feel calm and ready for company.
Rugs, cushions, and textures for an outdoor living room feel
Roll out a weather-friendly rug to anchor the seating and soften the patio underfoot. Add cushions in fade-resistant fabrics and mix linen-look, woven, and knit textures for a relaxed, collected look.
Keep seating versatile: a loveseat and two chairs move easily between dining and lounging. Use natural trays, stone coasters, and simple wood accents to tie materials together.
Color stories that cool or warm the space
Pick a clear color story so the area reads as one calming room. Cool blues and greens make the space feel breezy and fresh. Warm terracotta and ochre bring a hearthlike, cozy feel—great if you include a compact tabletop fire pit.
- Hang subtle lights along beams and add lanterns on side tables for layered lighting.
- Place plants at varied heights: a tub tree, a herb basket, and a trailing vine for life and scent.
- Tidy cords and stash extras in a bench box so the area stays peaceful and ready.
"Small, thoughtful elements make evenings linger—step back at dusk and adjust shadows and glow."
Conclusion
Start with one small step. Pick a single idea that fits your backyard—one seat, one light, or one planted trellis—and let that move shape the rest. This simple choice turns a corner into a useable room you’ll reach for every day.
With a clear plan you’ll boost functionality, style, and even home value. A well-placed structure and the right scale make your patio and garden feel like an extension of your home.
Keep comfort simple: soft light, a favorite chair, and herbs within reach make the outdoor living spot feel like an everyday oasis. Plan for sun, wind, and views, then add plants and textures to soften the space.
Whether you build yourself or work with a pro, small maintenance—seasonal rinses, a fast hardware check, and fresh cushions—extends enjoyment. Enjoy quiet mornings, long dinners, and evenings under open beams. Here’s to more time outside under your pergola, where living feels easy and calm.
FAQ
What is a pergola and how does it elevate outdoor living?
A pergola is an open-roofed structure of columns and cross beams that defines an outdoor room. It elevates outdoor living by creating shade, framing views, and giving a clear place for dining, lounging, or an outdoor kitchen. With the right roof, lighting, and plantings it becomes a sunlit, private extension of your home that feels like a living room in the garden.
Should I choose an attached or a freestanding structure?
Choose attached if you want the structure to flow from your house and extend interior architecture onto the patio. Pick freestanding when you need to define a backyard room, center a seating area, or frame a poolside retreat. Consider footings, anchor hardware, and how the placement affects sightlines and privacy.
How can I use one over an outdoor kitchen or grill area?
Plan for ventilation, heat clearance, and service access. Use weather-hardy counters and cabinets, noncombustible surfaces near the grill, and durable flooring like stone or composite. Add task lighting and power outlets for appliances, and consider a louvered roof or retractable canopy to manage smoke and sun.
What materials last longest with low maintenance?
Metal frames and composite slats offer low maintenance and strong weather resistance. Hardwoods like ipe are durable but need sealing; cedar and redwood resist rot and look warm when stained. Mixed builds — for example, a stone base with wood slats and metal accents — balance longevity with style.
How do I add privacy without blocking light or airflow?
Use lattice panels, horizontal slats with spacing, or outdoor fabric curtains that can open and close. Plant living walls of jasmine, roses, or Boston ivy on trellises to soften views while keeping breezes. Position screens to block sightlines but allow cross ventilation.
What lighting works best to make evenings cozy?
Combine string lights for ambiance, integrated LEDs for task zones, and pendants over dining areas. Choose warm color temperatures (2700–3000K) for a cozy feel. Add dimmers and path lights to create layered illumination that’s both functional and magical.
Can a structure be used year-round with a fire pit or fireplace?
Yes. Pairing a fire pit or built-in fireplace with windbreaks, thermal seating, and a solid floor extends use into cooler months. Keep safety clearances around open flames, use noncombustible hearth materials, and consider a chimney or venting for smoke control.
What are small-space options for narrow patios or balconies?
Try a half-structure, slim-profile frame, or banquette seating under a compact roof to define a cozy corner. Retractable canopies and vertical planters save footprint while adding shade and green privacy for small yards or decks.
Which plants work best for living shade and climbing walls?
Choose vines suited to your USDA zone and sun exposure. In sunnier spots, wisteria or climbing roses create lush shade; jasmine and honeysuckle are fragrant options for partial sun. Train vines on trellises to avoid damage and prune regularly for healthy growth.
Should I buy a kit or commission a custom build?
Kits suit tighter budgets and quicker installs; they come with pre-cut parts and hardware. Custom builds fit unique site conditions, match your home’s architecture, and allow mixed materials and integrated features like lighting or grills. Compare budgets, timelines, and whether you want a DIY project or professional finish.
What permits and site considerations should I check before building?
Check local building codes and zoning for height limits, setbacks, and whether footings require permits. Consider orientation for sun and wind, drainage, and proximity to utilities. Proper footings and anchored hardware keep the structure safe and long-lasting.
How do I choose finishes and colors to match my home?
Match trim colors, use complementary stains, or echo architectural materials like stone or metal to create a seamless look. Light neutrals brighten shady spots; dark frames give a modern contrast. Test swatches in natural light and pair textures — rugs, cushions, and planters — to complete the outdoor living room feel.