Imagine the soft scent of fresh soil and a sunlit corner full of green leaves. You might notice a droop here, a brown edge there — small signals that tell you what your houseplants need. This guide is written to take the guesswork out of growing a calm, thriving corner in your home.
We’ll show you simple steps: the right tools, how to read light and soil, and common mistakes to avoid. Start with one plant, one pot with drainage, and a regular check that only takes a few minutes each week.
Expect clear, practical tips for watering slowly until water drains, using a soil-less mix with peat and perlite, and keeping temperature above 55°F. You’ll also learn gentle habits like rotating pots and wiping leaves so they capture more light.
Key Takeaways
- Start small: one houseplant, one bright spot, one pot with drainage.
- Use a balanced soil mix and water until drainage, then pause.
- Read light and leaves regularly and reduce watering in winter.
- Keep the environment above 55°F and avoid cold drafts.
- Rotate and dust leaves weekly for even growth and better light capture.
Start here: a simple path to thriving houseplants
Choose a steady routine—one hardy specimen, one bright location, one pot with drainage. This guide shows a calm, friendly way to begin. Small, regular steps beat guesswork every time.
- Pick one resilient plant and a bright spot that avoids harsh midday sun.
- Touch the soil with your hand; only water when the top 1/2–1 inch feels dry.
- Set a five-minute weekly check: soil, leaves, and rotate the pot a quarter turn.
- Choose medium light near an east or bright north window for steady growth.
- Keep a small kit—pruners, a watering can, spray bottle, and soft cloth.
Learn three simple things your plants need: steady light, enough but not too much water, and a breathable soil mix. Err slightly dry rather than soggy; overwatering is the most common mistake.
One more tip: Keep brief notes on what works in your home. Each space nudges your indoor plants to grow a bit differently, and a short log helps you learn fast.
Essential tools and materials for low-maintenance indoor plants
Build a simple, lovely kit and you’ll find maintaining green spaces feels calm and doable. A few well-chosen items cut mistakes, save time, and make daily routines pleasant.
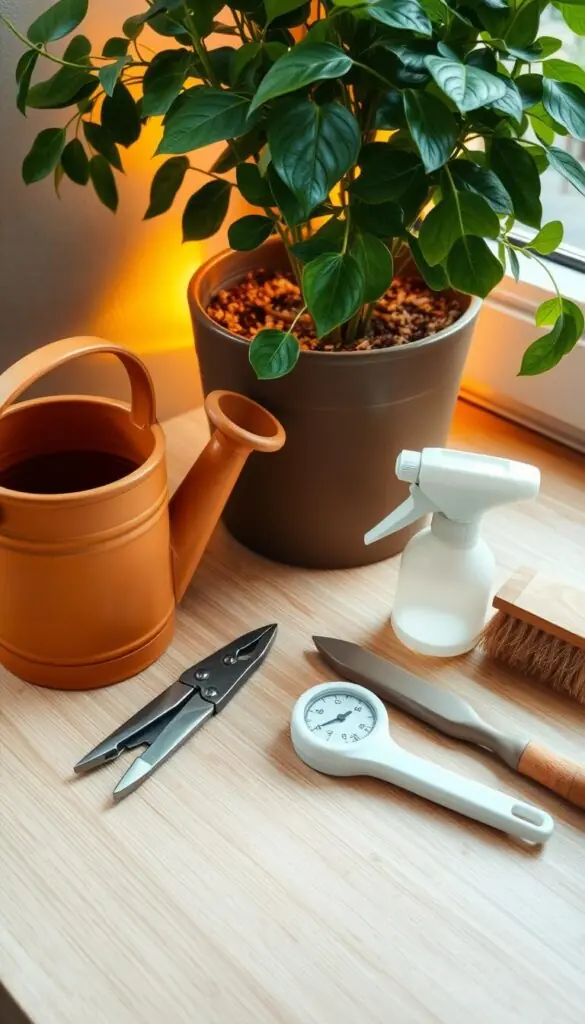
- Planters with drainage plus a matching saucer or tray — the pot protects furniture and the holes stop roots from sitting in water.
- Slim-spout watering can for precise pours and a gentle spray bottle for humidity-loving varieties without soaking the soil.
- Sharp pruners for clean cuts and a soft microfiber cloth to wipe leaves so they shine and absorb light better.
Mixes, watering, and simple habits
Make a potting mix with equal parts peat moss, perlite or vermiculite, and compost for a light, airy texture that cradles roots.
Water slowly until water runs from drainage holes and use trays to catch runoff. Use the finger-knuckle test or lift the pot to feel if it’s lighter before you water again.
Keep a small stash of plant food (granular or water-soluble) for spring and summer boosts, stored dry and sealed. A bit of rubbing alcohol and cotton swabs helps spot-treat scale or mealybugs quickly.
Why these tools matter
They make routine tasks faster and prettier—choose a pretty can or a natural-fiber caddy so you’ll use them often. Label each pot with its name and needs to save guessing later.
Light made easy: finding the right spot for your plants
Light makes or breaks growth—learn a few simple ways to read windows and leaves. A short check of sunlight through the day tells you what to place where. Use your senses: warm afternoon heat feels stronger than cool morning glow.
Reading your windows: south, east, west, and north explained
South: bright and direct—best for sun-lovers. Use a sheer curtain to soften harsh midday rays and make sure leaves don’t scorch.
East: gentle morning light that feels cool and kind on your skin—ideal for medium-light varieties.
West: warmer afternoon glow that can be strong; slide pots slightly back in summer to avoid heat stress.
North: soft, low light—choose forgiving species like snake plants and pothos for these corners.
Signs the light is off
Pale, bleached, or crispy leaf edges mean too much direct sun. Stretched stems, small new leaves, or very slow growth point to too little light. When growth stalls, move the pot to a brighter spot before changing water or soil.
Grow lights and diffusion for balanced glow
If a room stays dim, add a full-spectrum LED grow light 12–18 inches above the foliage and run it 10–12 hours a day. Use sheer curtains to filter harsh rays into a soft, even wash.
"Rotate a quarter turn each week so every side of the plant faces the light and growth stays balanced."
| Window | Light Quality | Best actions |
|---|---|---|
| South | Bright, direct | Use sheer curtain; monitor for scorching |
| East | Gentle morning | Place medium-light plants; enjoy pearly leaf color |
| West | Warm afternoon | Move back in summer; check for heat stress |
| North | Soft, low | Group low-light species like snake plants; use grow light if needed |
Quick routine: group similar light needs together, rotate pots weekly, and shift pots closer in winter when the sun sits lower. These small steps help leaves stay full and soil dry evenly between water sessions.
Watering the right way: when, how much, and how often
Watering well starts with simple checks you can do in under a minute. This short routine keeps leaves bright and roots strong. Use touch, weight, and a slow pour to avoid common mistakes.
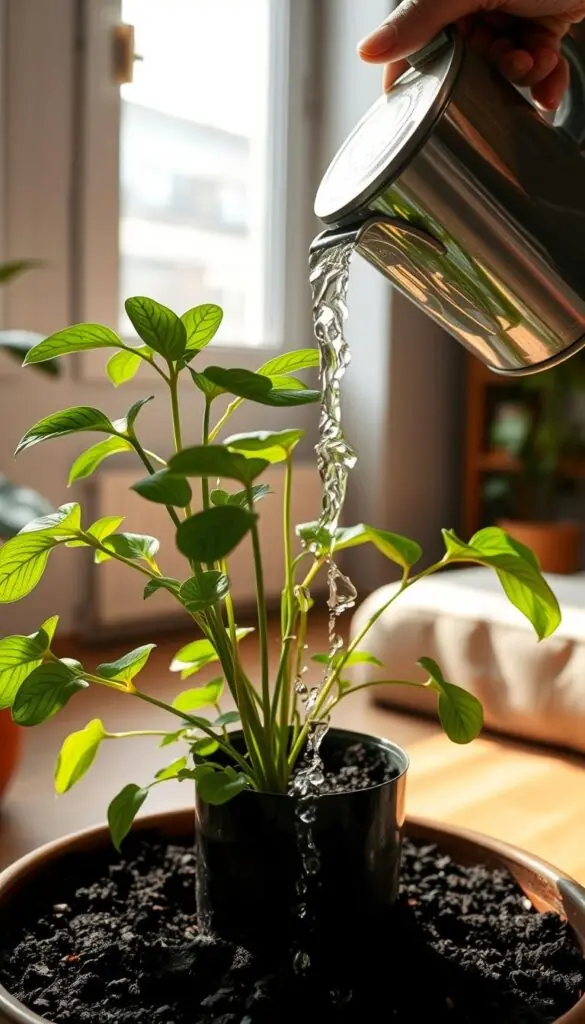
The touch-and-weight test to prevent overwatering
Step 1: Press your finger 1/2–1 inch into the soil. If it is dry, check the pot’s weight.
Step 2: Lift one edge of larger pots to feel how heavy it is when moist versus dry. If it feels light, it’s time to water.
Frequency by type
- Succulents and cacti: long intervals between waterings; let soil dry fully.
- Foliage plants: steady rhythm—water when the top half-inch dries.
- Flowering plants: a bit more frequent during bloom; watch for drooping or pale leaves.
Deep watering, trays, and winter adjustments
Water slowly at the soil line until you see steady runoff in the tray, then stop. Empty trays after 10–15 minutes so roots don’t sit in water—no “wet feet.”
In winter, extend the time between waterings. Plants grow slower and need less water.
"If you’re unsure, wait a day—plants need air in the soil as much as they need water."
Quick tip: Keep leaves dry when you water to prevent spots and disease. If spider mites appear, raise humidity while keeping this watering way steady.
Soil and pots: choosing potting mix, size, and drainage for healthy roots
Good soil and the right container set the stage for strong, happy roots. Start by thinking texture: light, springy, and airy beats heavy, compacted dirt every time.
Well-drained mixes feel loose and slightly spongy in your hands. A classic blend uses equal parts peat moss, perlite or vermiculite, and compost. This potting mix holds moisture without staying soggy, so roots breathe and grow.

Pick the right size and drainage
Choose a pot about 1–2 inches wider than the current root ball. Too big a pot keeps soil wet and slows growth. Always use containers with drainage holes and a saucer to catch runoff.
Simple potting steps with sensory cues
- Place small mesh over drainage holes to keep mix from escaping while letting water flow.
- Loosen circling roots gently so they can spread into fresh mix.
- Fill around roots, firm lightly—don’t compact; the mix should feel airy when you press it.
- Water slowly until you see runoff; this settles the mix and shows any low spots to top up.
"Healthy roots are firm and pale, not mushy or dark — check them first if growth stalls."
Mistakes to avoid: using a pot with no hole, choosing a container far too large, or packing soil tight. For thirstier varieties add more compost; for fast-draining mixes, add extra perlite. Refresh the top inch of soil every few months to keep nutrients lively.
| Need | Mix feeling | Pot choice | Why it matters |
|---|---|---|---|
| General houseplants | Light, springy | 1–2" larger than root ball | Balanced moisture and air for steady growth |
| Thirsty species | More compost, slightly denser | Same size; good drainage | Holds moisture without drowning roots |
| Succulents | Very gritty, extra perlite | Tight fit, free-draining pot | Fast drying prevents rot |
Humidity, temperature, and airflow for happy houseplants
Humidity, temperature, and gentle airflow together set the stage for lush, steady growth. Small changes in the room environment stop brown tips and keep foliage fuller.
Raise humidity simply: group plants together to create a shared pocket of moisture or place a small humidifier nearby for a steady boost. Bathrooms with windows can work well for tropical varieties if they get enough light.
For dry rooms, set trays with pebbles and water under pots. As the water evaporates, it raises local humidity without soaking soil. This helps sensitive species and reduces stress on leaves.

- Keep pots away from heating and AC vents—fast, dry air wicks moisture from soil and foliage.
- Aim for steady warmth; most houseplants do fine above 55°F. Sudden swings cause shock.
- Use a ceiling fan on low or a gentle oscillating fan to prevent still air, which can invite pests and fungal issues.
"Rotate a quarter turn each week so every side gets light and growth stays even."
Weekly routine: rotate each plant once, and wipe leaves with a soft, barely damp cloth to remove dust and brighten light uptake. If tips brown on humidity lovers like calathea, raise the moisture in the air rather than adding extra water to soil.
Watch for spider mites in very dry conditions. Better humidity and a bit of airflow usually help keep them in check.
Plant food 101: fertilizing for steady growth without stress
Fertilizing the right way keeps growth steady without stressing roots or leaves. A little planning goes a long way: timing, label directions, and the right mix matter more than frequent feeding.
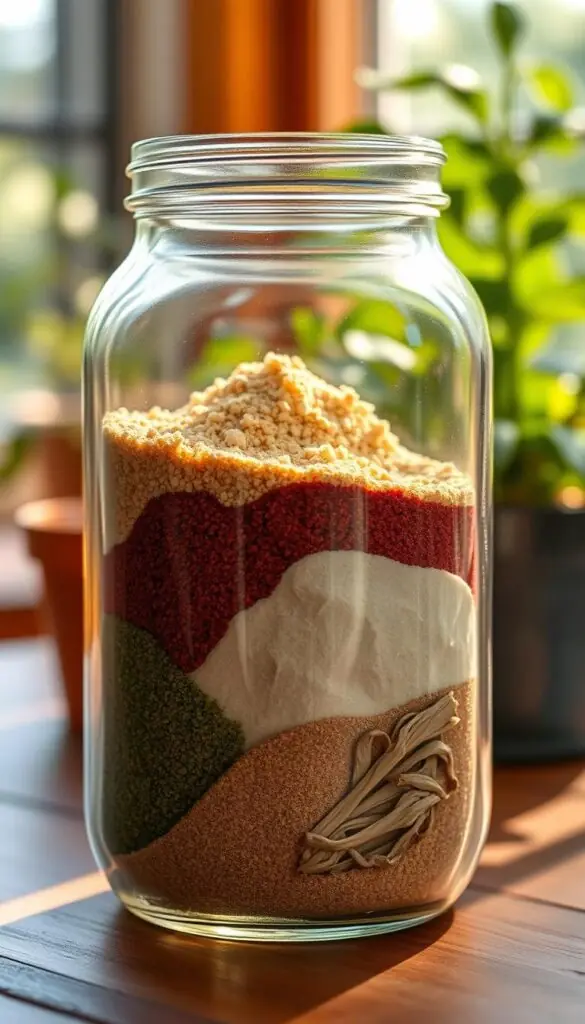
Choose balanced N-P-K and include micronutrients
Look for a balanced formula (for example 10-10-10 or 14-14-14) that lists micronutrients like iron, magnesium, and zinc.
Balanced mixes support leaves and flowers. Too much nitrogen favors lots of foliage and fewer blooms.
When and how much to feed
Feed during spring and summer when light and growth increase. Pause or cut back in fall and winter when growth slows.
- Water lightly before feeding so roots aren’t thirsty.
- Mix to the label rate or try ¾ strength for a gentler start.
- Liquid feeds act fast; slow-release granules reduce frequency.
Avoid overfertilizing and test with your senses
Overfeeding can burn roots and stunt growth. If you see pale tips, darkened roots, or a white crust on soil or pot edges, flush with clear water to rinse salts.
"It's easier to add a little more later than to undo excess—feed gently and observe."
| Goal | Recommended N-P-K | Style | Quick rule |
|---|---|---|---|
| General foliage & blooms | Balanced 10-10-10 | Liquid or granular | Feed every 2–4 weeks in growth season |
| Flowering boost | Lower N, higher P (5-10-5) | Liquid during bloom | Use when buds form; avoid excess N |
| Low-light rooms | Light feed (any balanced) | Slow-release | Half the normal rate; feed less often |
Simple checklist: keep notes on dates and rates, check light and water before feeding, and choose the feed type that fits your routine.
Repotting without stress: timing, technique, and aftercare
When a container feels crowded and growth slows, repotting can give roots fresh room to breathe. Do this in spring or summer when your plants have energy to recover. A small, gentle move keeps things calm and healthy.
Signs it's time: roots circling the pot, soil that dries too fast, or steady slow growth despite good light and routine. Check the drainage hole or lift the root ball to confirm.
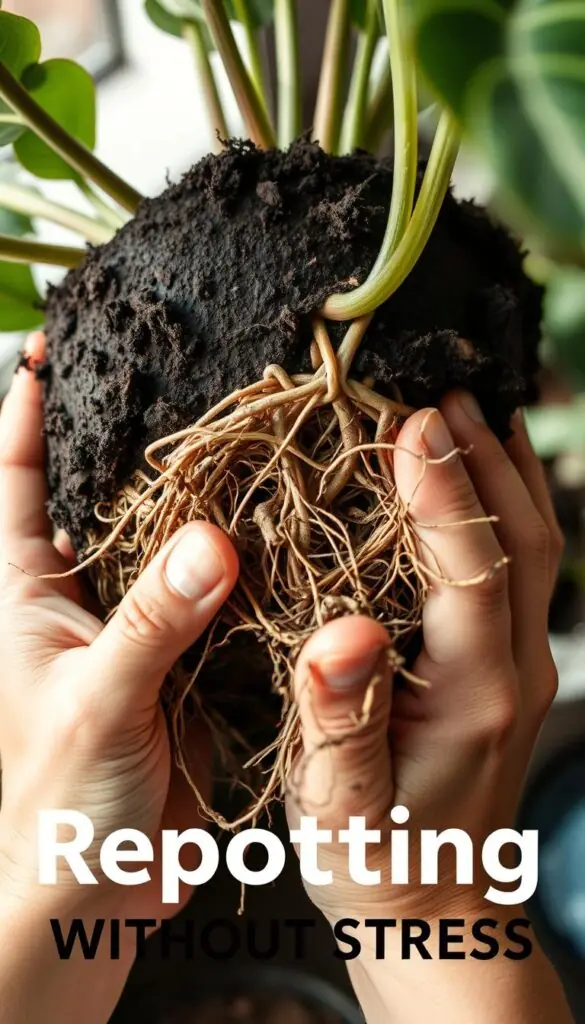
Step-by-step repotting
- Choose a new container 1–2 inches wider or plan to trim roots to reuse the same pot.
- Loosen circling roots with your fingers and, if dividing, separate clumps each with healthy roots and several leaves.
- Set the plant a touch lower than the rim and backfill with fresh, airy potting soil.
- Water slowly until runoff to settle the mix and remove air pockets; empty the saucer after 10–15 minutes.
Aftercare checklist
- Hold fertilizer for 3–4 weeks so roots can knit into new soil.
- Top up the surface the next day if it settles and keep the top tidy to deter gnats.
- Place in bright, indirect light for about a week, then return to its usual spot.
- Note the date and pot size so you can track timing year to year.
"A gentle repot in the right season gives your greenery the fresh start it needs."
Pruning and cleaning: compact shape, fresh growth, and shinier leaves
A light trim and a quick clean bring back shape, encourage new shoots, and make leaves shine.
Where to cut and when: Prune anytime, though many gardeners shape specimens in fall after summer growth. For fuller results, cut just above a bud or side shoot. This directs new growth to the spot you choose. Pinch soft tips between finger and thumb to encourage side shoots on vining plants like pothos.
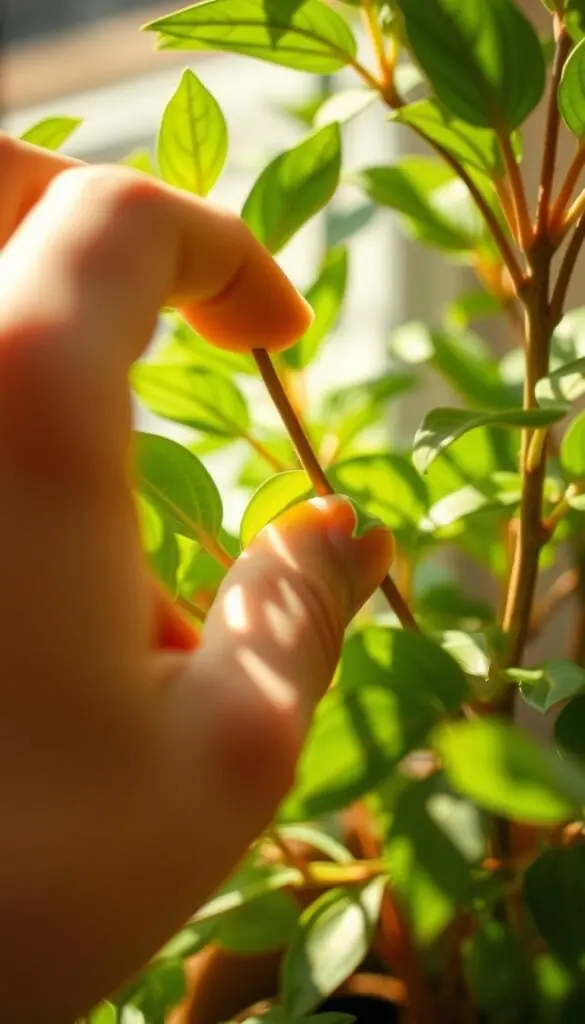
Tools, sanitation, and exact cuts
Use sharp shears or snips for bigger stems and clean scissors for tiny tips. Wipe blades with rubbing alcohol between plants to avoid spreading pests and disease. Keep a small jar of alcohol and cotton swabs nearby for quick cleanups if you spot sticky residue or pests like spider mites.
Cleaning methods for smooth and hairy foliage
- Wipe smooth leaves with a soft, damp cloth for a natural shine.
- Use a soft brush or a gentle shower for hairy leaves so moisture doesn’t trap and rot.
- Remove yellow or damaged leaves promptly and deadhead spent blooms to redirect energy to new growth.
"Take your time and step back often; small, thoughtful cuts shape a plant gracefully without shock."
| Action | Where to cut | Tools | Why it helps |
|---|---|---|---|
| Pinch tips | Just above node | Fingers | Encourages side shoots and a fuller silhouette |
| Snip leggy stems | 4–6 inches from base | Sharp shears | Refreshes and promotes dense growth |
| Leaf cleaning | Whole leaf surface | Cloth or soft brush | Improves light capture and reduces pests |
Propagation basics: free new plants from your favorites
You can multiply your favorites easily with a few careful snips and a bit of patience. Propagation is simple in spring and summer when growth is active. Follow small steps and watch for white root nubs as your best sign.
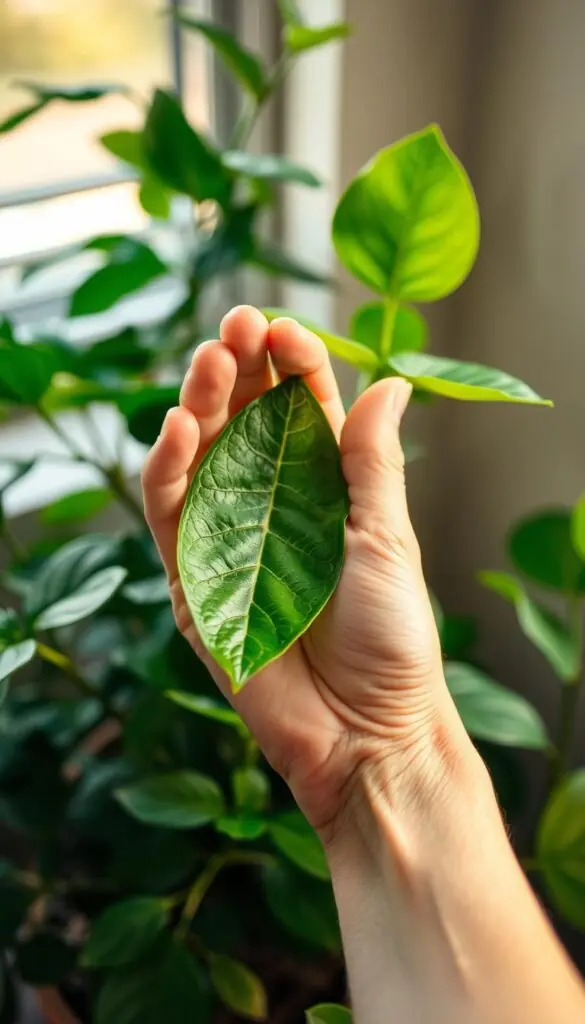
Stem cuttings — pothos and philodendron
- Take 4–6 inch cuttings with 2–3 nodes and remove the bottom leaves.
- Place the nodes in a jar of water until white roots appear, or dip in rooting powder and insert into moist potting mix.
- Keep starts in bright, indirect light and change water weekly if using a jar.
- When roots are 1–2 inches long, pot up gently and keep the soil evenly moist for a few weeks.
Offsets and runners — spider plant and bromeliads
Wait until offsets show small roots. Snip them free with clean shears and pot into an airy mix.
Give them bright, indirect light and a steady bit of moisture while they settle.
Leaf propagation — African violet
Place a single healthy leaf stem in a small jar of water for a couple of weeks.
Watch for tiny roots and baby crowns before moving to potting soil. Label each start with the date so you know when to up-pot.
"Start a bit at a time—one or two cuttings per week—so each new start gets your attention."
| Method | Best timing | Light | Sign to pot up |
|---|---|---|---|
| Stem cuttings (pothos/philodendron) | Spring–summer | Bright, indirect | White roots 1–2" long |
| Offsets (spider, bromeliad) | When small roots form | Bright, indirect | Visible rootlets at base |
| Leaf (African violet) | Spring–summer | Bright, indirect | Baby crowns or tiny leaves |
Quick tips: keep jars and tools clean to avoid rot, label each start, and share extras with friends. Start small and enjoy watching new life take hold.
Easy, beautiful houseplants for every room
Choose a handful of easy growers that add texture, height, and simple rhythms to any room. Below are four favorites that balance beauty with simple routines. Each snapshot shows where a specimen fits and how it likes to be treated.
Snake plant
Sculptural and steady. Sword-like leaves give a hallway or bedroom architectural interest. It tolerates low light and sips water rarely.
Keep it near the floor in dim corners, water sparingly, and expect slow, steady growth. Some people call it simply snake for short.
Pothos
Trailing motion for shelves and mantels. Pothos thrives in medium light and likes alternating deep and light drinks—let the top layer dry between watering.
Place it high so vines can drape; prune for a fuller look and share cuttings with friends.
Spider plant
Bright, humid spots love it. A spider plant blooms new baby plantlets and perks up in a sunny bathroom where steam raises humidity.
Trim offlets and re-pot the youngsters to grow your collection fast.
Peace lily
Glossy leaves and soft blooms. Place this houseplant in medium light; it flowers more with brighter exposure. Let the top soil dry slightly and water when leaves relax.
Note: snake plants, pothos, and peace lilies can be toxic to pets and small children—keep them out of reach.
"Start with two or three houseplants to learn rhythms before adding a lot more."
- Living room mix: low snake near the floor, pothos up high, peace lily at eye level for softness.
- Bedrooms: pick quiet, low-maintenance companions like snake and pothos for an easy routine.
- Use matching planters to unify the group and keep your home calm and cohesive.
Seasonal indoor plant care across the year
Follow a seasonal checklist to match water, light, and feeding to each phase of the year. This simple rhythm helps you plan without fuss and keeps your indoor plants thriving through cycles of rest and growth.
Spring and summer: growth spurts, fertilize, repot, and propagate
Spring is prime time to repot tight pots, start cuttings, and add light fertilizer to support new growth.
In summer, increase waterings a touch and rotate weekly so every side gets even light.
Fall: shape with pruning and tidy spent blooms
Use fall to prune for shape and remove faded flowers. Cut back feeding as days shorten so the root zone rests.
Winter: reduce watering, avoid drafts, maximize light
In winter, reduce watering and move pots away from vents and cold drafts. Place them near bright south or west windows or under LEDs to keep light steady.
- Plan your year: spring refresh, summer enjoy, fall tidy, winter rest.
- Set reminders for repotting and stepping back on fertilizer at the right time.
- Watch for spider mites in dry months; raise humidity and rinse foliage if needed.
"Adjust water and light with the season rather than the clock—your plants will tell you what they prefer."
Troubleshooting pests and diseases indoors
A weekly inspection and a gentle plan stop most pests before they spread. Start with a quick look at leaves, soil surface, and the underside of foliage. Early detection makes treatments simpler and less stressful.
Soft-bodied pests: mist foliage (undersides too) with insecticidal soap. Repeat once a week for four weeks to break the life cycle. Check hidden spots and reapply after heavy watering or rain.
Scale and mealybugs: dab individuals with rubbing alcohol on a cotton swab, wipe them away, and recheck in 3–5 days. Sanitize tools between plants to avoid transfer.
Fungus gnats: let the top 1/2" of soil dry, clear fallen debris, and consider repotting into fresh mix if adults persist. Sticky traps can monitor populations.
Common diseases: powdery mildew shows as white powder on leaves; leaf spots are yellow, brown, or black patches. If roots smell sour or feel mushy, trim rotten roots, repot into airy soil, and reduce water. Improve airflow with a gentle fan and avoid crowding to lower humidity and make the environment less hospitable to pests.
"Record what you used and when; a simple log helps you follow up and see what works."
| Issue | Signs | Treatment | Follow-up |
|---|---|---|---|
| Soft-bodied pests | Sticky residue, webbing, tiny moving dots | Insecticidal soap spray; cover undersides | Repeat weekly x4; inspect weekly |
| Scale / Mealybugs | Small bumps, cottony clusters | Alcohol swab and wipe | Recheck in 3–5 days; sanitize tools |
| Fungus gnats | Flying tiny flies; larvae in soil | Dry topsoil, remove debris, repot if severe | Use sticky traps; monitor weekly |
| Root rot / leaf diseases | Mushy dark roots; white powder or spots on leaves | Trim diseased parts, repot to airy mix, reduce water | Keep airflow steady; check roots monthly |
Designing for beauty and function at home
Design choices that favor reachability and light make daily routines easier and the space calmer. Think of layout as both stage and system: beauty that asks little from you will actually get tended.
Planters, stands, and soft lighting to highlight foliage and flowers
Place taller plants on stands to frame a space and let trailing varieties spill from higher shelves. Add a small lamp or spotlight to highlight foliage in the evening for a cozy glow.
Use sheer curtains to filter sun so variegation shows without scorching. Choose pots that match your palette—warm clay, cool ceramic, or woven covers—so displays feel curated, not cluttered.
Flow and maintenance: reachable pots, easy watering, clean surfaces
Make sure every pot is easy to reach with your watering can. Convenience keeps maintenance light and consistent.
- Group plants by care needs so you can water and rotate in one sweep.
- Use matching saucers and wipeable surfaces so watering day stays tidy.
- Keep pathways clear and avoid bump zones to protect leaves.
Sensory touches: glossy greens, variegation, subtle scents, and textures
Mix textures—glossy greens with velvety leaves—and add subtle scents near entryways for a welcoming feel. Dust leaves regularly; clean foliage catches more light and looks healthier.
"Rotate pots weekly and keep airflow steady; small habits preserve both look and health."
Result: a calm, livable environment where plants feel intentional and your home invites quiet enjoyment.
Common mistakes to avoid with indoor plants
Overwatering tops the list. Wait until the top of the soil feels dry and the pot is noticeably lighter before watering. Better a little dry than soggy.
No drainage traps moisture. Swap to pots with holes and use a saucer. This small change saves roots and stops rot.
- Feeding too often or too strong — dilute fertilizer and use it only in the growing season.
- Wrong light — move pots closer or farther from windows so stems stay full and leaves don’t scorch.
- Ignoring seasons — in winter water less and offer brighter spots.
Other things to watch: wipe dusty leaves so light reaches them, clean tools with alcohol between cuts, and flush soil now and then to remove salts from hard tap water.
"Give each plant a little space and a quick weekly check — it saves a lot of headaches."
indoor plant care: a confident routine you can keep
Small, regular habits are the fastest path to steady growth and less stress in your home. Make a short weekly ritual and you’ll see steady wins: a fresh leaf, perked stems, a dust-free shine.
- Touch the soil to check moisture, then water only if it feels dry.
- Rotate each pot a quarter turn so growth stays even.
- Wipe a few leaves to improve light capture and remove dust.
Seasonally, feed lightly in spring and summer and pause in winter so roots rest. Move pots a bit closer to windows in winter and step them back in summer to balance light and heat.
Keep gentle air moving and avoid vents that blow hot or cold air directly on foliage. Once a month, scan for pests, tidy saucers, and trim any stray stems.
"Keep notes in a small guide you build for your space — your home’s patterns make the best teacher."
Start small, add a bit as you learn, and celebrate tiny victories. This guide is about steady, calm steps that help both you and your plants thrive through the year.
Conclusion
Finish with confidence: gentle routines and sensible choices make a thriving collection possible for anyone.
Use this guide as your steady plan. One short weekly check, breathable soil, and careful watering add up to calm, dependable growth. Your home will reward you with brighter leaves and occasional flowers.
Feed lightly in the growing season with balanced fertilizer or food, then pause when days shorten. Rotate pots, wipe foliage, and let fresh air move through the room for steady results.
When it’s time, check roots and refresh the mix—this simple reset helps new plants settle and keeps momentum. You’ve learned clear steps for indoor plant care; now enjoy the quiet green comfort you created.
FAQ
How often should I water common houseplants like pothos and snake plant?
Watering depends on light, pot size, and season. Use the touch-and-weight test: stick a finger an inch into the soil or lift the pot to feel its weight. Pothos prefer alternating deep and light drinks — roughly every 1–2 weeks in bright rooms. Snake plants need much less; often every 3–6 weeks, especially in winter. Always ensure pots have drainage and avoid letting roots sit in water.
What kind of potting mix is best for healthy roots?
Choose a well-drained potting mix that's light, airy, and slightly spongy. For foliage houseplants, a general indoor mix with added perlite or pumice improves drainage. Succulents and cacti need a grittier blend. Match the mix to your plant's needs and pick a pot with drainage holes and a saucer to catch excess water.
How do I tell if my plant is getting too much or too little light?
Leaves give clear clues. Too little light causes leggy growth, pale leaves, and slowed growth. Too much direct sun creates scorched, brown or bleached patches. Learn your windows: south offers strong light, east is gentle morning sun, west is brighter afternoons, and north is low, indirect light. Use sheer curtains or grow lights to balance conditions.
When and how should I fertilize my houseplants?
Feed plants during active growth months — spring and summer — with a balanced fertilizer that includes N-P-K and micronutrients. Reduce or pause feeding in fall and winter. Follow label rates; dilute liquid fertilizer to avoid overfertilizing, which often causes lush foliage but weak roots or burned tips.
What's the best way to repot without stressing the plant?
Repot when roots circle the pot, soil compacts, or growth slows. Use fresh potting mix and a pot just one size larger. Gently tease roots, place the plant slightly higher than before, and fill with mix. Water deeply after repotting and keep the plant in bright, indirect light while it settles.
How can I increase humidity for tropical houseplants?
Simple boosts work well: cluster plants together, use a room humidifier, or set pots on pebble trays with water (pots on pebbles so roots stay dry). Placing moisture-loving plants like spider plant or peace lily near a steamy bathroom helps, too. Avoid cold drafts and heaters that dry air.
What are easy, low-maintenance options for busy homes?
Choose resilient choices: snake plant for architectural form and rare watering, pothos for trailing color and forgiving light, and spider plant for bright spots and occasional humidity. These tolerate a range of rooms and forgiving schedules, making them ideal for renters or first-time stewards.
How do I propagate a pothos or philodendron from stem cuttings?
Take a 4–6 inch stem with at least two nodes, remove lower leaves, and place the cutting in water or a light potting mix. Keep in bright, indirect light and change water weekly if rooting in a jar. Roots appear in 2–4 weeks; then pot into a container with fresh mix and a drainage hole.
What should I do about pests like mealybugs or fungus gnats?
For soft-bodied pests, use insecticidal soap and repeat weekly until gone. Dab scale and mealybugs with rubbing alcohol on a cotton swab. For fungus gnats, allow the soil surface to dry, remove debris, and consider repotting with clean mix. Good airflow and clean pots reduce outbreaks.
How should I adjust my routine in winter?
Slow growth means less water and no heavy feeding. Increase light by moving plants closer to windows, but avoid cold drafts from vents or poorly sealed panes. Rotate pots weekly for even light exposure, dust leaves to maximize photosynthesis, and reduce potting frequency until spring.