Imagine the morning sun touching a smooth, green surface and your plant drinking in the light. You want a simple, repeatable routine that boosts both beauty and plant health.
We promise clear, step-by-step methods that fit into your day. You’ll learn a gentle way to remove dust and film so foliage breathes and photosynthesizes better.
These home tips use common tools—soft cloths, a spray bottle, and plain water or mild vinegar mixes. We’ll show how to avoid mineral spots from hard water and why oily polishes are best skipped.
Expect short routines for quick touch-ups and deeper wipes for big shifts. You’ll gain confidence caring for each texture, from glossy to velvety, and a calmer rhythm that makes gardening feel like a pleasure, not a chore.
Key Takeaways
- One easy method helps foliage take in more light and look lush without streaks.
- Use soft cloths, a spray bottle, and mild solutions for best results.
- Avoid oily polishes; let leaves air-dry out of hot sun.
- Watch for sticky residue or pale patches as you clean—these signal issues.
- Set a gentle routine so maintenance stays simple and calming.
Why Clean Leaves Matter for Health, Light, and Beauty
A quick wipe can bring back a deep, sunlit green and let your plants breathe easier.
Surface buildup blocks the light and the tiny pores that let a leaf respire. Dust acts like a shade cloth, cutting photosynthesis and slowing growth, especially in low-light rooms or winter months. Removing film lets chlorophyll work, so foliage looks richer and growth steadies.
Wiping is also a hands-on health check. Hard water can leave white residue that dulls shine, and sticky spots may signal mealybugs, scale, aphids, or whiteflies. When you touch each surface you spot trouble early and save time later.
Do this work in daylight so you see streaks, spots, and sticky patches clearly. You’ll notice sensory rewards: a deeper green, a soft squeak when a polished surface meets your cloth, and a calmer corner in your home or garden.

- More light reaches chlorophyll, so plants make energy and regain rich tones.
- A clear surface helps pores function, showing up as perkier posture and new growth.
Tools and Materials You’ll Use at Home
A small kit of everyday gear turns plant upkeep into a simple ritual. Gather a few reliable items and stage them in your kitchen or bath so each session is calm and fast.
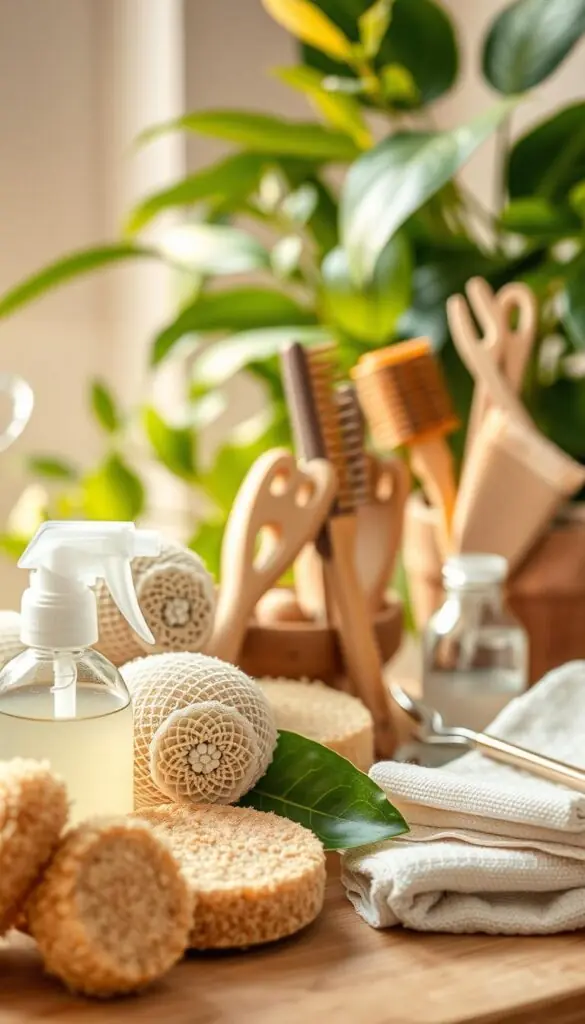
- Soft, lint-free cloths (2–3) and a washable microfiber duster—use the duster first, then a cloth to wipe each leaf without dragging grit.
- A spray bottle or two: one filled with plain lukewarm water, another with a mild mix (a few drops castile soap in water).
- A deep kitchen sink is ideal for gentle rinses; keep towels nearby to blot pots and protect floors.
- Extras: a small step ladder or telescoping duster for tall plants, a compost bin for trimmings, and a bag or caddy to keep everything together.
"Choose washable, reusable materials and store them where they're dry and easy to reach."
Recipe note: for mineral spots, mix 1/4–1/2 cup white vinegar in 1/2 gallon lukewarm water with 5–10 drops of non-toxic liquid soap, or use a few drops of castile soap in water for daily work. Keep pH-neutral soap and avoid scented products that leave residue.
Assess Your Plant: Leaf Size, Texture, and Location
Begin with a quick inspection: size, texture, and the room’s traffic tell you which method to use.
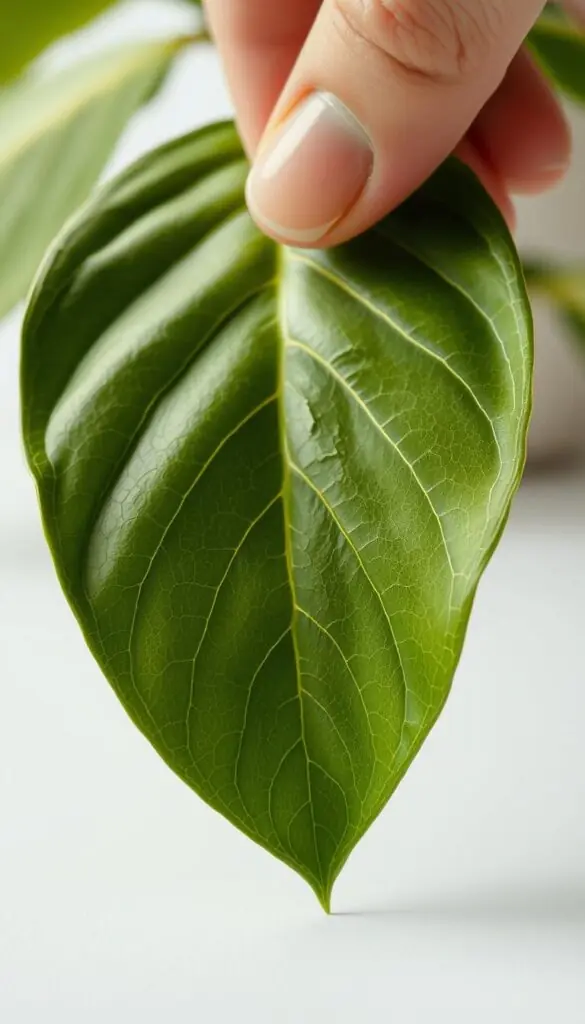
Feel each leaf. Smooth, glossy surfaces will usually squeak when they’re free of dust. Fuzzy or velvety foliage should feel soft and never be scrubbed. Small, clustered foliage often responds best to a light spray and drip.
Note where the pot lives. Plants near a stove, entryway, or sunny window gather films faster and may need more frequent attention. Tall plants collect dust on top leaves first, so start high and work down.
| Type | Typical Method | Tactile Cue | Location Tip |
|---|---|---|---|
| Large, smooth (Monstera, Dracaena) | Wipe-and-buff | Squeaks when clean | Use filtered water to avoid spots |
| Small or trailing (Pothos, Ficus) | Spray-and-drip | Leaves cluster; light mist works | Quick dusting in high-contact areas |
| Hairy/delicate (African violet) | Feather-light dusting | Velvety, do not spray | Avoid kitchen splatter zones |
Use these cues and you’ll know what each leaf may need. Small, steady care keeps plants looking lush and healthy.
Protect Soil and Surroundings Before You Start
Set a calm, protected workspace so the process stays simple and mess-free.
Cover the potting mix. Use a paper plate, foil, or a repurposed lid to shield soil from water and cleaner. This prevents soil from splashing onto leaves or the floor and keeps roots from getting soggy during a quick wipe.
Move plants to the kitchen or bath. The sink or tub is ideal for rinses. Line the surface with a towel so pots don’t slip and stray drips are contained. When spraying indoors, protect wood and fabric nearby with an extra towel barrier.
- Keep a bag or small bin close to collect used cloths and pest-sticky wipes to avoid spreading residue to other plants.
- Remove décor and pre-check saucers for loose debris or fallen leaves; empty trays before you begin.
- Work from the top down so dust and water move away from already-treated foliage.
- Keep the room warm and draft-free so leaves dry naturally and without water spots.
- For many plants, set up a simple station: a towel, two cloths, a spray bottle, and a small trash bag to speed the process.
"A little prep saves time and keeps your home tidy while you care for plants."
Step-by-Step: Gentle Methods to Clean Leaves
A steady, simple routine makes the whole process feel quick and even a little calming. Below are four gentle methods with clear steps, tool notes, and drying guidance.
Quick dusting for light buildup
- Cradle each leaf and draw a dry microfiber duster along both sides. The soft glide lifts dull film without moisture.
- Work top to bottom so stray dust falls away from treated foliage.
Sink or shower rinse for small plants
- Set sprayer to a gentle stream of lukewarm water. Rotate the pot so every leaf gets a brief rinse.
- Keep pressure low to avoid blasting soil. Let excess water drain fully before returning the plant.
Spray-and-drip for many small leaves
- Use a fine mist on Ficus benjamina or Pothos. Let water sheet off naturally, then repeat if needed for stubborn spots.
- Turn leaves over to check undersides where dust and pests hide.
Wipe-and-buff for large leaves
- Spray a microfiber cloth, not the plant. Sweep from stem to tip and finish with a dry cloth to reveal a natural sheen on Dracaena, Philodendron, or Monstera.
- Keep strokes in the same direction and refresh cloths often to avoid dragging grit.
Practical tips: Always air-dry out of direct hot sun. A final light pass often makes the difference between clean leaves and glowing foliage.
Mixtures That Work and Spot Treatment for Stubborn Marks
A few gentle mixtures and spot methods handle most marks without hurting tissue.
Everyday mix: Use a few drops of castile soap in a spray of plain water. Spray the cloth, not the leaf, and wipe gently.
Hard water spots: For mineral film, mix 1/4–1/2 cup white vinegar in 1/2 gallon lukewarm water with 5–10 drops of non-toxic liquid soap. Test one leaf first. Wipe, then rinse with plain water and let it air-dry.
Sticky residue from pests: Remove the film first with the soap mix. Then treat with neem oil or insecticidal soap per label. Discard any cloths that touched pests to avoid spreading the problem.
| Issue | Mix | Test / Rinse | Repeat |
|---|---|---|---|
| Daily dust and light dirt | Few drops castile soap + water | Spot-test on one leaf; wipe and air-dry | As needed; quick passes weekly |
| Mineral / cloudy spots | 1/4–1/2 cup vinegar per 1/2 gal + 5–10 drops soap | Test one leaf; rinse with plain water | May need a second pass after 7 days |
| Sticky pest residue | Soap mix for initial cleaning; then neem or insecticidal soap | Clean fully, then follow treatment label | Follow product timing; discard used cloths |
- Avoid strong fragrances or harsh detergents; they attract dust and dry surfaces.
- Work in small sections and allow time between passes so marks lift gently.
How to Clean Leaves on Tricky Plants and Tall Specimens
Tackling tall trees and spiny succulents calls for a slower, more deliberate approach. Choose a gentle toolset and move with intention so both you and the plant stay safe.
Cacti and succulents: Use a medium‑soft paintbrush to sweep dust from rosettes and between spines. Guide bristles into tight areas and avoid soaking these plants. For many rosettes, once every year or two is enough to keep them looking healthy.
Tall indoor trees: Reach safely with a 6' ladder or a telescoping microfiber duster. Dust from the top down, then spot‑wipe reachable larger leaves with a lightly dampened cloth.
- Keep three points of contact on the ladder and move it rather than leaning to reach distant areas.
- Work slowly and plan pathways around furniture or planters to avoid bumps and spills.
- For oversized foliage high up, use a cloth‑over‑hand technique to feel ribs and avoid creases.
- Match your tools to plant size and architecture; a small angled artist’s brush is perfect for tiny rosettes.
Seasonal touch-ups save time. Big specimens gather dust aloft, so a careful pass every month or so keeps them vibrant and responsive to light.
Drying, Shining, and Natural Finishes
Give each plant a calm spot to air-dry; that quiet time is where a natural glow appears.
Let leaves air-dry out of direct, hot sun. Move the pot to bright, indirect light and gentle airflow. That prevents scorch and water spots and helps tissue recover without stress.
A soft final buff with a dry microfiber cloth brings out the leaf’s natural satin sheen. Buff in one direction and keep a separate "finish" cloth that stays clean and dry for this last pass.
Avoid oils, mayonnaise, commercial shiners, and baby wipes. Oily polishes like coconut or olive oil, and food products such as mayonnaise, leave films that clog pores. Those films attract dust and can hide pests.
- After cleaning, set plants where air moves gently and light is bright but indirect so leaves dry without spots or stress.
- A final dry-cloth buff brings out the leaf’s natural glow—no oils or shiners needed for that healthy, satin finish.
- Skip mayonnaise, baby wipes, and commercial leaf shiners; they leave films that attract dust and block pores that need to breathe.
- Patience pays off—giving time for a full dry helps you see if any faint streaks remain so you can do an easy touch-up.
- If you must move a plant back to a sunny windowsill, wait until every surface is dry; damp surfaces in hot beams can scorch.
| Action | Why it matters | Quick tip |
|---|---|---|
| Air-dry in indirect light | Prevents burns and water spots | Use a bright room with a fan on low if needed |
| Buff with a dry microfiber | Reveals natural sheen without residue | Keep a dedicated finish cloth |
| Avoid oils & wipes | They clog pores and attract dust | Use plain water or mild soap mixes instead |
Seasonal Timing, Routines, and Reducing Dust at the Source
Let the season guide small routines indoors and simple yard work that cuts dust at the source.
Present-day care: Tidy your plants when surfaces look dull and do it by daylight. Mild weather with low wind is ideal. A light, gentle rain can rinse many plants naturally if the forecast is calm.
Keep outdoor work ahead of heavy fall drop in the yard. Dry days are the best time to rake or blow leaves efficiently. Use a plastic leaf rake for wide swaths, a lawn rake for thatch, and garden rakes to push rows toward beds.
- Slide piles on a heavy-duty tarp instead of lifting to cut effort and protect your back.
- Leaf blowers and leaf vacuums shred material and reduce bags; mulching mowers can shred flakes into the lawn as mulch with two or three passes.
- Watch wind and weather—wet debris is harder to move. Wear eye, hearing, and dust protection with any blower and let engines cool before refueling.
"A few smart outdoor habits lower indoor dust, so your houseplants stay fresher with less work."
Beyond the Wipe: Compost, Mulch, and Yard Practices That Support Clean Leaves
Simple yard habits can cut dust and keep your indoor plants brighter. When you manage piles, mulch, and compost well, less debris drifts into the house. That means less frequent wiping and healthier foliage overall.
Shred and mulch: Run a mower or leaf vacuum over piles to reduce volume dramatically. Vacuuming and shredding can cut leaves up to 11:1, and mulchers can shrink a heap to about 1/16 its original size. Spread a thin layer of shredded mulch around garden beds to nourish soil without making a dusty mess near doors.
Compost smart: Add shredded yard material into your bin at about two parts browns to one part greens. Finer material breaks down faster and becomes rich mulch for pots and beds. Secure stored piles with a tarp and stakes so wind doesn't scatter debris back toward the lawn or entry.
"A tarp and a tidy staging area make big yard days faster and keep grass and paths clear."
Practical routines and tools
- Rake into rows, use a tarp to slide piles, then bag or move to curb—fast and tidy.
- Combine a blower with rakes and a bag to get rid of bulk in fall waves.
- Mulch in place with the mower on light-drop days to keep grass clear and cut cleanup time.
- Use simple DIY tools—a garden rake, a push broom, and a dependable mower—to do most work without heavy gear.
| Task | Why it helps | Quick tip |
|---|---|---|
| Shred/mow | Reduces volume; lowers dust near entries | Multiple passes blend flakes evenly |
| Compost (2:1 brown:green) | Creates nutrient-rich mulch for containers | Shred leaves first for faster breakdown |
| Rake & tarp | Makes moving piles quick and tidy | Secure tarp with stakes or bricks on windy days |
| Blower + bag | Speeds collection in large yards | Use blower then rake rows into bag |
These small outdoor steps keep grass and beds neat, cut indoor dust, and give your plants a fresher, more sunlit home.
Clean Leaves: Common Mistakes to Avoid
Simple habits protect your plants and make each session safer and faster.
Many mistakes come from rushing or using the wrong tool for the job. Below is a friendly checklist with safer alternatives so you can do this right with less effort.
What not to do — and what to do instead
- Don’t spray hairy or velvety foliage (example: African violets). Do gently dust with a soft brush so the texture stays airy and not matted.
- Don’t use high-pressure water; it can tear tissue and blast soil. Do use a soft stream and support each leaf while you rinse or wipe it.
- Don’t overuse vinegar mixes — they can burn edges. Do test dilutions on one leaf, dilute well, and rinse with plain water afterward.
- Don’t clean at night when you can’t see streaks. Do work in daylight so you catch spots and avoid stressing plants during rest.
- Don’t skip protecting furniture and floors. Do lay towels and bag pest‑affected wipes to avoid moving debris or bugs around the home.
Outdoor tool safety and yard tips
When you work outside, respect basic safety and common sense. Wear eye and hearing protection when using a leaf blower or any blower. Let engines cool at least 15 minutes before refueling. Electric leaf models are quieter but still need care.
| Wrong move | Risk | Better approach |
|---|---|---|
| Using a leaf blower on wet piles | Heavy, slippery debris and mold | Wait to dry, then vacuum or rake in thin layers |
| Overfilling bags | Extra weight; tears and spills | Fill bags lightly; make more trips |
| Piling a thick layer on the lawn | Smothers grass and creates rot | Mulch thinly with a mower and rake lightly |
| No PPE with gas tools | Hearing loss, eye injury, burns | Wear gloves, ear protection, and goggles; wait to refuel |
Final tip: the gentler you are, the less dirt, debris, and damage you’ll cause. Take your time, use the right tools, and your garden and indoor plants will thank you.
Conclusion
A simple routine lets you tend to each plant without fuss and enjoy steady results. When you take a moment, your houseplants repay you with brighter color and healthier growth.
Trust small actions: wipe a dull spot, let foliage air-dry in bright, indirect light, and skip oily polishes so pores stay clear.
Make it part of your home rhythm. A quick check in daylight, a calm wipe, and a bit of outdoor care with a rake or leaf blower reduce dust over time and cut chores later. Your gardening can be peaceful and practical—few mindful minutes now mean more thriving green in your garden corner.
FAQ
How often should I clean my plant leaves to keep them healthy?
Aim for a gentle dusting every 1–2 weeks and a deeper clean every 4–6 weeks. High-traffic rooms, dusty yards, or homes near busy streets may need more frequent care. Regular wiping improves light absorption, reduces pests, and keeps your plants looking lush without extra effort.
What is the safest homemade mix to remove dust and grime?
Use lukewarm water with a few drops of castile soap in a spray bottle or bowl. For stubborn mineral spots, try a very diluted white vinegar solution (one part vinegar to ten parts water). Test on one leaf first and avoid overusing vinegar on sensitive foliage.
Which tools work best for different leaf sizes and textures?
Use a soft microfiber cloth or duster for large smooth leaves like Monstera. A spray-and-drip method or gentle shower suits small, trailing leaves such as Pothos. For hairy or delicate plants like African violets, a soft paintbrush or compressed air on low setting prevents damage.
Can I clean plants in the sink or shower?
Yes—small and medium plants handle a lukewarm, low-pressure rinse well. Place a plug or mesh to protect soil, tilt pots slightly to drain, and let them air-dry away from direct hot sun. For potted plants, cover the potting mix with a towel or plastic while rinsing to limit mess.
Should I use commercial leaf shine or natural alternatives?
Avoid commercial leaf shiners, oils, or mayonnaise; they clog stomata and look unnatural. After cleaning, gently buff large leaves with a dry microfiber cloth to restore a natural sheen. A light, quick buff keeps leaves bright without chemical buildup.
How do I handle sticky residue from pests or sap?
First clean the sticky area with the castile soap mix. If pests are present, treat the plant with neem oil or insecticidal soap per label directions. For stubborn sap, a slightly stronger soap solution and careful rubbing with a soft cloth usually removes it—always rinse afterward.
What precautions should I take to protect soil and floors when cleaning?
Cover potting mix with a towel or plastic, move plants to a sink or bath if possible, and place towels or a tarp under the work area. Use a compost bin for plant debris and keep bags or garden bins handy to contain waste and avoid tracking dirt through your home.
How do I clean tall indoor trees or hard-to-reach foliage safely?
Use a stable step ladder and a telescoping microfiber duster for high branches. Work with a partner if the tree is large. For regular upkeep, a long-handled duster prevents frequent ladder use and reduces risk while keeping upper leaves free of dust.
Is it okay to use a leaf blower or vacuum near garden beds to reduce dust indoors?
Yes—with caution. Use a blower or lawn vacuum on low settings to move yard debris away from entrances and beds. Bag or tarp leaves and mulch them or compost to reduce dust. Keep wind direction and nearby plants in mind so you don’t scatter debris onto paths or into your home.
How should I dry leaves after cleaning to avoid sun damage?
Let foliage air-dry in bright, indirect light or shaded daylight. Avoid placing freshly washed plants in direct, hot sun, which can cause spotting or stress. A gentle fan can speed drying in humid spaces without harming the plant.
Are baby wipes or household cleaners safe for quick touch-ups?
Avoid baby wipes and standard household cleaners; they often contain oils, fragrances, or harsh chemicals that harm plants. Stick to plain water or the mild castile soap mix for touch-ups to protect leaf pores and preserve natural texture.
How do seasonal routines change for leaf care?
In fall and winter, indoor dust tends to rise—so increase dusting frequency. Spring and summer are great for deeper rinses when plants can dry quickly. Use gentle rain for an outside rinse on calm days, and mulch yard leaves after shredding to cut airborne dust near entries.
What common mistakes should I avoid when cleaning foliage?
Don’t blast delicate leaves with high water pressure, spray hairy plants directly, or clean at night when stomata are more active. Avoid overusing vinegar and never rely on oily commercial shiners. Protect tools and use towels or tarps to prevent soil and debris from creating extra work.