You notice a strip of sunlight fall across your kitchen counter and wish the herbs on the shelf looked that lush every day. Have you wondered how to help basil, orchids, or compact peppers keep that sheen when the sun skips your window?
We’ll guide you through simple, practical steps so your indoor garden feels bright and healthy year-round. You’ll learn which types of light work best, from energy-wise LED fixtures to full spectrum options that mimic natural sunlight.
Expect clear advice on size and coverage for small shelves, 2×2 tents, or a sunny corner. We’ll show tools that make care predictable — timers, PPFD meters, hangers, and clip fans — and point out common mistakes so your plants thrive without extra stress.
Key Takeaways
- Pick a suitable light type—LED or full spectrum—for versatile plant growth.
- Match fixture size to coverage so every plant gets even brightness.
- Use timers and simple meters to set consistent daily schedules.
- Watch distance and intensity to avoid leaf burn and uneven results.
- Balance price and energy use for a lasting, sunlit feel in your space.
Why lighting matters for indoor gardening
Light is the engine of any indoor garden — it feeds leaves and sets the pace for healthy growth. When days shorten or rooms sit shadowed, steady illumination keeps photosynthesis humming and plant growth on track.
Some plants ask for bright, long days. Basil, for example, will perk up and show deeper green when given steady brightness. Other houseplants, like a snake plant, tolerate softer conditions and need less time under a beam.
Quality matters as much as quantity. A balanced spectrum helps roots, stems, and blooms develop. That means foliage stays rich and flowers set more predictably than under uneven light.
Good placement avoids shadows and hot spots so every leaf gets a share of energy. Consistent timing — a gentle sunrise-to-sunset routine you deliver with a simple timer — helps plants find rhythm and reduces stress.
"A steady schedule lets plants focus on lush leaves and firm stems rather than scrambling for brightness."
- Match intensity to the plant: herbs need longer bright periods; tolerant houseplants need less.
- Adjust height as the canopy thickens to keep lower leaves engaged.
- Choose energy-wise options to keep your utility bill manageable.
| Plant type | Typical hours/day | Placement tip | Best feature |
|---|---|---|---|
| Basil and herbs | 12–16 | Near bright window + supplemental source | Produces lush, flavorful leaves |
| Snake plant | 6–10 | Indirect light, moderate distance | Tolerates low, steady light |
| Flowering houseplants | 10–14 | Even coverage, balanced spectrum | Better bud set and vivid color |
Understanding light spectrum for plant growth
Light’s color tells a plant what to do next—leaf up, stretch out, or bloom.
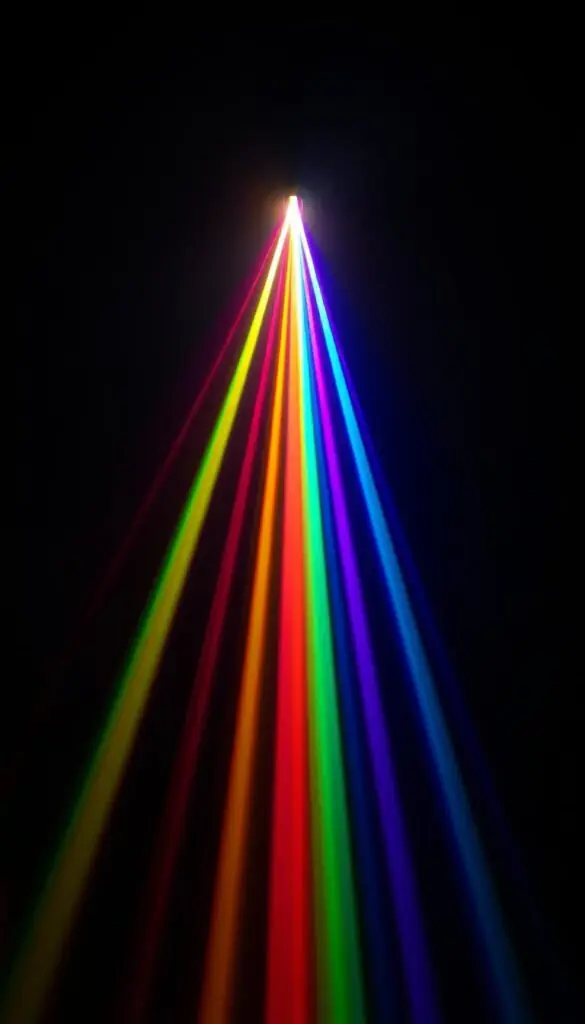
Plants use specific bands of the spectrum to run photosynthesis and shape form. Blue wavelengths promote compact, leafy texture and strong stems. Red wavelengths signal flowering and fruit set. CMH bulbs mirror sunlight with broad coverage, LEDs let you tune bands for each stage, and HPS favors warmer tones that boost bloom.
Red and blue wavelengths: how plants use them for photosynthesis
Blue helps seedlings and greens stay short and dense. Use more blue for propagation and leafy herbs to keep texture crisp.
Red supports buds and fruiting. Increasing red as plants move to bloom helps buds set and color deepen.
Full spectrum vs. targeted spectrum for different stages
Full spectrum sources are a simple, all-purpose choice for mixed collections. They mimic daylight and reduce guesswork.
Targeted spectrum works when you focus on stages: start with blue-heavy settings for seedlings and switch to red-rich balance as flowers form. If unsure, begin with full spectrum and adjust intensity or distance.
- Seedlings: close, gentle, more blue for firm stems.
- Vegetative: moderate distance, balanced blue for leafy growth.
- Bloom/fruit: raise red proportion and keep steady hours.
| Stage | Dominant spectrum | Recommended source | Practical tip |
|---|---|---|---|
| Seedling / propagation | Blue-rich (400–500 nm) | Tunable LED or cool fluorescent | Keep light close and gentle; watch for compact growth |
| Vegetative | Balanced blue + red | Full spectrum LED or CMH | Raise fixture as canopy fills; maintain steady hours |
| Flower / fruit | Red-enhanced (600–700 nm) | HPS or red-tuned LED | Increase red ratio; avoid scorching by adjusting distance |
Types of grow lights: LED, fluorescent, CMH, HPS, and double-ended
Different fixture types suit different homes — your choice shapes heat, coverage, and cost. Below are practical notes to help you choose the right option for your space and plants.
LED options for apartments and mixed collections
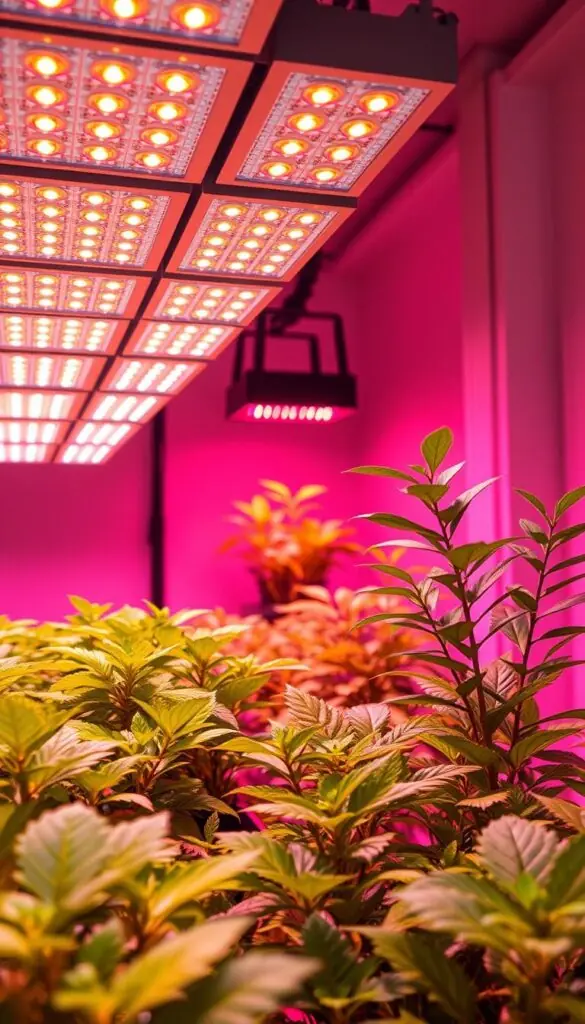
LED panels save on energy and have low heat output, so they work well in small spaces and living rooms. Many models offer full spectrum output and dimming for stage-specific needs.
Use an LED grow light over a shelf or a 2×2 area; they blend into décor and need little extra cooling.
Fluorescent T5/T8 for seedlings and greens
Fluorescent lights (T5/T8) are budget-friendly and gentle. They deliver a cooler spectrum that suits lettuce, herbs, and young plants.
CMH and HPS: intensity and stage performance
CMH gives a sunlight-like spectrum and uses about 30% less energy than older HID systems. It balances veg and bloom while easing heat concerns.
HPS is the classic flowering powerhouse: high output for blooms and fruit, but plan for reflectors and active cooling if you use it indoors.
Double-ended fixtures for larger coverage
Double-ended setups give commercial-level coverage and efficiency, with long bulb life and strong watts-per-square-foot. They suit grouped plants or big tents where wide, even coverage matters.
- Match watts and coverage to your footprint — avoid undersizing or overspending for the space.
- Consider reflectors for better spread; ballasts must match HID bulbs for safe operation.
- If heat is a concern, choose fanless LED panels or add ducting and clip fans for HID systems.
| Type | Best use | Key advantage |
|---|---|---|
| LED | Apartments, mixed shelves | Low heat, energy efficient |
| Fluorescent (T5/T8) | Seedlings, herbs | Cool spectrum, low cost |
| CMH / HPS / Double-ended | Blooming, large rooms | High intensity, wide coverage |
Editor’s picks: best grow lights for different spaces and plant needs
A compact panel or a simple bulb can make the difference between sparse seedlings and a thriving tray.
Best overall: Hytekgro LED grow light panel
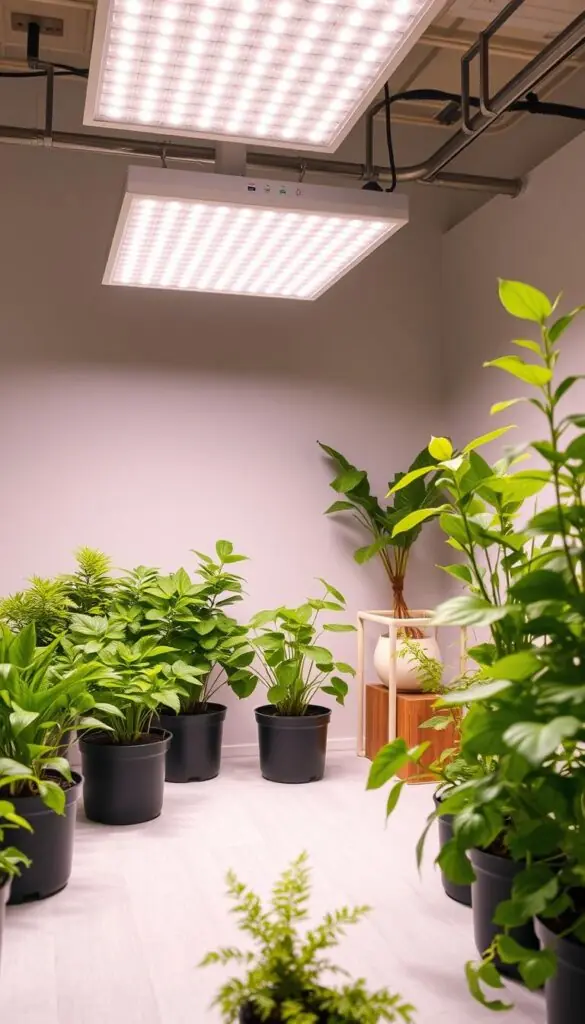
Why we like it: 12" square, full spectrum, and low heat. It gives roughly 3' square coverage at 18".
Who it's for: trays of seedlings, microgreens, and small veg patches. It boosts blooms without baking leaves. No onboard timer — add a plug-in timer for reliable schedules.
Best budget bulb: GE Grow LED
Why we like it: E26 screw-in bulb, bright white full spectrum. Coverage is about a 2' diameter at 18".
Who it's for: seed-starting in standard fixtures. Practical results: lemon balm sprouted in about 10 days. Price-friendly and easy to swap.
Best shelf/under-cabinet: Soltech Grove slim bar
Why we like it: 18" x 1" slim form, magnetic or adhesive mounts, 50,000-hour life. A manual timer arrives in the box.
Who it's for: bookcase displays and kitchen herb shelves. Premium price, but neat coverage and a tidy install.
Best high-output panel: Vivosun VS1000
Why we like it: 11.8" square, 100W, full spectrum with dimmer and daisy-chain options. Coverage: ~2' for flowering, ~3' for veg.
Who it's for: closet tents or larger racks where you want known coverage and stage control. Fanless design keeps operation quiet.
Best pendant for décor: Valikiy hanging light
Why we like it: Compact 7" x 4", warm 3000K full spectrum that looks intentional above a statement pot.
Who it's for: living rooms and entryways where style matters. The included timer failed in our test, so plan to add a reliable controller.
"Pick a model with the right coverage and a simple timer — steady hours trump fancy modes every time."
- Tip: For shelves, use slim bars for even spread; for desks, a bulb or clip works fine.
- Tip: Match size and coverage to your footprint and add a dimmer or timer for better results.
- Tip: Consider price vs. lifespan — higher-quality LED lights often save energy over seasons.
Houseplant-friendly lighting that blends with décor
Let your plant lighting blend into the room so care feels simple and your space stays calm.
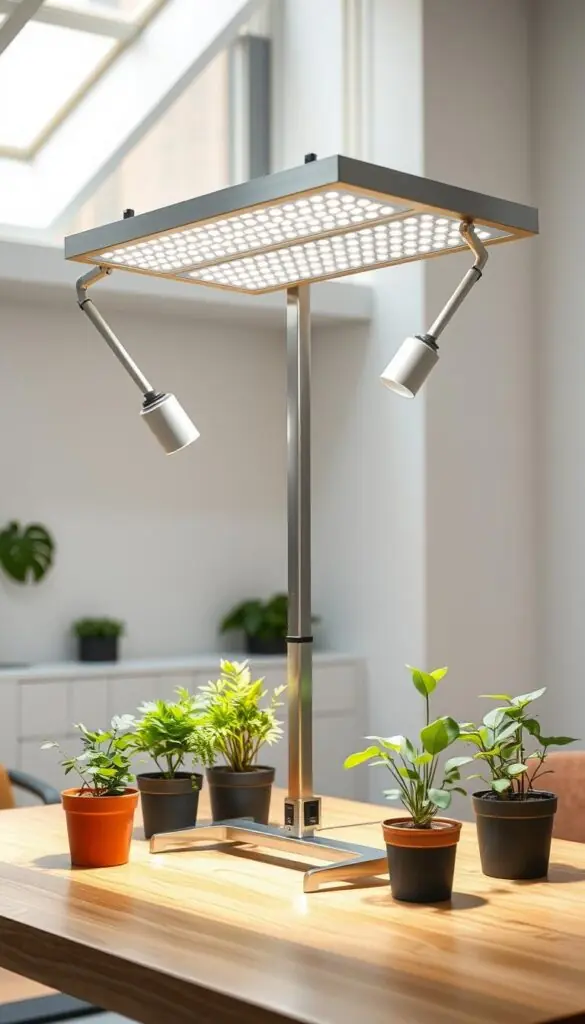
AeroGarden tabletop is a sleek lamp with app scheduling and an adjustable 19–25" arm. It offers four modes (full, white, warm, cool) and fits plants up to ~15". Use the app as a controller to set daily routines and avoid fiddling with switches.
AeroGarden setup tips
Place upright plants like ZZs about 10–15 inches below the head. For herbs, set the height near 8–12 inches and use the warm or full mode. Raise the lamp as foliage nears the shade to prevent scorch.
Clip-on flexibility: GooingTop gooseneck
The GooingTop clip has two bendable necks, 6000K full spectrum, ~10W, and a 4/8/12h timer. Clip it to a desk or counter to cover two small pots evenly. Use the built-in timer for 8–12 hours daily to keep routines simple.
- Choose a lamp that suits your room and the size of your pots.
- Dim slightly in the evening for a cozy feel while keeping plants healthy.
- Dust heads with a soft cloth so the diodes stay bright.
"A tasteful fixture and a steady schedule make healthy plants part of your everyday room."
| Model | Key feature | Best for |
|---|---|---|
| AeroGarden tabletop | App scheduling, adjustable height | Upright indoor plants and herb pots |
| GooingTop gooseneck | Dual clip necks, built-in timer | Desks, counters, pairs of small plants |
| Compact led light bar | Low profile, neutral look | Shelves and tight spaces |
Grow light stands and all-in-one solutions
A tidy stand with built-in illumination can turn an unused corner into a stylish, productive display.
The Bacekoll S-shaped plant stand pairs display and function with LED strips under the upper tiers. It assembles easily and looks neat on a shelf or in a nook.
Placement tips: Put sun-loving herbs and small pots directly under the lit tiers. Reserve the top shelf for décor or low-light species. Rotate plants weekly so every pot gets even coverage.
- Anchor the lightweight frame to the wall if you have pets or kids for safety.
- Measure footprint and shelf size before you buy so the stand fits your space and watering routine.
- Use trays to catch water and protect wood; vary plant heights for a layered look.
Compare price to building a shelf plus bar. Often an all-in-one saves money and time. Add a plug-in timer and use supplemental lighting seasonally by moving the stand near a bright window in summer.
Coverage, watts, and PPFD: sizing a light to your plants and space
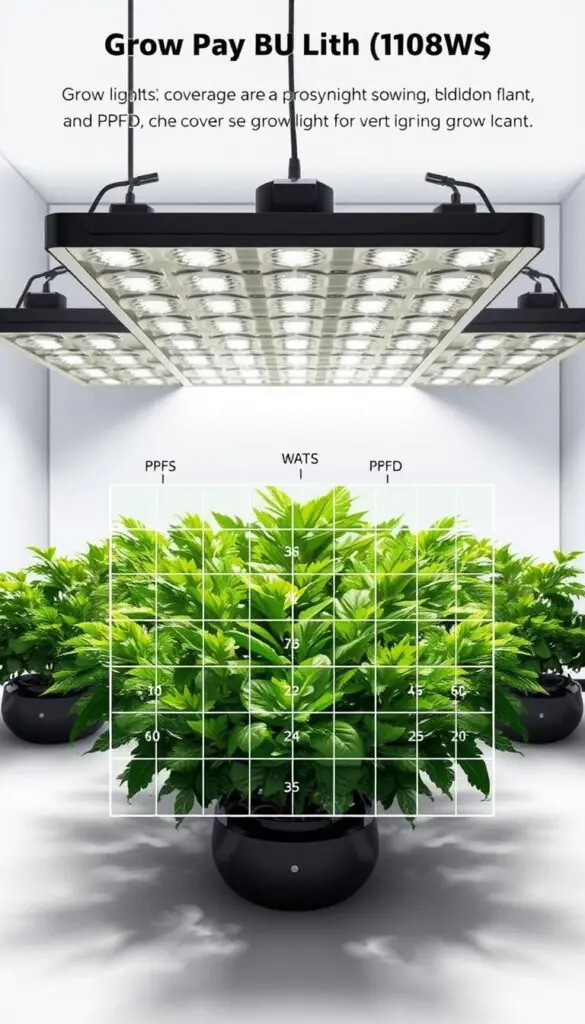
Picking the right wattage and coverage starts with measuring the space your plants actually occupy. Measure the canopy in feet, then pick a fixture sized for that footprint. That keeps intensity even and avoids shaded corners.
Basic math: a 2×2 tent pairs well with ~100–150 watts of an efficient LED for vegetative growth. A 3×3 often needs a panel rated for that space or ~200–300 watts if you push for fruiting. Match watts to published coverage maps when possible.
Match intensity to plant type
Use PPFD targets to set real goals: herbs 100–300 µmol/m²/s, leafy greens 200–400, and fruiting plants 400–700+. Seedlings start lower. Increase height or dim to lower PPFD as plants thicken.
Coverage examples and practical tips
- Vivosun VS1000: ~2' flowering, ~3' veg at efficient 100W — good for a 2×2 tent or a small rack.
- Hytekgro 12" panel: covers ~3' square at 18" height — handy for seed flats.
- GE Grow LED bulb: ~2' diameter at 18" — perfect for a window niche or single pot.
Use a budget PPFD or lux meter to measure center and corners. Take readings at canopy height. Then raise, lower, or move the fixture until center and edges fall within your target range.
| Footprint | Typical watts (efficient LED) | PPFD target | Fixture example |
|---|---|---|---|
| 2×2 (4 sq ft) | 100–150 W | 200–400 (veg) | Vivosun VS1000 (100W) |
| 3×3 (9 sq ft) | 200–300 W | 200–700 (veg → fruit) | Panel rated 3×3 veg |
| Window niche / 1–2 ft | 15–40 W | 100–300 (herbs) | Hytekgro panel / GE bulb |
"Measure before you buy — a well-sized fixture saves energy and helps plants grow more evenly."
Step-by-step: setting up your grow light the right way
Start your setup calmly: unpack, inspect, and plan where the fixture will sit before you flip a switch.
Tools and materials
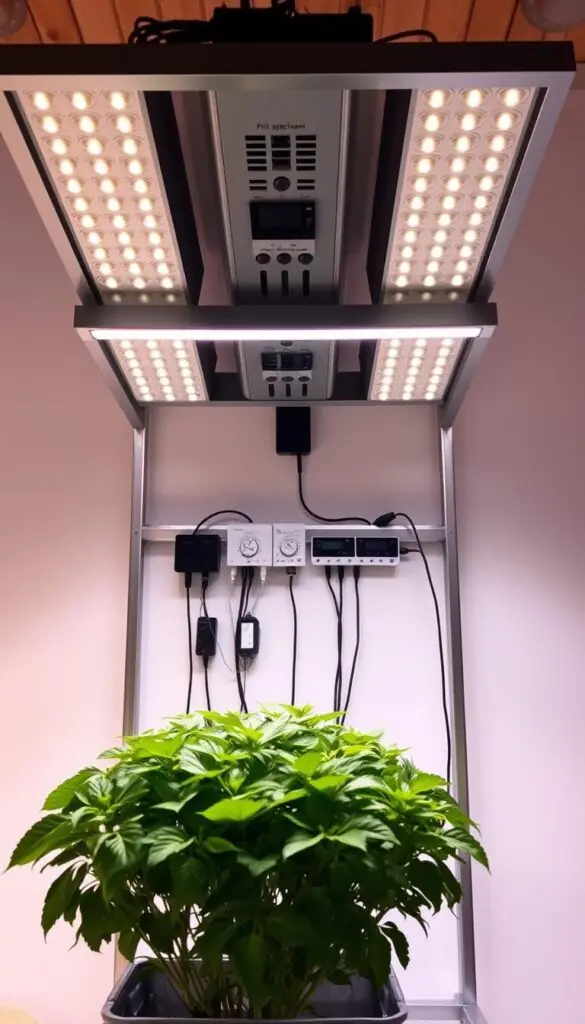
Have hangers, rope ratchets, a reflector if included, a grounded cord, a timer or controller, and a PPFD or lux meter on hand. A simple pulley system makes height tweaks easy.
Mounting height and angle
Mount panels 18–24 inches above seedlings. For mature plants, 12–18 inches often gives good intensity without hotspots.
Angle the fixture slightly or add a reflector to brighten edges and reduce shadows. Check corners with a meter and move a few inches if coverage dips.
Dialing in schedules with timers and controllers
Set a 24-hour timer: 14–16 hours for herbs and greens, 12–14 for light-loving tropicals, 12 for bloom cycles. Use a controller to dim or run multiple units together.
Safety and final checks: Mount to studs or anchors, route cords with clips, and plug into a grounded outlet. Run fans for gentle airflow and log settings in a notebook.
"A calm, checklist approach saves time and keeps plants thriving."
| Step | Example | Why it matters |
|---|---|---|
| Unbox & check parts | Hangers, cord, manual, controller | Prevents missing hardware during install |
| Mount securely | Anchors or studs | Safety and stable coverage |
| Set height & angle | Seedlings 18–24"; mature 12–18" | Even intensity, avoids hotspots |
| Program timer/controller | 14–16h herbs; 12–14h tropicals | Consistent cycles support growth |
Seasonal schedules for indoor gardens in the United States
Adjusting daily run times with the seasons gives your indoor garden a consistent beat that prevents stretching and stress. Small timing and height tweaks help plants hold form and set buds as sunlight shifts.
Winter boost: extending short days for healthier growth
Zones 5–7: add 4–6 extra hours to mimic longer days and avoid leaf drop. In warmer Zones 8–9, 2–4 hours is usually enough.
Place the fixture a bit closer in winter to compensate for low sun, but watch leaves for warm spots. Use timers for steady, predictable cycles.
Spring seedlings: hours, distance, and hardening-off prep
Give seedlings 14–16 hours under gentle intensity. Raise the device as stems thicken to keep growth compact.
Two weeks before moving plants outdoors, start hardening off: reduce daily artificial time slightly and add short morning window sessions or shaded outdoor breaks.
Summer supplementation: offsetting low-light rooms
In dim corners add 4–6 hours of supplemental run time so leafy herbs and houseplants stay lush. Shift on-time to morning and evening if midday heat is a concern.
Fall transitions: maintaining growth as days shorten
Gradually extend artificial hours as daylight fades to keep steady, healthier growth. Emphasize warmer spectrum near late-season bloom stages and use timers to manage energy use.
- Watch plant cues more than the calendar—stretching, slow color, or leaf drop tell you to tweak timing.
- In Zones 5–7 expect longer winter runs; Zones 8–9 need less extra time.
Placement and distance: how far should the light be from plants?
Aim for even coverage across the tops of pots so every plant shares the same beam.
Start seedlings about 18–24 inches beneath most panels. For compact bulbs, try 12–18 inches so leaves get steady, gentle intensity without glare.
For mature herbs and common houseplants, 12–18 inches usually hits the sweet spot. Fruiting specimens can sit closer when heat is managed.
If a fixture advertises a 2×2 flower or 3×3 veg coverage, match the published distance. Moving the unit closer raises intensity but reduces even coverage across the footprint.
- Too much light: crisp leaf edges or washed-out color. Raise the fixture a few inches and recheck in 48 hours.
- Not enough: stems stretch and leaves turn pale. Lower the lamp or add an hour or two of daily run time.
- Measure across the canopy and use risers under short pots so tops stay level for even exposure.
| Fixture type | Stage | Suggested distance | Example / coverage |
|---|---|---|---|
| Panel | Seedlings | 18–24 in | Hytekgro at 18" covers ~3' square |
| Bulb (compact) | Young plants | 12–18 in | GE bulb ≈ 2' diameter at 18" |
| High-output panel | Flowering / fruiting | 12–18 in (or as spec) | Vivosun VS1000: ~2' flower / 3' veg coverage |
For pendant fixtures, center the glow over the broadest leaf span. Keep gentle airflow between fixture and foliage; moving air helps avoid warm pockets near powerful units.
Adjust weekly as plants grow. Recheck distances after repotting or moving furniture — small shifts in space change coverage more than you expect.
Managing heat output and airflow for healthier growth
A small fan and a cheap thermometer will save more plants than an extra bulb ever will. Keep a simple thermometer near the canopy so you can aim for a comfortable range: 65–80°F for most indoor plants.
Fanless LED panels run quietly and produce low heat output, so they suit bedrooms and shared space. HID options (HPS/CMH) put out more heat and need venting or ducting to avoid warm pockets.
Use a small clip fan for gentle airflow. Leaves should flutter lightly, not whip. If you smell hot dust or see drooping, pause the run and let things cool.
Simple, practical steps
- Run fixtures during cooler hours in summer to lower ambient temps.
- Raise a panel a few inches to reduce surface heat without losing useful light.
- Monitor humidity: tropicals like 40–60%, succulents prefer drier air.
- Use a dimmer or controller to cut intensity during heat waves.
Keep cords and vents clear. Blocked airflow traps warmth and wastes energy. A little routine attention keeps your setup calm, safe, and welcoming for healthy, happy plants.
Essential accessories: reflectors, ballasts, timers, and controllers
The right accessories help you shape brightness, save energy, and keep your setup safe and tidy. A few upgrades make coverage more even and daily care much simpler.
Reflectors direct usable light to the edges of your shelf or tent. Angle-adjustable reflectors reduce hotspots and brighten corners so every pot gets similar intensity.
Ballasts and bulbs: compatibility basics for HID setups
Ballasts regulate voltage and current for HID bulbs. Match ballast type to the bulb model exactly—mismatched gear can shorten life or fail to start safely.
Tip: Buy the ballast spec listed on the bulb box and keep the manual for replacement references.
Timers and smart controllers: remote control and dimming
Plug-in timers are the simplest way to set consistent on/off cycles. Choose grounded units with clear dials or digital presets for reliability.
Smart controllers add remote control and dimming so you can tweak intensity without climbing a ladder. If you run several fixtures, a master controller keeps schedules synced and saves time.
Cords, hangers, and pulley systems for easy adjustments
Rope ratchets and pulleys make height changes quick as plants grow. Sturdy hangers and the right gauge extension cord prevent voltage drop and cut hazards.
Keep cables routed neatly and anchor mounts securely for safety. A small kit with spare hangers, an extra timer, zip ties, and a screwdriver keeps adjustments stress-free.
"Angle reflectors and a matched ballast save both energy and disappointment—small choices that matter."
- Quick-buy checklist: angle-adjustable reflector, matched ballast (for HID), grounded plug-in timer, smart controller (optional), rope ratchets, heavy-gauge extension cord, spare hangers.
- Choose quality over lowest price for hangers and timers—durable parts pay off in daily ease and safety.
Hydroponic grow setups and supplemental lighting
When space is tight, matching slim LED bars to tiered hydro units gives steady light without clutter.
Pairing compact hydro units with racks
Compact hydroponic grow systems work well under slim bars or low-profile panels. Mount Soltech Grove–style bars under each shelf so leaves get even coverage without touching water or pumps.
Keep fixtures high enough to avoid moisture on the housing. Use drip loops on all cables and secure cords away from the reservoir.
Light color choices for veg vs. flower stages
For leafy veg, favor a cooler spectrum to keep internodes short and foliage dense. For flowering herbs or compact peppers, add warmer tones during bloom to encourage buds and fruit.
Practical tips:
- Start seedlings on upper tiers close to bars, then move mature plants to lower shelves with a bit more intensity.
- Label each tier with hours and height so you can repeat successful runs.
- Choose efficient LED fixtures to save energy during long daily runtimes.
"Slim bars and careful spacing let a small rack produce lush, balanced plants without fuss."
| Setup | Recommended fixture | Spacing tip | Safety note |
|---|---|---|---|
| Single-shelf hydro unit | Low-profile LED bar | 12–18 in from canopy | Drip loop cables; keep vents clear |
| Multi-tier rack | Full-spectrum panel per tier | Uniform 10–12 in between tiers | Secure mounts; label hours/height |
| Window rack + winter aid | Slim supplemental lighting | Raise slightly to avoid glare | Use a small fan over reservoir to cut algae |
Common mistakes to avoid with grow lights
Small mistakes with setup or timing can quietly undo weeks of good plant care. Below are common signs, quick diagnostics, and calm fixes so your plants relax and return to steady growth.
Too much light or heat stress: signs and fixes
Signs: crispy tips, bleached or curled leaves, and rapid wilting point to too much intensity or excess heat.
Quick fix: raise the fixture a few inches or dim it slightly. Check again in two days. If a fixture has high heat output—especially HID—add a clip fan or move runs to cooler hours.
Inadequate coverage and uneven canopy lighting
Long, weak stems mean some pots aren’t getting enough brightness. Map your canopy with a simple meter or a phone lux app.
- Adjust angle or add a reflector to spread the beam.
- Rotate pots weekly, or add a smaller secondary unit to fill edges rather than moving one fixture too close.
Wrong spectrum or schedule for the plant’s stage
If foliage stretches, you may be low on blue; if blooms stall, add red tones. Use a timer or a smart controller so on/off cycles stay steady.
Track changes in a small notebook. Gentle, stepwise tweaks help seedlings acclimate and lead to healthier growth and steady development.
"A few calm adjustments — height, spectrum, and schedule — usually brings plants back to life."
Care, safety, and maintenance of your light fixture
A calm maintenance routine keeps your fixture reliable and your plants thriving. A little attention each month keeps brightness steady and prevents small problems from growing into big ones.
Cleaning lenses, checking cords, and securing mounts
Monthly: wipe lenses or diode surfaces with a soft, dry cloth. Clean glass and plastic so the same energy gives you more usable light.
Check cords for nicks and plugs for unusual warmth. Replace worn parts right away to avoid hazards.
Tighten hangers and mounts seasonally so the fixture holds steady over your pots. A snug mount saves worry and keeps coverage even.
Lifespan expectations and when to replace LEDs or bulbs
Track runtime with a small label or sticker. Many LED bars run tens of thousands of hours (some ~50,000 hours). Double-ended HID bulbs can last up to 24,000 hours, while fluorescent and other HID bulbs need periodic replacement.
- If brightness fades or your plants respond less at the same height, consider a new bulb or a replacement fixture.
- Keep reflectors and hangers dust-free — a clean reflector restores corner brightness.
- Store spare bulbs in original boxes, dry and cool; handle HID glass with clean hands and wipe fingerprints off.
"Always unplug before you adjust or clean a fixture; a calm routine keeps you and your garden safe."
When upgrading, compare price, size, and energy efficiency. A durable LED often costs more up front but saves energy and reduces maintenance over seasons.
Budget, energy use, and long-term value
Deciding on a fixture is a balance between upfront price and ongoing energy cost. Think of the purchase as months of bills plus years of service. That view helps you pick the right size and performance for your space.
Comparing price, size, watts, and efficiency
Compare advertised watts to real-world coverage. A quality 100W panel that truly covers a 2×2 flower area can outperform a cheaper 150W unit that wastes power. The Vivosun VS1000 is a clear example: ~100W with reliable coverage.
CMH often uses up to 30% less electricity than older HID systems. Double-ended fixtures deliver more usable output per watt but need periodic bulb swaps.
Where spending more saves on energy and plant performance
Higher-priced LED panels usually last far longer (some offer ~50,000-hour life like the Soltech Grove) and cut replacement costs. Buy a dimmer or controller to trim energy during veg stages. Track run hours — 12–16 hours daily adds up — and use a plug-in power meter for one month to see real savings.
"A small extra investment in efficiency often pays back in lower bills and steadier growth."
- Quick rule: match watts to coverage, favor longevity, and measure real consumption before judging payback.
grow lights
Right-for-space illumination means less guesswork and more steady, sunlit-looking foliage.
Think of a fixture as daylength on demand. Set a steady schedule and your pots will stop stretching and start storing energy for leaves and blooms.
Match type to goal: sleek LED panels for small shelves, cool fluorescents for seedlings, or higher-output HID and double-ended units when you want serious flowering and fruit.
Full spectrum keeps a mixed collection happy. Targeted blends help if you focus on leafy veg or heavy bloom. Use dimmers and timers so you don’t babysit cycles—consistent hours help plants settle into steady growth.
- Size to your space: window niche, shelf, or a 2×2 tent—aim for even coverage.
- Mind heat and airflow: gentle fans protect tender foliage.
- Keep simple accessories—reflectors, hangers, and a basic controller—for quick tweaks.
Final tip: try one of the editor’s picks, note settings that work, and repeat the routine. With a little care, your indoor garden will look sunlit and confident even when days are short.
"Set a steady schedule — steady hours trump fancy modes every time."
Conclusion
A few steady choices can turn a quiet corner into a cheerful, sunlit nook for your plants.
Start simple: pick a well-sized grow light or a compact panel, hang it safely, and set a timer. Consistent hours are your plant’s best friend and help steady healthy growth.
Choose a spectrum that fits your goal, then use distance and dimming to fine-tune color and comfort. Watch warmth and airflow; a gentle fan and a few inches of clearance prevent stress.
Note what works in a small journal. Seasonal tweaks become easy when you trust your notes and your eye. Energy-wise LED options save bills and keep your indoor garden calm and bright.
Switch it on, breathe, and enjoy: with simple care and steady light, your home can feel sunlit year-round and your plants will reward you with confident, steady growth.
FAQ
How do I use LED grow lights for indoor plants?
Start by placing the fixture at the manufacturer’s recommended height above the canopy. Use a timer to set daily light hours for the plant’s stage — typically 14–18 hours for vegetative growth and 10–12 hours for flowering or mature houseplants. Monitor plant response and adjust distance if you see stretching or leaf bleaching. Ensure good airflow and rotate pots for even coverage.
Why does lighting matter for indoor gardening?
Light powers photosynthesis, which makes plants lush and healthy. The right intensity and spectrum help leaves, stems, and flowers develop properly. Without enough light, plants become leggy, produce fewer leaves or blooms, and get more disease-prone. Proper fixtures also control heat and energy use for safer, more efficient growth.
What is the role of red and blue wavelengths in photosynthesis?
Blue wavelengths encourage compact leaf and stem growth and open stomata for healthy respiration. Red wavelengths support flowering and fruiting and help drive flowering hormones. Combining both gives balanced growth; many modern fixtures blend red and blue plus additional colors for natural development.
Should I choose full spectrum or targeted spectrum for different stages?
For most home gardeners, full spectrum models mimic natural sunlight and work well across stages. Targeted red/blue arrays can boost seedlings or blooms but may not look natural. Use full spectrum during seedling and veg, and you can boost red for flowering or fruiting if needed.
How do LED panels compare to fluorescent and HID options?
LEDs use less energy, run cooler, and offer full spectrum in compact fixtures. Fluorescents (T5/T8) are good for seedlings and low-light greens. CMH and HPS provide high intensity for larger flowering needs but need more cooling and power. Double-ended HID fixtures suit commercial setups for wide, efficient coverage.
Are there specific fixtures you recommend for different spaces?
For small shelves or windows, slim bars or clip-on units work well. For a 2×2 or 3×3 tent, use high-output panels with adjustable dimming and daisy-chain features. For décor-forward rooms, pendant-style fixtures blend function and style. Choose based on coverage, heat output, and room size.
How do I size a light based on coverage, watts, and PPFD?
Match intensity to plant type — herbs need less than fruiting plants. Use manufacturer PPFD maps if available. As a rule, aim for even coverage with minimal hotspots: small seedlings do fine at lower PPFD, mature fruiting plants need higher numbers. Consider wattage per area as a rough guide, but prioritize PPFD and spectrum.
What tools and materials do I need to set up my fixture properly?
Gather hangers or adjustable pulleys, a timer or smart controller, a light meter if possible, reflectors for better spread, and safety-rated cords. Mount securely, set the angle to avoid shadows, and use a timer to keep a consistent schedule.
How far should the light be from different plants?
Seedlings: keep lights close but not touching — often 6–12 inches for low-heat LEDs or fluorescents. Vegetative plants: 12–24 inches depending on output. Flowering or high-output panels: 18–30 inches. Watch leaves for bleaching or stretching and adjust accordingly.
How do I manage heat and airflow for healthier plants?
Choose fanless LED panels to reduce noise and heat, or add clip fans and vents with HID systems. Keep an inch or two of clearance around fixtures, monitor temperature and humidity, and use exhaust if heat or humidity builds up.
What accessories are essential for better efficiency?
Timers or smart controllers, reflectors to focus light, ballast-compatible bulbs for HID setups, and secure hangers or pulley systems for easy height adjustments. A basic light meter helps dial in intensity across the canopy.
Can I use these lights with compact hydroponic units?
Yes. Pair full spectrum LED panels or slim bars with compact hydro racks for herbs and greens. Match spectrum to stage — more blue for veg, more red for flowering — and ensure proper coverage and distance over each tray.
What common mistakes should I avoid?
Don’t overdo intensity or run fixtures too close — heat and light stress show as burned or curled leaves. Avoid uneven coverage that causes stretching. Also, don’t use the wrong schedule or spectrum for the plant’s stage; consistency matters most.
How often should I clean and replace parts of my fixture?
Clean lenses and dust off units every few months. Check cords and mounts for wear. LEDs last many years but dim gradually; plan to replace older panels when output drops noticeably or after the manufacturer’s rated lifespan.
How do price, energy use, and long-term value compare across options?
Higher upfront cost for quality LEDs usually pays back in lower energy bills and less cooling. HID systems may cost less initially but use more power and need more ventilation. Consider efficiency (watts per usable light) and expected lifespan when budgeting.
What signs indicate too much light or heat stress?
Look for yellowing or bleached leaf tips, curled or crispy edges, and slowed growth. Move the fixture up, reduce run hours, or increase airflow. For persistent stress, lower intensity or switch to a cooler-spectrum setting.
When should I switch schedules for seasonal changes?
In winter, add hours to compensate for short days. For seedlings in spring, run longer light periods and slowly harden off by reducing time or moving plants toward natural sun. In summer, use supplemental light only in low-light rooms or to extend evening hours.
How do I choose between a freestanding lamp, shelf system, or integrated planter?
Choose a freestanding lamp for flexibility and decorative placement. Shelf systems suit multi-layer micro-gardens. Integrated planter systems simplify setup for beginners who want an all-in-one display plus functional lighting.
Are there specific model recommendations for home growers?
Look for panels and bulbs with clear spectrum info, adjustable dimming, and good reviews for reliability. For small spaces, slim bars and app-controlled tabletop units offer ease of use. For larger racks, pick panels with daisy-chain and high PPFD coverage.